¶ 1. Image Adjustments
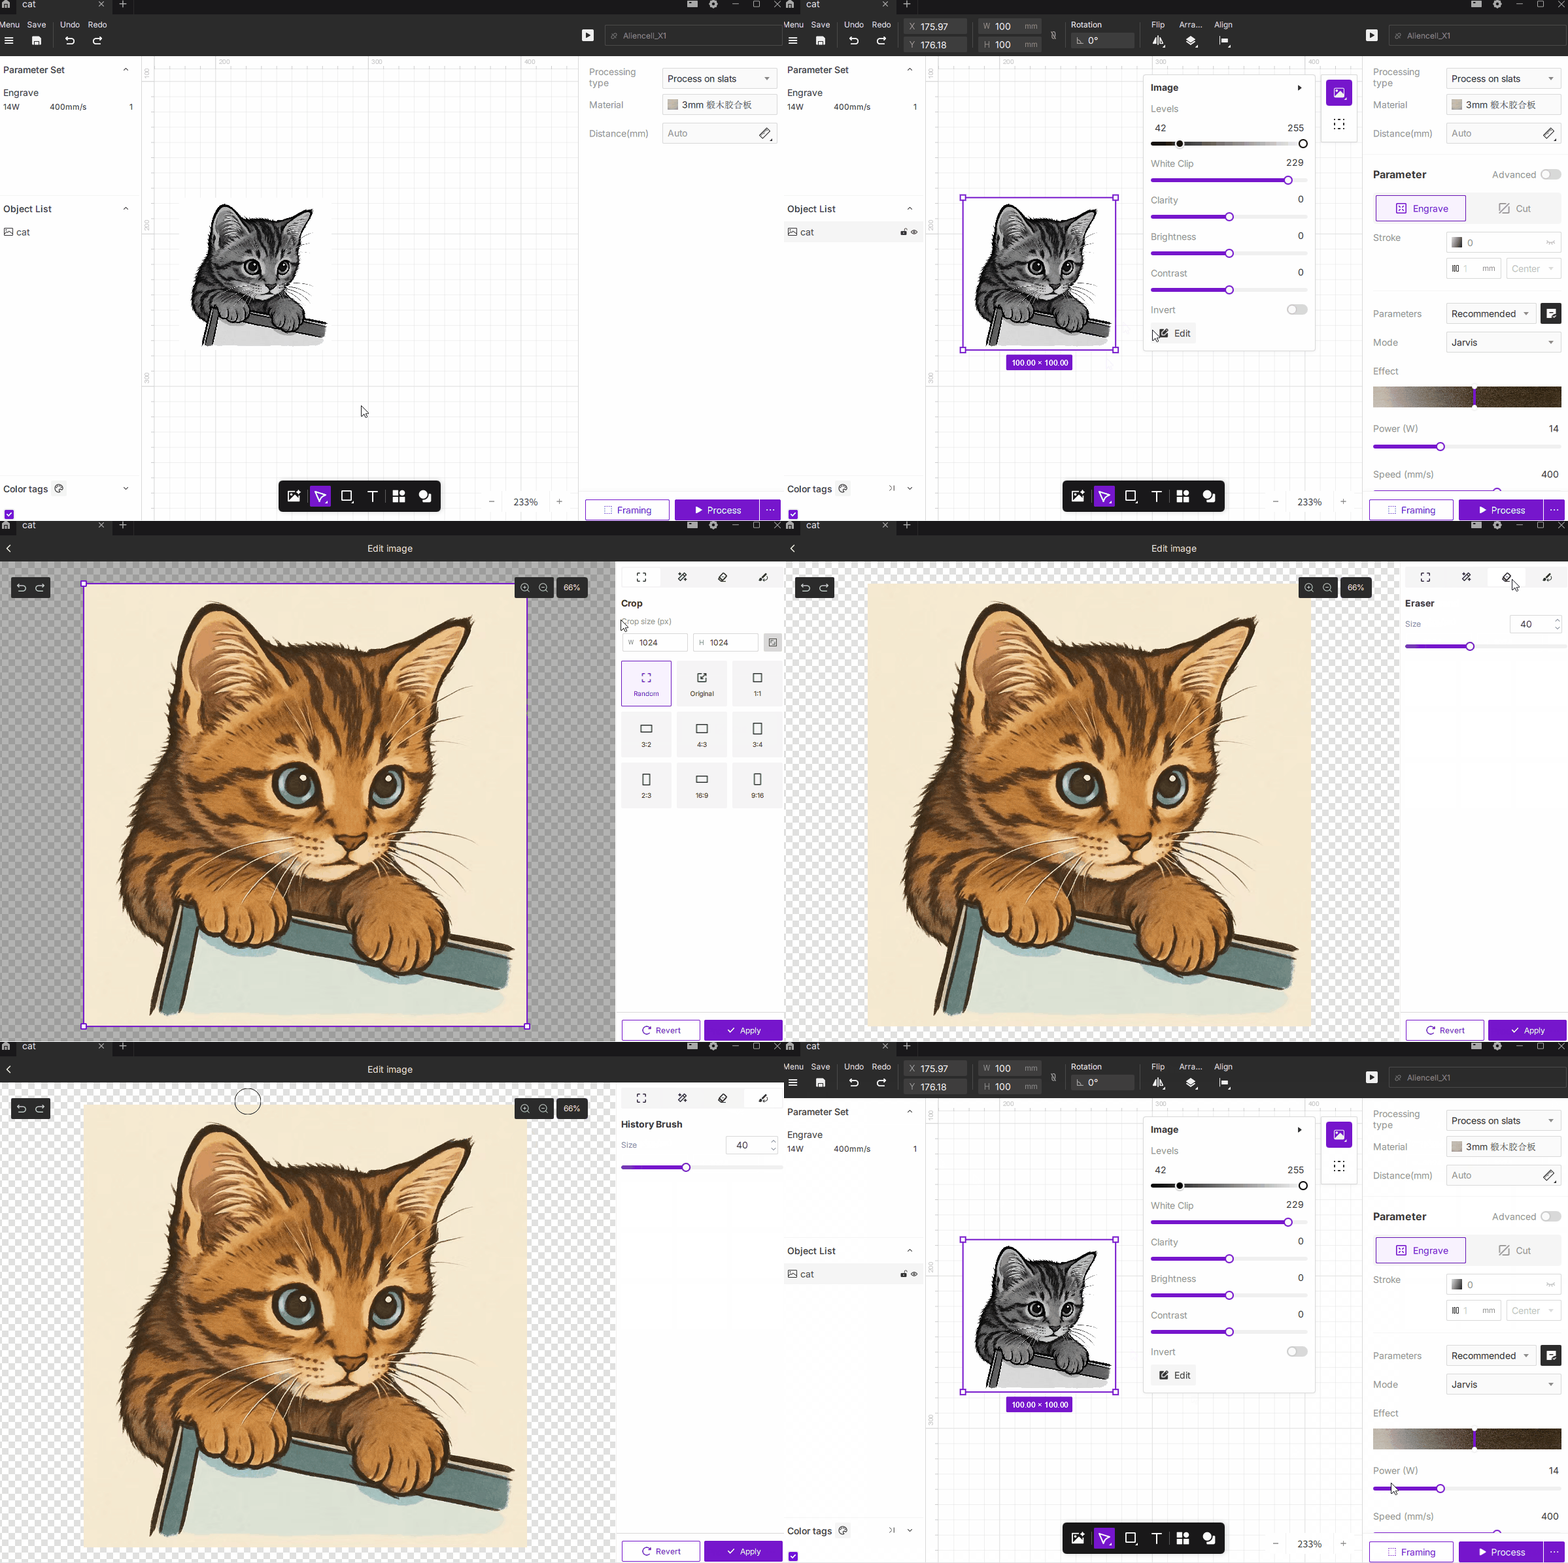
The Image Adjustment tools include Levels, White Clip, Clarity, Brightness, Contrast, and Invert.
These controls help optimize the tonal range and visual quality of bitmap images before engraving, ensuring better grayscale detail and overall engraving results.
¶ 1.1 Levels
-
Description: Adjust the darkest (black) and brightest (white) points of the image. By shifting the endpoints, you can enhance contrast—making shadows darker and highlights brighter.
-
How to Use: Default range is 0–255. Adjust the black and white sliders to redefine the tonal range.
- Black Point (0): Moving the slider right deepens the shadows.
- White Point (255): Moving the slider left expands the highlights.
-
Best For: Correcting overly dark or washed-out images by expanding dynamic range.
¶ 1.2 White Clip
-
Description: Treats pixels below a target brightness threshold as pure white. This helps remove faint background tones or brighten the overall image.
-
How to Use: Range 0–255.
- Higher values convert more light-gray pixels into white, resulting in a cleaner background.
- Lower values preserve more detail but can cause the image to appear washed out.
-
Best For: Removing gray noise or brightening dull images.
¶ 1.3 Clarity
-
Description: Enhances edge contrast and texture details, improving visual sharpness in engravings.
-
How to Use: Range –50–50.
- Increase for crisp detail and stronger textures.
- Decrease to soften edges and reduce harshness.
-
Best For: Making details more defined and engraving results more textured.
¶ 1.4 Brightness
-
Description: Raises or lowers the overall lightness of the image.
-
How to Use: Range –100–100.
- Drag right to brighten.
- Drag left to darken.
-
Best For: Fixing photos that are too dark or too bright to achieve balanced grayscale engraving.
¶ 1.5 Contrast
- Description: Controls the intensity difference between light and dark tones, enhancing image definition.
- How to Use: Range –100–100.
- Increase for more dramatic highlights and deeper shadows.
- Decrease for a softer look.
- Best For: Images that lack tonal separation or detail.
¶ 1.6 Invert
-
Description: Reverses the image colors—black becomes white, and white becomes black.
-
How to Use: Check Invert in the adjustment panel to apply; uncheck to return to the original.
-
Best For: Reverse engravings or bright results on dark materials.
¶ 2. Image Editing
The Image Editing panel provides pixel-level editing tools for bitmap images. Available tools include Crop, Magic Wand, Eraser, and History Brush.
To enter the editing window:
- Select an image, then click the Edit button
 at the bottom of the Image panel.

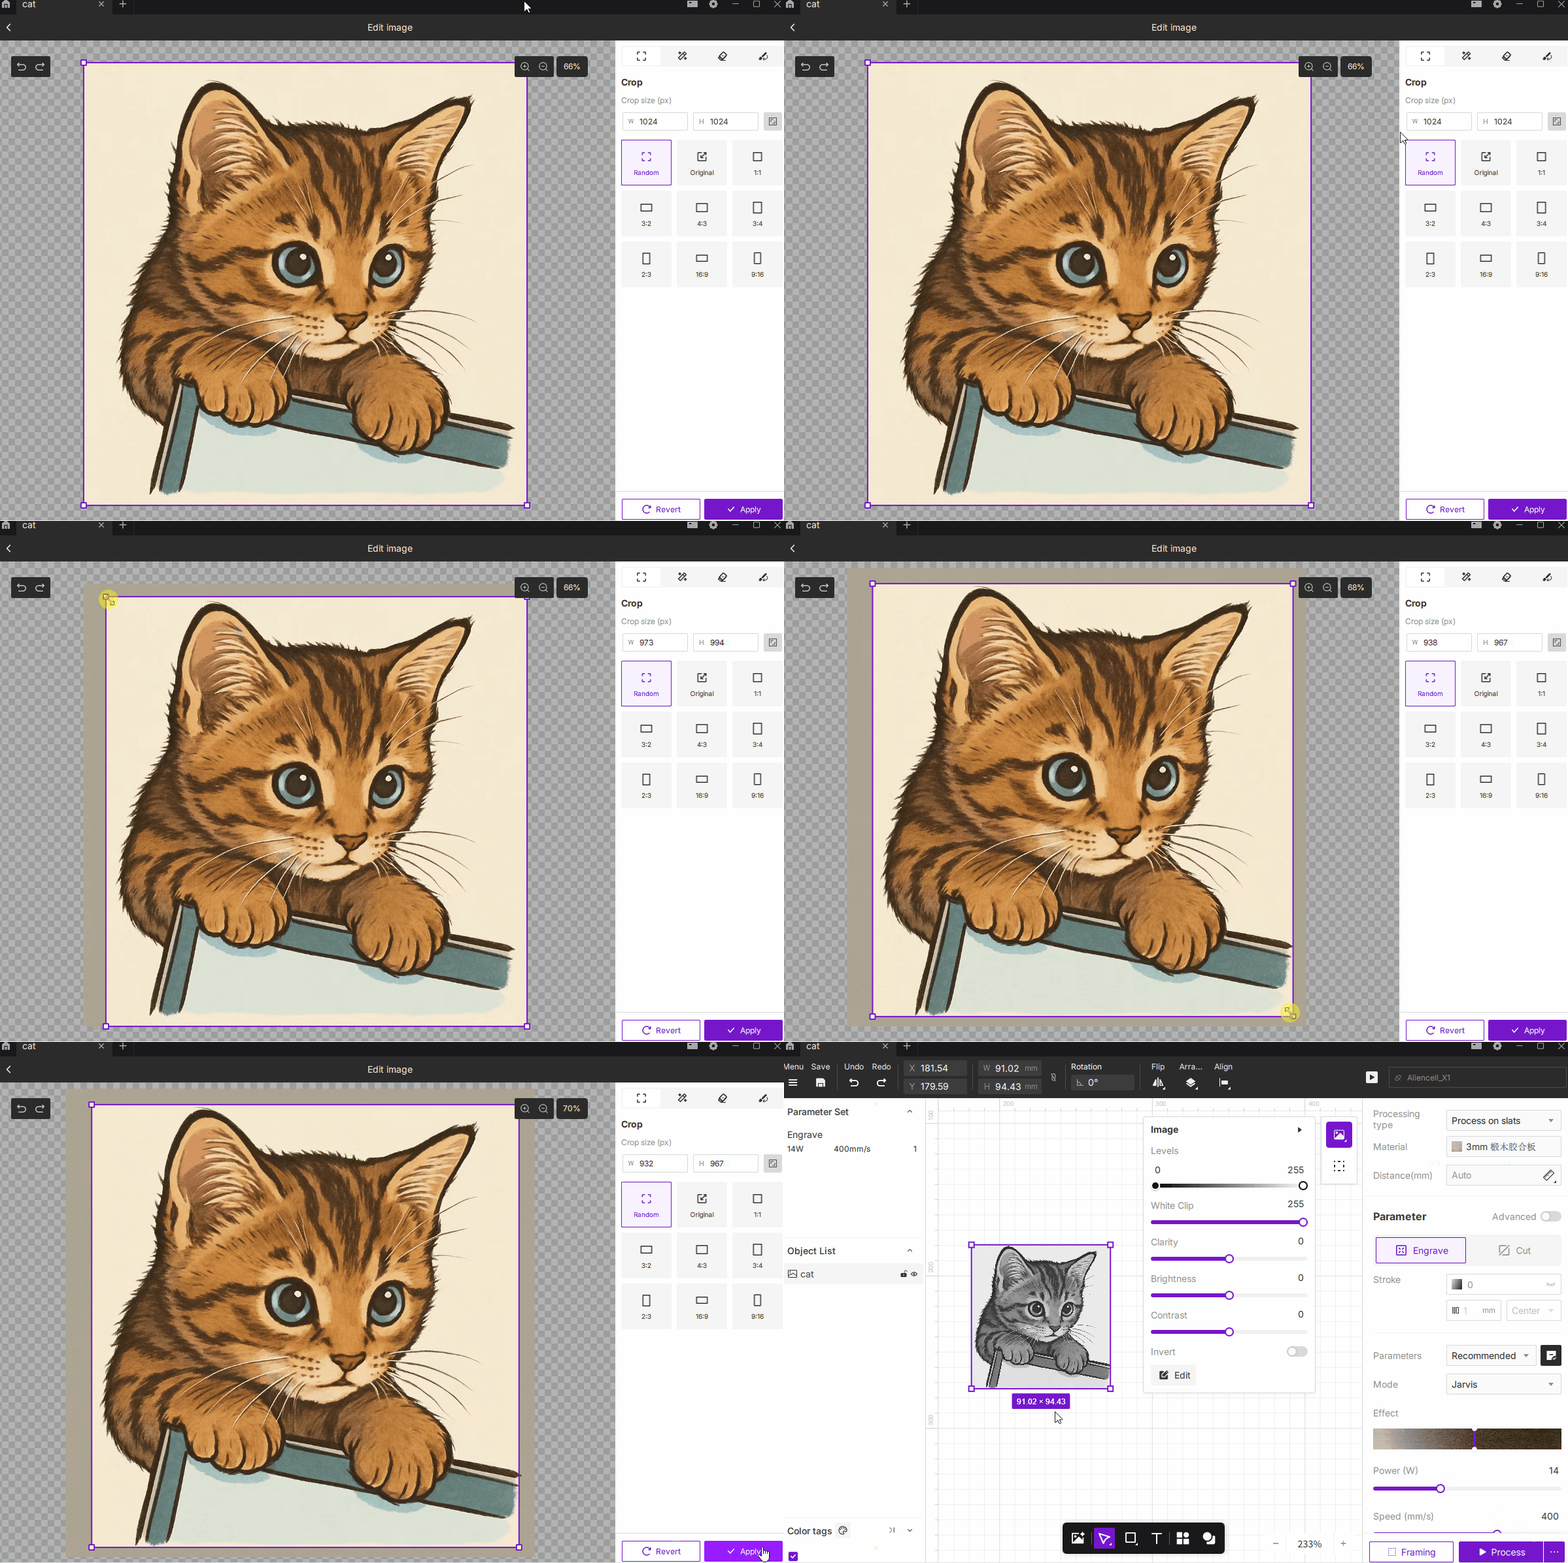
¶ 2.1 Crop
- Description: Removes unwanted regions of the image, keeping only the selected area to focus on the subject or control the engraving size.
- How to Use:
- Choose Free or Fixed Ratio mode, with 9 common presets such as 1:1, 3:2, 4:3, 16:9, etc.
- You can manually enter pixel dimensions for precise output size.
- Best For: Highlighting the main subject, removing excess background, or defining an exact engraving area.

¶ 2.2 Magic Wand
- Description: Automatically selects areas of similar color for quick removal or isolation.
- How to Use:
- Click on the image to select color-matched regions.
- Adjust Tolerance (0–255). Higher values select a broader range of similar colors.
- Best For: Removing backgrounds, isolating subjects, or cleaning uniform-color regions.

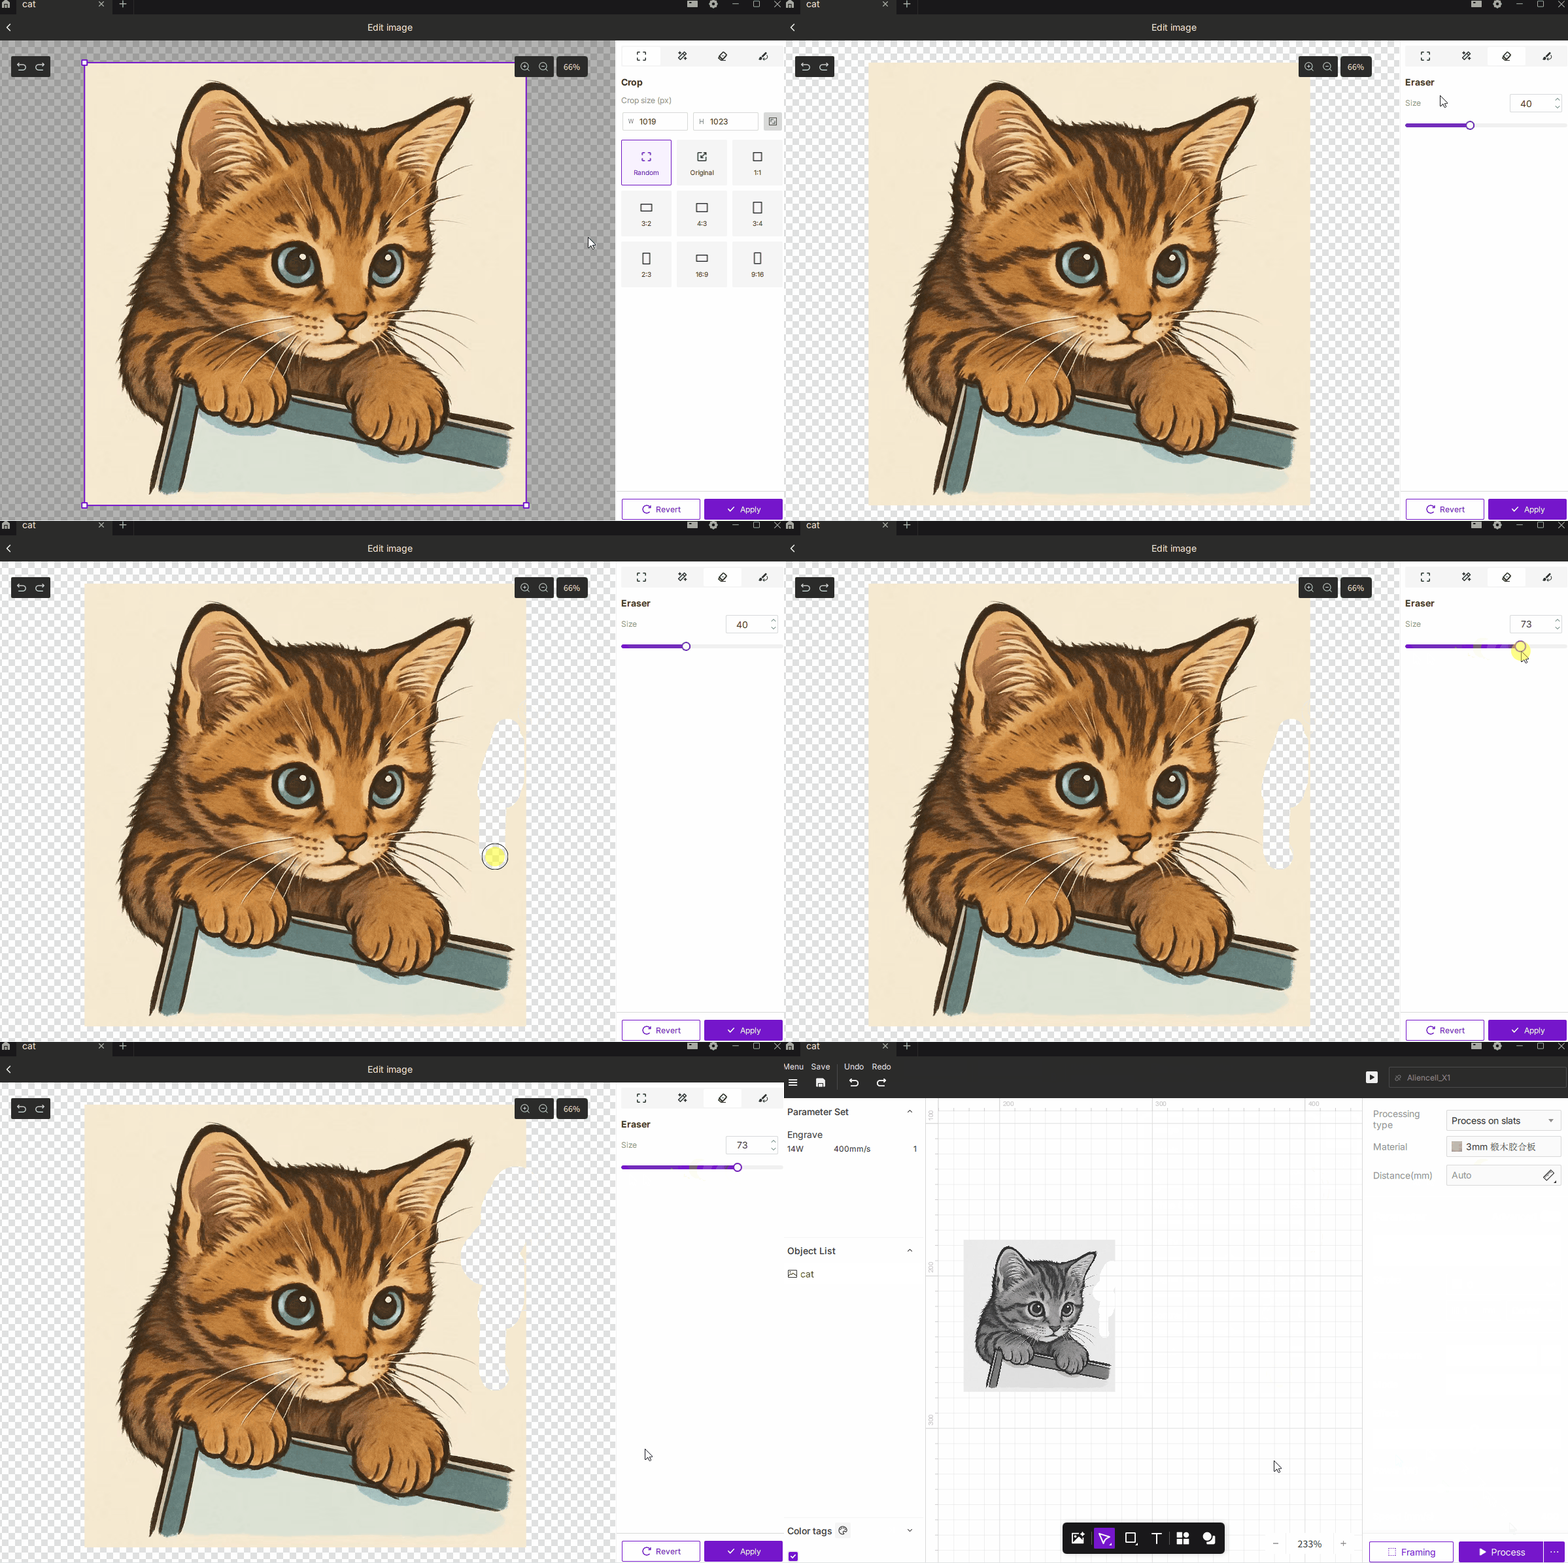
¶ 2.3 Eraser
- Description: Manually erase unwanted parts of the image for fine adjustments.
- How to Use:
- Press and drag to erase.
- Brush size range: 1–100, with larger values covering more area.
- Best For: Removing small dots, cleaning edges, or refining details by hand.

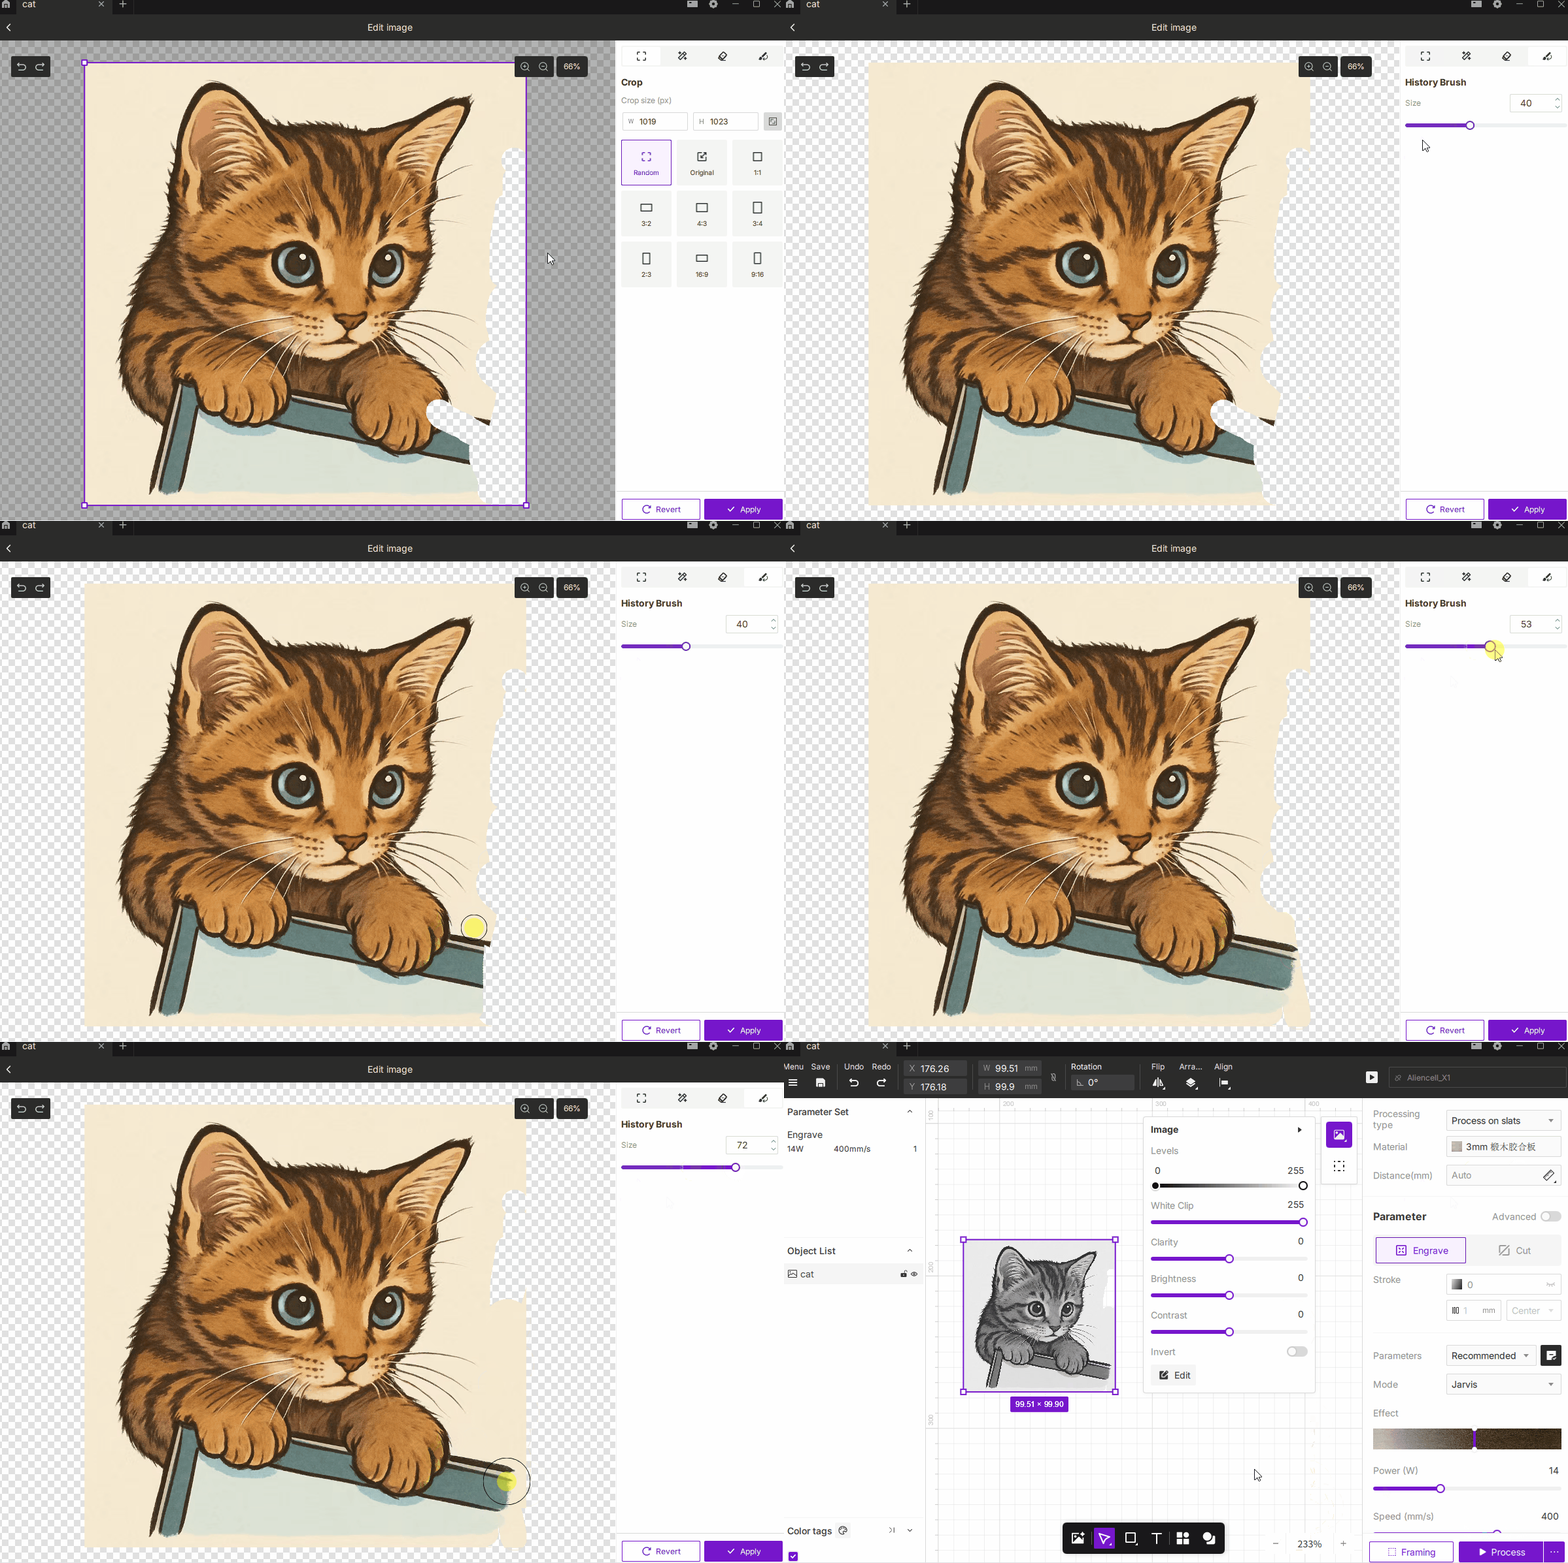
¶ 2.4 History Brush
- Description: Restores selected areas to their original, unedited state.
- How to Use:
- Paint over areas you want to revert without undoing the entire edit sequence.
- Brush size range: 1–100.
- Best For: Correcting mistakes or selectively restoring portions of the original image.
