The Distance function is used to measure the distance from the material's surface to the laser module.
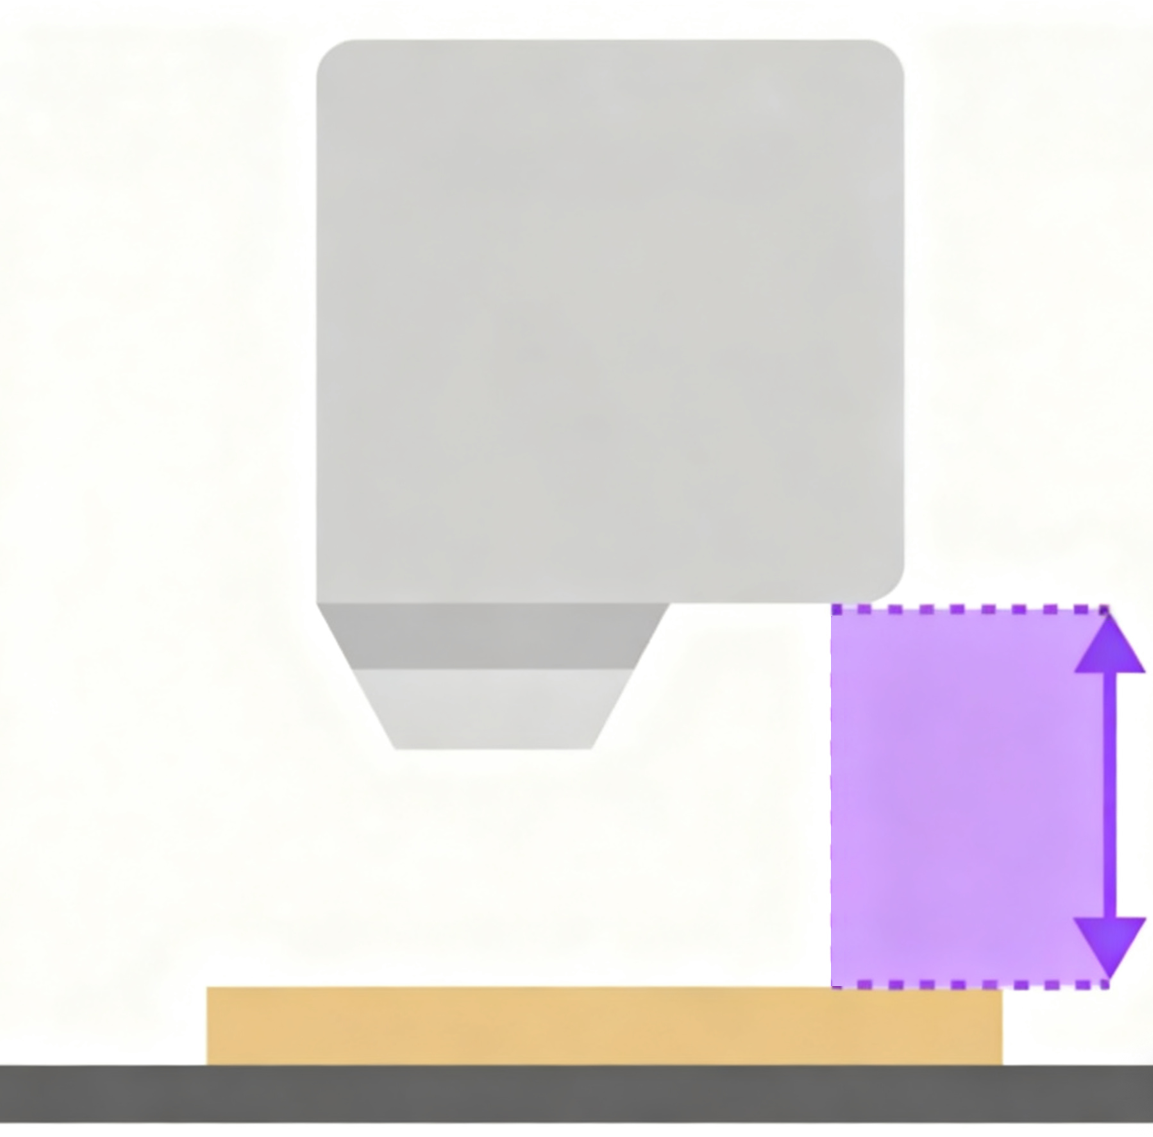
This value is not the laser module's focal length (which is a fixed value). Instead, it's a reference parameter that helps the software calculate the optimal focus position.
Once the software has this distance, it combines it with the laser module's fixed focal length to automatically calculate how far the Z-axis needs to lower the laser head during the job. This ensures the focal point lands precisely on the material's surface, resulting in crisp engraving lines and clean cutting edges.
If you manually set the distance parameter before processing, the machine will skip the auto-focus routine and proceed directly to the job.
In the settings panel, you can set the precise distance from the laser head to the material surface by either manual input or by using the measurement tool. The software will use this value to set the focus.
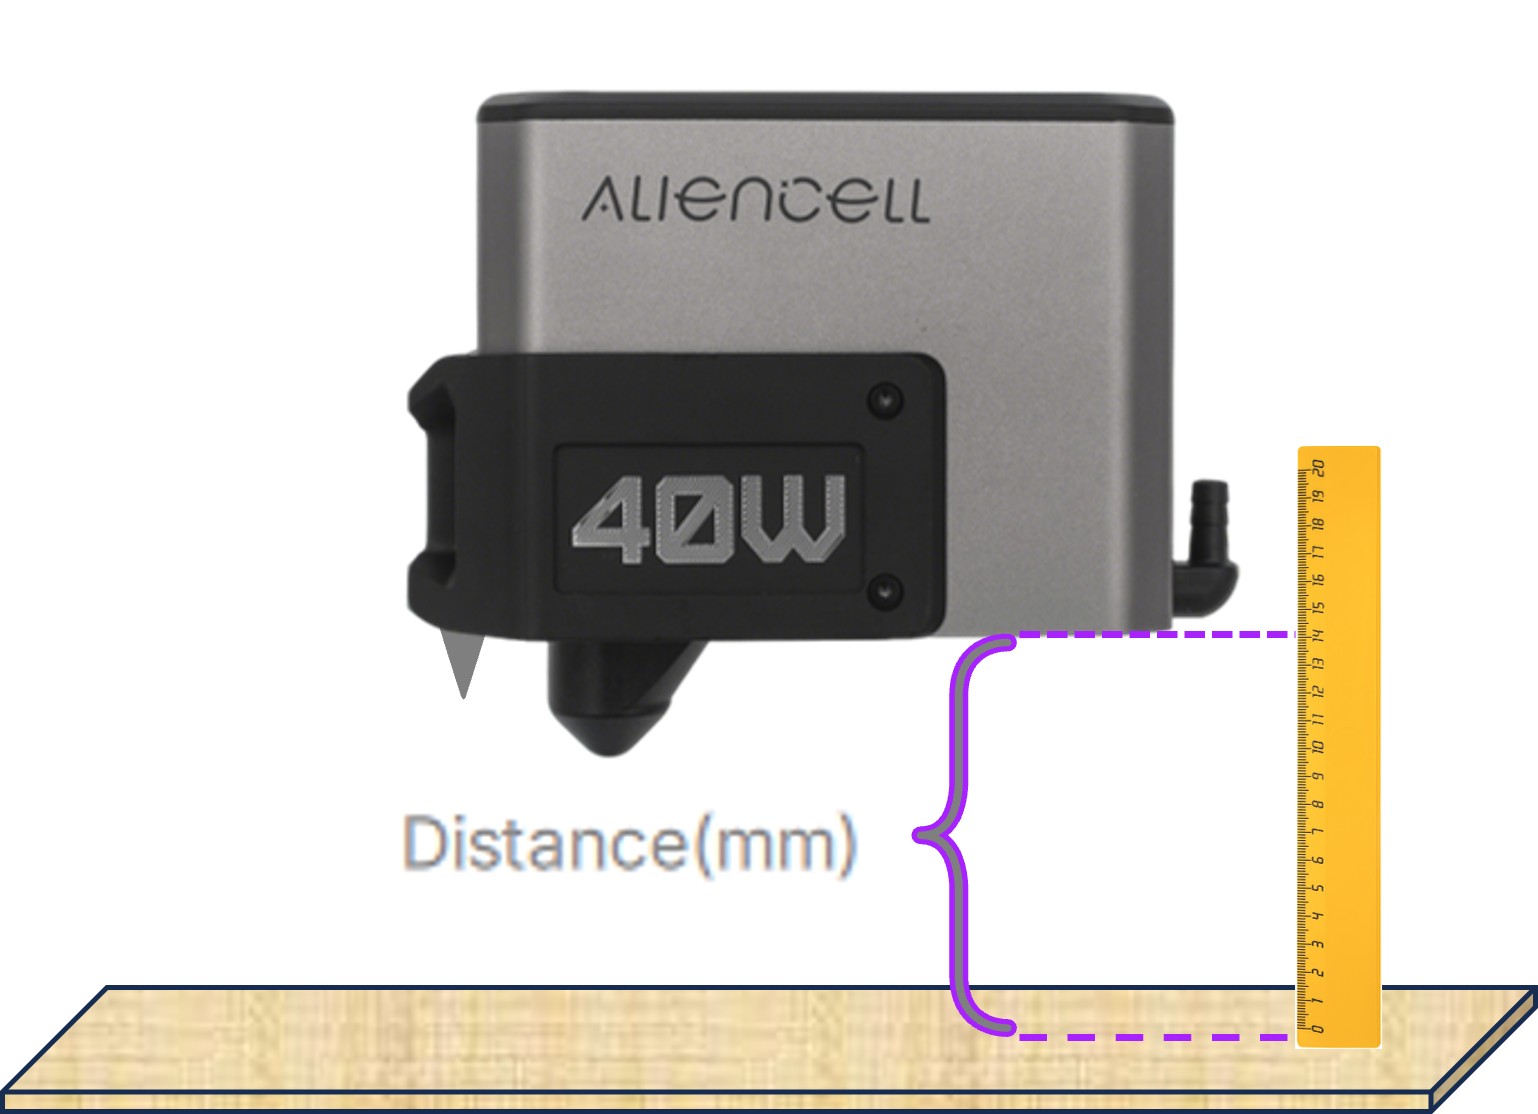
¶ 1. Manual Input
This method requires you to measure the actual distance between the material surface and the laser module beforehand. Simply enter the measured value directly into the distance input box. The unit is millimeters (mm), and you can enter up to two decimal places.
 |
 |
Use a ruler or other tool to measure the height of the material surface |
Enter the measured data |
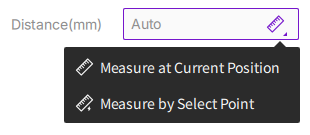
Click the measure
icon on the right side of the input box to activate the machine's auto-ranging function. The software provides two precise automatic measurement methods: Measure at current position and Measure by select point.
¶ 2. Measure at Current Position
When you choose Measure at current position, the laser module will perform a height measurement directly below its current physical location.
¶ 2.1 How to Operate
- Manually move the laser head over the point on the material you want to measure.
Position the red crosshair on your material. Once you click "Measure at current position," the machine automatically shifts the probe to the crosshair's spot. The built-in offset handles the distance for you, so you don't need to align the probe yourself.
-
Click the measure
icon and select Measure at current position from the drop-down menu. -
The laser module will automatically lower to take the measurement. The software interface will display a "Measuring..." prompt.
-
Upon success, the exact measured value will be automatically filled into the "Distance" input box, and a "Focusing completed" prompt will appear. The laser head's probe will then retract. If the measurement fails (e.g., due to reflective material or being out of the sensor's range), the software will show a "Measurement failed" prompt.
¶ 2.2 Use Cases
- When the laser module is already positioned over the processing area on your material.
- When you want to set the focus at a very specific location of your choice.
¶ 3. Measure by Select Point
Using the Measure by select point mode, you can specify a precise point on the software canvas, and the laser module will move to the corresponding physical location before taking the measurement.
¶ 3.1 How to Operate
-
Click the measure
icon and select Measure by select point from the drop-down menu. Your mouse cursor will change to a red crosshair when it's over the canvas. -
Move the red crosshair to your desired measurement location and click to confirm. This action can only be performed within the canvas area.
-
After a successful measurement, the value will be automatically filled in, and a success prompt will appear. The laser head will then retract to its reset position.
-
The machine's laser module will automatically move to the point you selected and then lower to perform the measurement. The software will display "Measuring...".
¶ 3.2 Use Cases
- When your material surface is uneven and you need to measure a specific point (like the highest point).
- When using the camera preview, you can perform precise measurements over a specific part of your design.
Exiting Select Point Mode: If you want to cancel the operation before selecting a point, you can exit in any of the following ways: press the ESC key on your keyboard, right-click within the canvas, or left-click anywhere outside the canvas workspace.