Dust accumulation inside the laser module cooling fan can reduce thermal efficiency and compromise engraving performance. Regularly clean the cooling fan to maintain proper airflow and ensure the stable operation of the laser device.
¶ 1. Video Guide
¶ 2. Cleaning Instructions
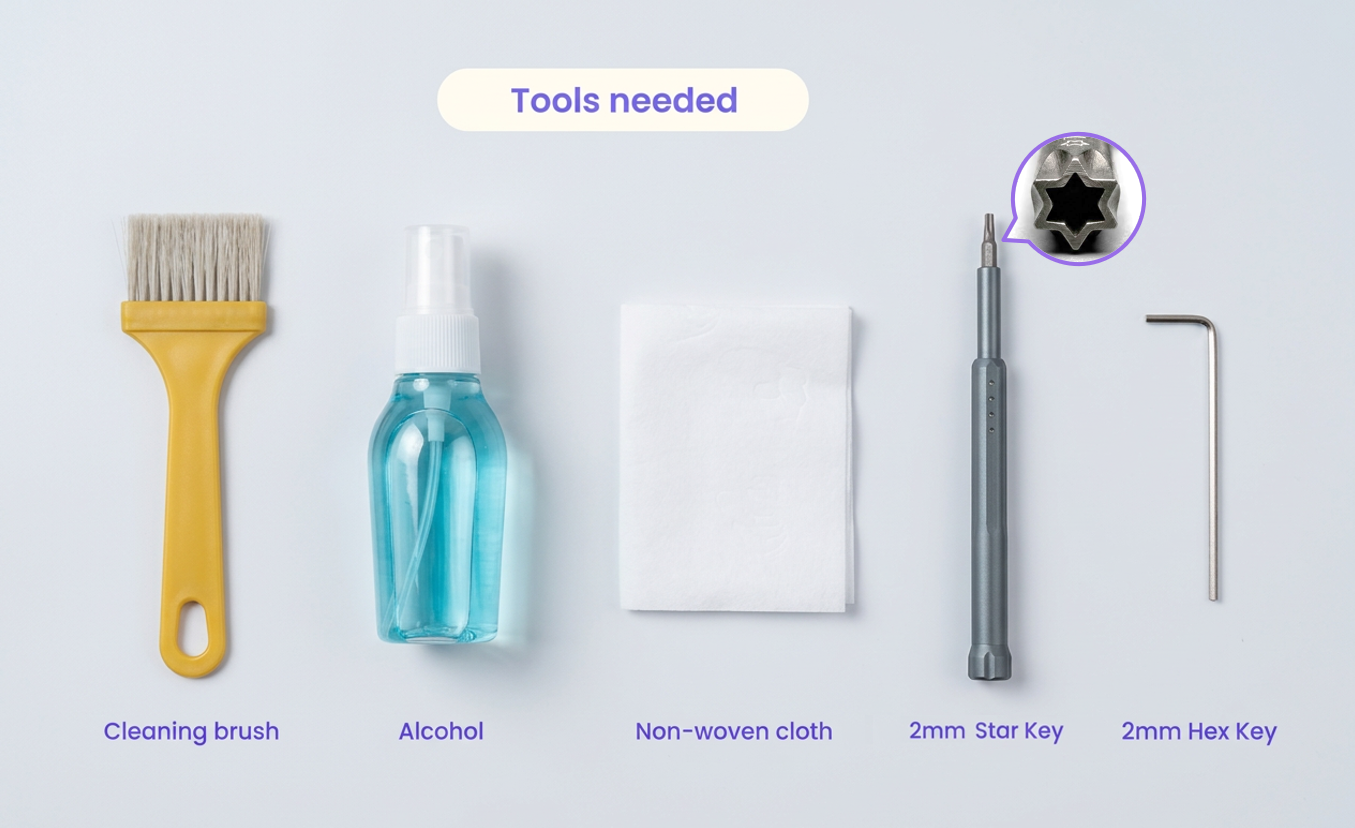
¶ Required Tools
- Alcohol
- Non-woven cloth
- Cleaning brush
- 2.0 mm Hex Key
- 2.0 mm Star Key
Always power off the device and unplug the power cable before performing any maintenance. Never disassemble or service the laser module while the device is connected to power.
Important: Keep all small parts organized during disassembly. Use a parts tray or magnetic mat to sort screws and spacers in removal order. This includes the front housing M2.5 × 4 mm Torx screws, back plate M3 × 6 mm countersunk hex screws, main driver board M3 × 6 mm hex screws, focus sensor M2.5 × 6 mm Torx screws, fan M3 × 30 mm socket head cap screws, and nylon spacers.
¶ Step 1: Remove the Housing
Remove the distance sensor from the top. |
Use the Star Key to remove the 4 screws on the front cover, then detach the cover. |
Pull out and remove the bottom air nozzle. |
Use the 2.0 mm Hex Key to remove the 4 screws from the back plate. |
Gently slide the metal housing off the laser module. |
¶ Step 2: Detach the Driver Board
Use the 2.0 mm Hex Key to remove the 4 screws securing the main driver board. |
Use the Star Key to remove the 2 small screws on the sideto release the focus distance sensor. |
¶ Step 3: Remove the Fans
Use the 2.0 mm Hex Key to remove the 4 long hex screws securing the two cooling fans. |
Detach the fans. Collect the 4 silicone spacers located between the fans and the heatsink. |
CAUTION: Do not lose the 4 silicone spacers. They are critical for vibration dampening and maintaining proper fan spacing.
¶ Step 4: Deep Clean
Use the cleaning brush to thoroughly remove dust from the heatsink fins. |
Use the cleaning brush to sweep dust off both fan enclosures. |
Use a cotton swab dipped in alcohol to wipe away stubborn sticky residue from the fan blades. |
Use a non-woven cloth to wipe clean the interior of the metal housing. |
¶ Step 5: Reinstall the Driver Board
Place the driver board back into position and tighten the 4 securing screws using the 2.0 mm Hex Key. |
Re-attach the focus distance sensor to the side and secure it with the 2 Star screws. |
¶ Step 6: Reinstall the Cooling Fans
Insert the 2 long hex screws through the mounting holes of the first fan. |
Slide the silicone spacers onto the protruding ends of the screws at the bottom of the fan. |
Align the screws with the mounting holes on the heatsink and tighten them using the 2.0 mm Hex Key. |
Follow the same procedure to install the second fan. |
¶ Step 7: Final Assembly
Carefully slide the metal housing back onto the module. |
Secure the metal back plate using the 4 hex screws. |
Secure the front cover using the 4 Star screws. |
Reinstall and firmly seat the distance sensor on top. |
Re-attach the air nozzle to the laser emission end. |
WARNING: Ensure the side wires are neatly tucked into the slot. Be extremely careful not to pinch or crush any cables when sliding the metal housing back into place.
Success: The cleaning process is now complete. Your laser module cooling system is ready for use.
¶ Maintenance Recommendations
- Increase the cleaning frequency when processing wood or other dust-heavy materials to prevent overheating.
- Keeping the cooling system clean helps extend the lifespan of the laser module and improves engraving stability.