The protective lens is one of the most critical protective components of the laser module. It blocks smoke, debris, and high-temperature airflow from entering the module, preventing contamination or damage to the focus lens.

- Focusing Lens: Installed inside the module, it concentrates the laser beam into a fine spot, enhancing cutting depth and engraving precision. It is one of the core optical components of the laser module.
- Nozzle: Located at the outermost end of the Laser Emission Port, usually cone- or cylinder-shaped with a small outlet hole. It focuses the airflow to blow away smoke and debris, while minimizing dust entering the module.
- Protective Lens: Positioned between the Nozzle and the Focusing Lens, typically a small circular glass piece. Its purpose is to block smoke and debris from entering the module, protecting the Focusing Lens from contamination or damage.
The protective lens can be replaced independently for easier maintenance and lower cost.
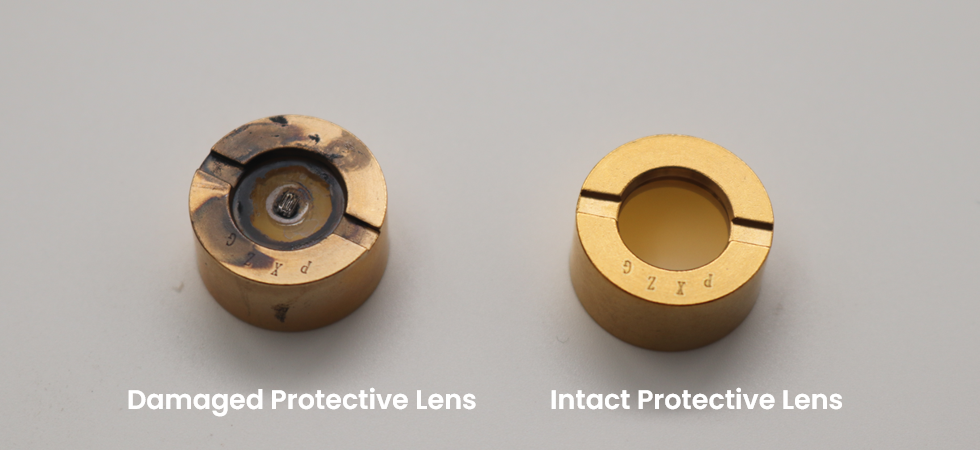
During daily use, the protective lens may develop burn marks or cracks due to laser burning, debris impact, or prolonged high-temperature operation, requiring cleaning or replacement.
¶ 1. Common Causes of Damage
- Laser Burning: Localized overheating caused by smoke accumulation or prolonged high-power processing.
- Debris Impact: Splatter hitting the lens surface when cutting hard materials.
- Mishandling: Scratches caused by using improper cleaning tools or excessive force.
- Aging Seals: Contamination caused by the degradation of sealing rings over time.
- Reflective Materials: Cutting highly reflective materials (e.g., mirrored metal, acrylic) can cause back reflection, where the beam bounces back and damages the lens.
¶ 2. Preparation Before Replacement
- Required Items: A new protective lens.
- Working Environment: Ensure the workspace is dust-free and dry. Avoid airflow that might blow dust into the module.
¶ 3. Replacement Steps
¶ Step 1: Remove the Installed Laser Module
 |
 |
Disconnect the Air Pump Tube and the laser module connector in sequence. |
Pull down the locking handle, then gently lift the Laser Module from the mounting slot. |
¶ Step 2: Remove the Old Lens
- Detach the Nozzle first, then unscrew the Protective Lens.
¶ Step 3: Install the New Protective Lens and Nozzle
- Quickly screw the clean, new protective lens back into the laser module and reattach the nozzle.
All lens assemblies are installed in a dust-free factory environment before shipping.
Therefore, when replacing the lens, you should simulate a clean environment as closely as possible to prevent dust contamination of the Focusing Lens, ensuring stable laser performance and longer lifespan.
¶ Step 4: Reinstall the Laser Module
 |
 |
Place the module back onto the slider mount, push the locking lever UP to secure it. |
Reconnect the module cable, followed by the air tubing. |