The Smart Air Assist is an essential accessory for laser engravers. It provides a stable airflow to remove smoke and debris generated during processing, keeping the engraving area clean, preventing material scorching, and protecting the laser lens. The Air Assist can adjust airflow automatically or manually based on processing needs, ensuring smooth engraving and cutting results.
¶ 1. In the Box
Upon receipt, please check the package to ensure it contains the following items:
| No. | Illustration | Item Name |
|---|---|---|
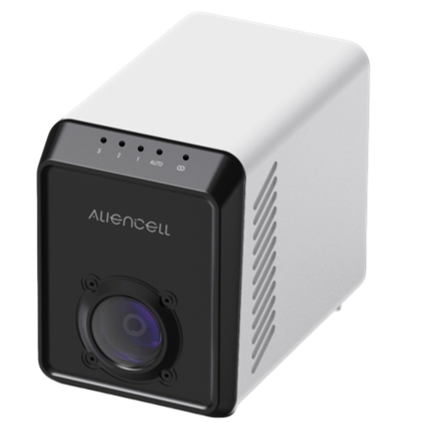
1 |
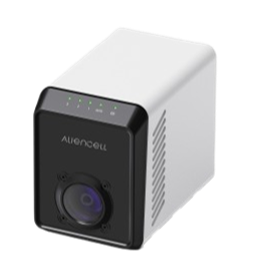 |
Air Pump Unit |
2 |
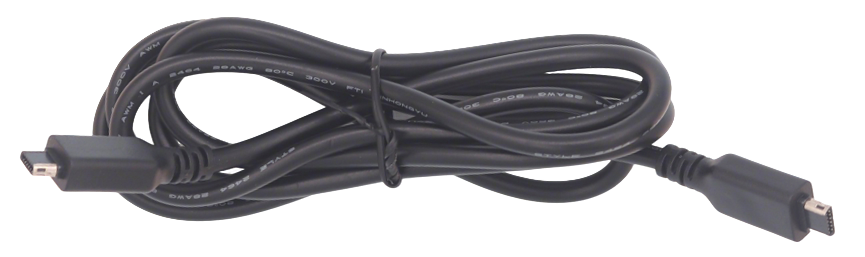 |
Mini-B to Mini-B Data Cable |
3 |
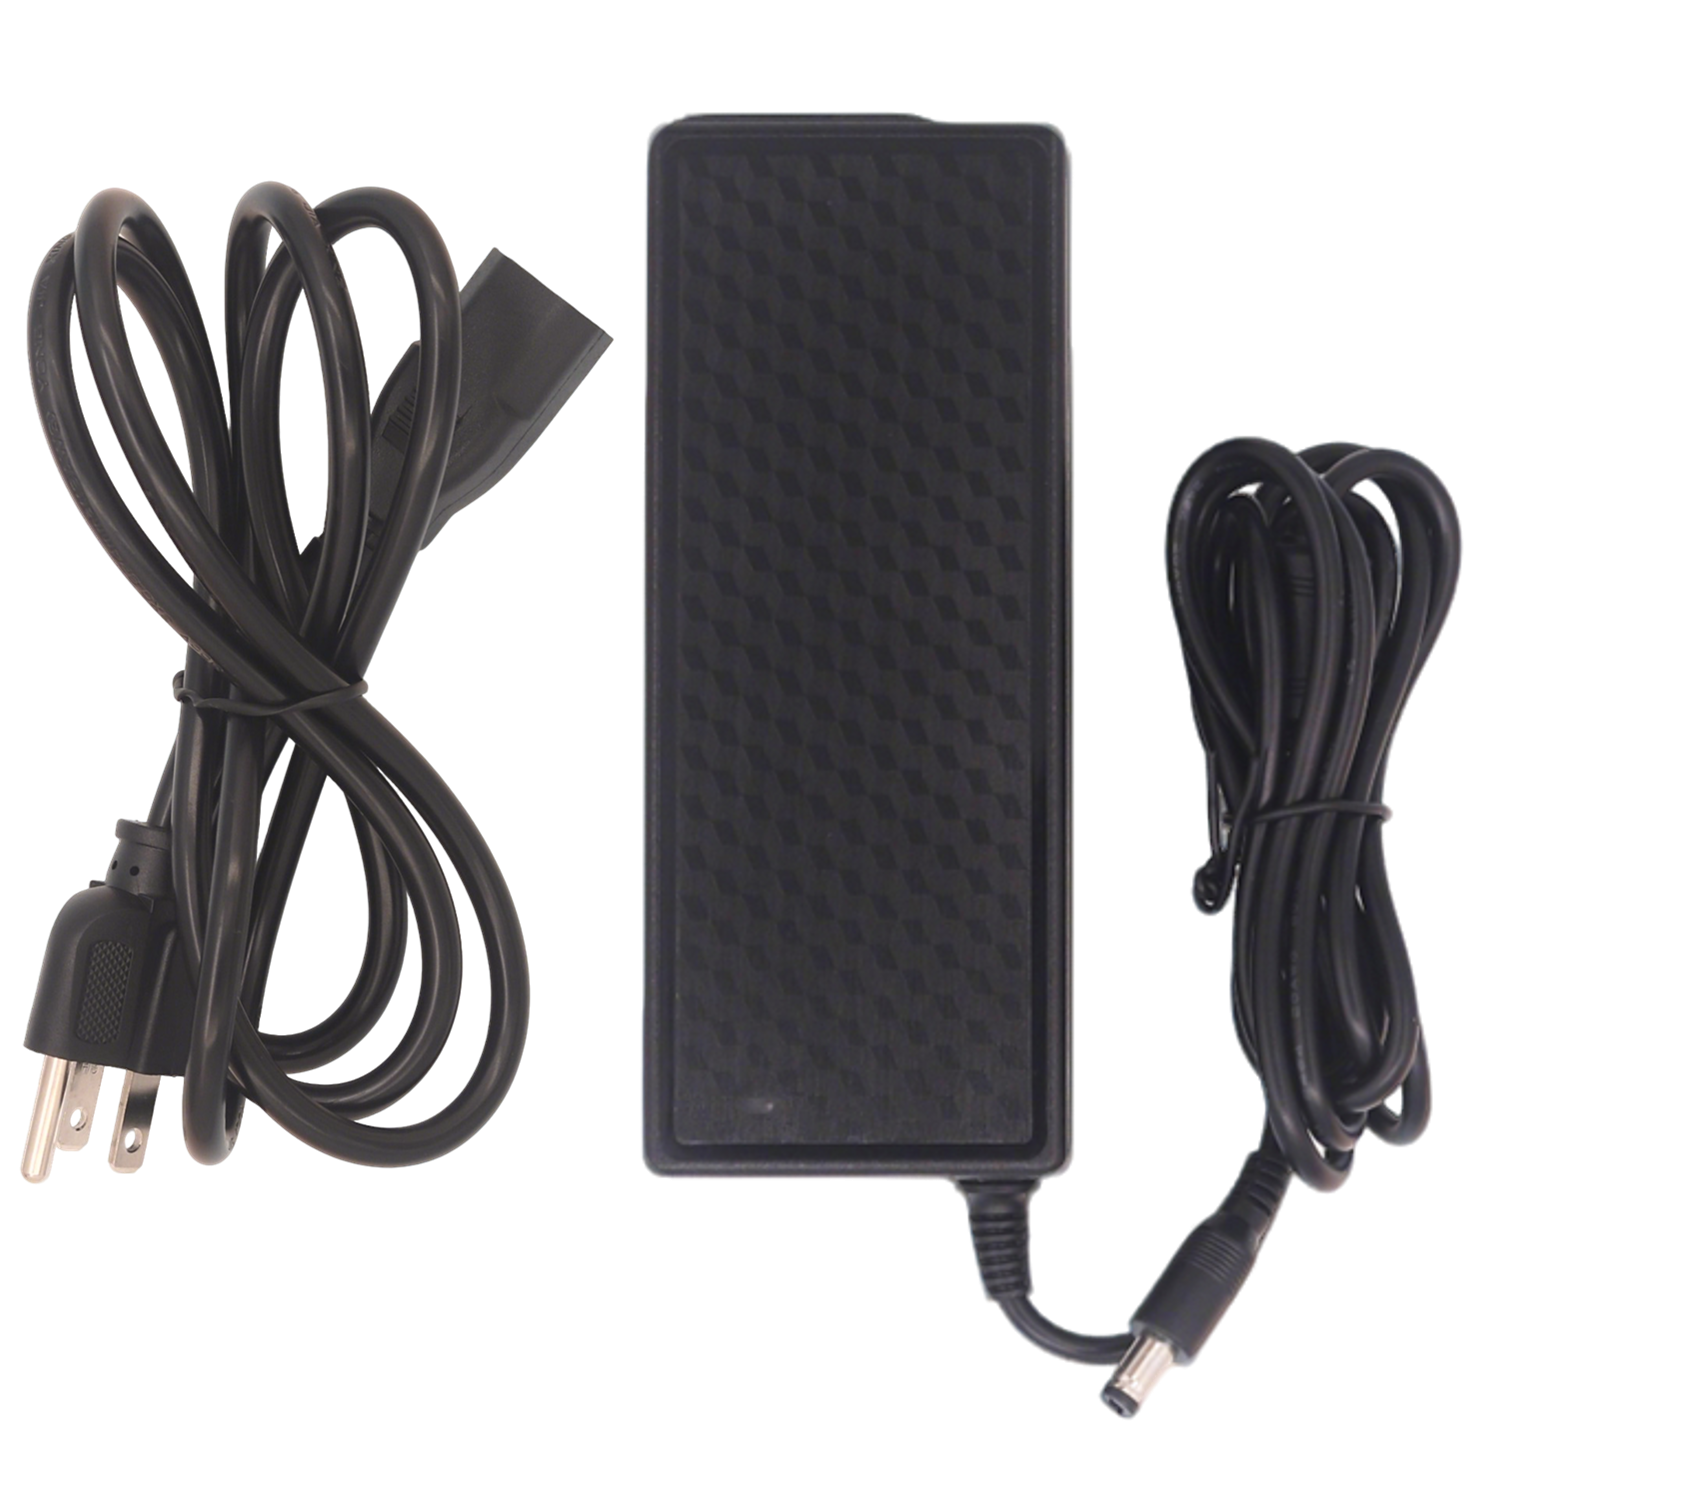 |
Power Adapter |
4 |
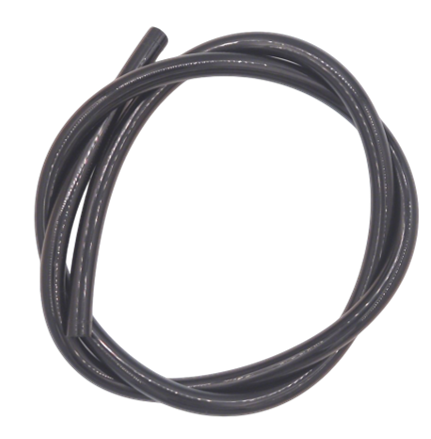 |
0.8m Length , 8mm Diameter Air Tube |
5 |
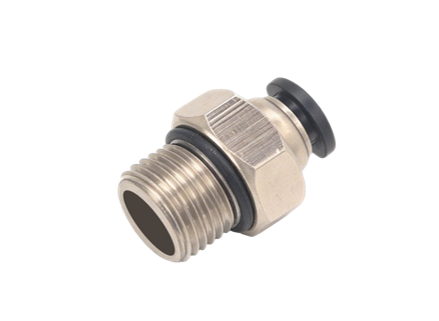 |
6mm OD Pneumatic Fitting (Male Thread) |
6 |
 |
User Manual |
¶ 2. Specifications
Parameter |
Value |
|---|---|
Airflow |
40 L/min (Max) |
Air Pressure |
14.5 psi |
Power Supply |
AC Adapter |
Input Voltage |
24V |
Input Current |
4A |
Noise Level |
55 dB |
Dimensions |
167 mm × 105 mm × 147.7 mm |
Weight |
1.30 kg |
¶ 3. Product Overview

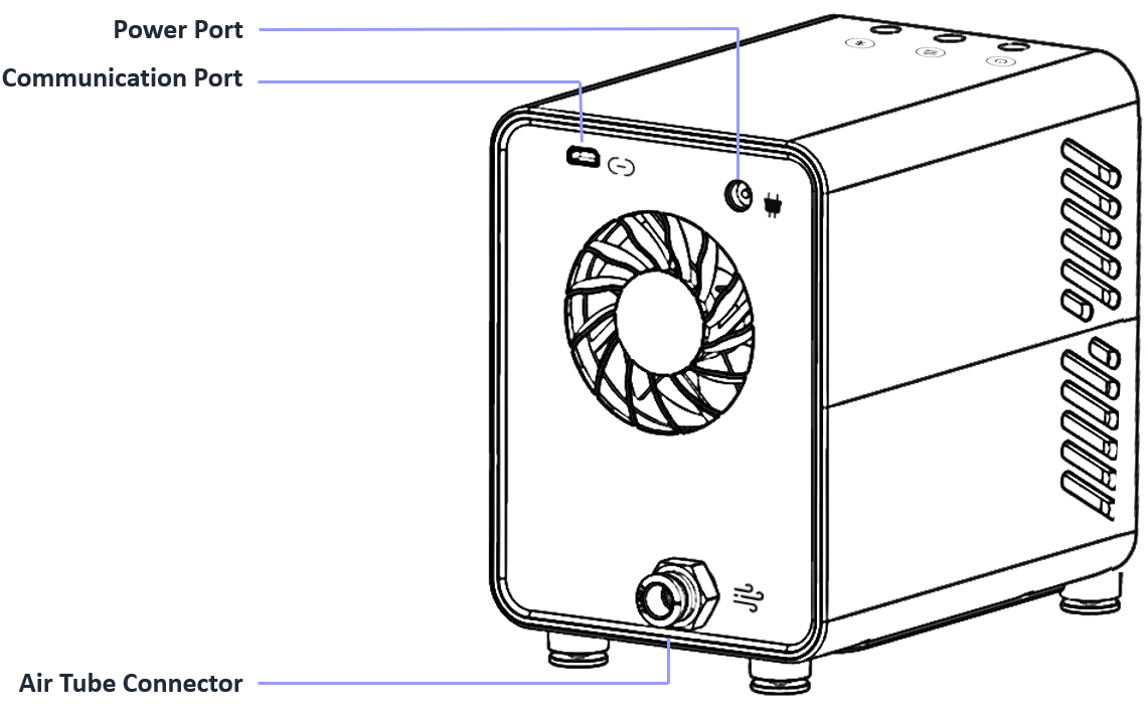
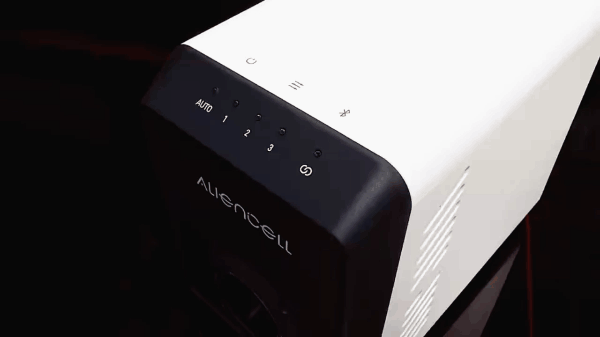
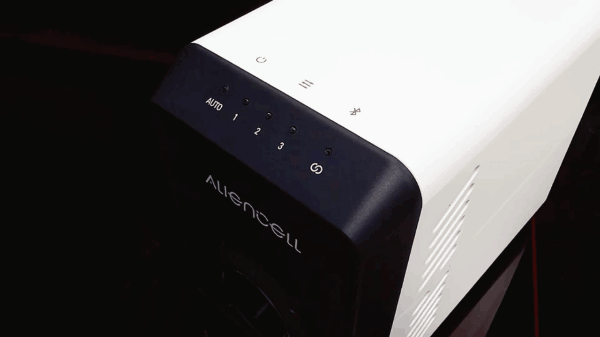
¶ 3.1 Interface Description
- Power Interface: Supplies stable power to the pump, ensuring reliable operation during processing.
- Air Outlet: Connects to the air tube to output airflow for smoke exhaust and debris removal.
- Communication Port: Mini-B interface. Connects to the engraving machine via data cable for communication and control.
The Aliencell Air Assist supports both USB and Bluetooth communication with the device.
¶ 3.2 Manual Speed Levels
Tap the Speed Control Button to cycle through the airflow modes. The cycle sequence is: AUTO - 1 - 2 - 3 - AUTO.
| Mode | Indicator Status |
Description |
|---|---|---|
AUTO |
 |
Auto Mode: The pump automatically toggles on/off and adjusts speed based on job file commands. |
Level 1 |
 |
Low Speed: Minimal airflow, suitable for engraving light or thin materials. |
Level 2 |
 |
Medium Speed: Moderate airflow, suitable for general cutting or engraving. |
Level 3 |
 |
High Speed: Maximum airflow, suitable for thick materials or high-speed cutting. |
¶ 3.3 Bluetooth Status
¶ 3.3.1 Bluetooth Switch
 |
 |
Turn ON: Tap the switch. |
Turn OFF: Press and hold for 1s until the light turns off. |
¶ 3.3.2 Bluetooth Indicator Description
Indicator Pattern |
Status Description |
Note |
|---|---|---|
 |
Flashing Blue |
Bluetooth Waiting for Connection (Pairing Mode) |
 |
Solid Blue |
Bluetooth Connected |
 |
Flashing Red |
Error / Fault Detected |
 |
Light Off |
Bluetooth is OFF |
¶ 4. Installation
¶ 4.1 Connect Power
Connect the power adapter to the power cord beforehand.
a. Plug the DC connector into the power interface on the back of the pump. |
b. Plug the power cord into a wall outlet. |
¶ 4.2 Start the Air Assist
- Turn on the pump power. Use the speed control button to adjust the airflow level.
 |
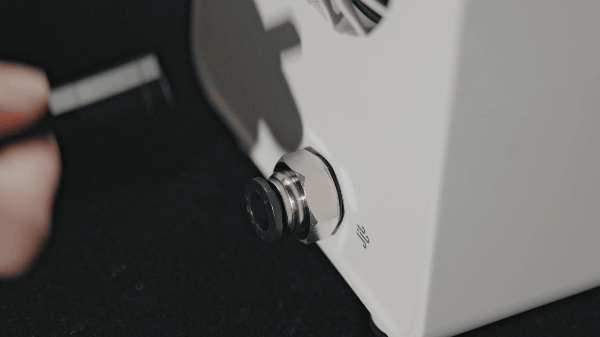
- Test the airflow: Switch the pump to Level 1, 2, or 3. Place a small strip of paper under the laser module nozzle. If the paper moves, the pump is working correctly.
 |
- Note: Before starting a job, switch the pump back to Auto mode for software control.
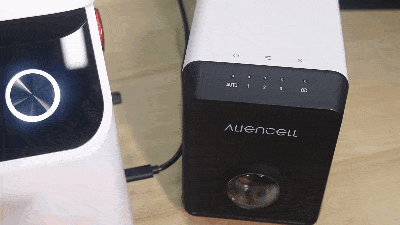
¶ 4.3 Connect to the X1 Air Inlet
The following instructions describe the hardware installation process for connecting the Air Assist to Aliencell X1, including air tube connection, power connection, and startup check. After completing this section, choose either data cable connection or Bluetooth connection based on your usage scenario.
Connect the air tube between the Air Assist and the X1 air inlet. When inserting or removing the air tube, press down on the black release ring around the connector.
 |
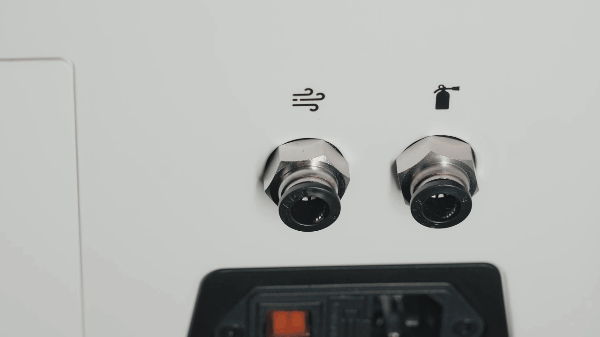 |
a. Push the air tube firmly into the air outlet port on the back of the Air Assist. |
b. Insert the other end of the tube into the air inlet port on the machine. |
¶ 5. Operation Guide
The Air Assist supports both Data Cable and Bluetooth connections to communicate with the machine.
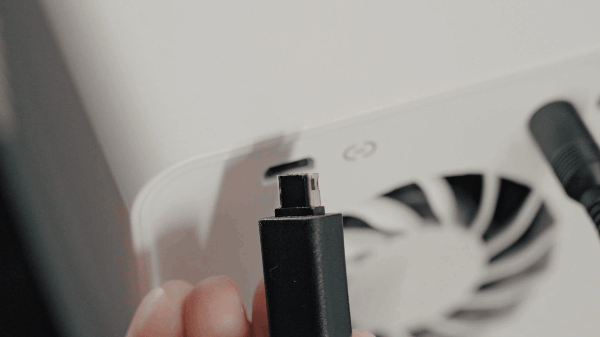
¶ 5.1 Wired Connection (Data Cable)
Using the provided Mini-B data cable is the most stable method of communication.
 |
 |
a. Plug the Mini-B cable into the pump's communication port. |
b. Plug the other end into the "Accessory" or "USB" port on the machine. |
¶ 5.2 Bluetooth Connection
¶ 5.2.1 Connect X1 to the Air Assist via Bluetooth
Aliencell X1 supports connecting to the Air Assist via Bluetooth. Using Bluetooth reduces cable clutter and keeps your workspace tidy.
- Enable Bluetooth on the Air Assist: Tap the Bluetooth switch on the pump. The Bluetooth indicator will flash blue, indicating it is in pairing mode.
-
On the Touchscreen: Tap the Settings icon
 on the home screen. Find and tap Bluetooth. Toggle the Bluetooth Switch in the top right corner to ON.
 -
Connect: In the Other Devices list, find the air pump's name (e.g.,
AC_Air00026). Tap the name, then tap Connect in the pop-up confirmation box.
- Confirmation: Once paired successfully, the Bluetooth indicator on the pump will turn Solid Blue.
- Disconnect Bluetooth
- Remove Bluetooth Device
¶ 5.3 Control Methods
You can control the Air Assist using three different methods depending on your scenario:
¶ 5.3.1 Manual Control
- Action: Tap the speed control button on the pump to cycle through Auto-1-2-3.
- Use Case: When you need continuous airflow regardless of the machine's status, or need to manually override the software settings.
|
¶ 5.3.2 Control from the X1 Touchscreen
Control the Air Assist directly from the X1 touchscreen.
- Tap the Accessory icon
 in the right-hand menu bar. A list of connected accessories will appear at the bottom.
 - Tap Air Assist Set to enter the control page. You can select:
- OFF: Turn off the pump.
- 1: Low airflow.
- 2: Medium airflow.
- 3: High airflow.
- Auto: Automatically adjusts based on processing status.
¶ 5.3.3 Control the Air Assist in LightBurn
- Double-click a Layer on the right side to open Cut Settings.
- Locate the "Air" toggle and switch it to ON (Green).
- Result: The pump automatically starts when the machine processes this layer and stops when finished. (In Auto mode, the pump maintains a standby airflow).
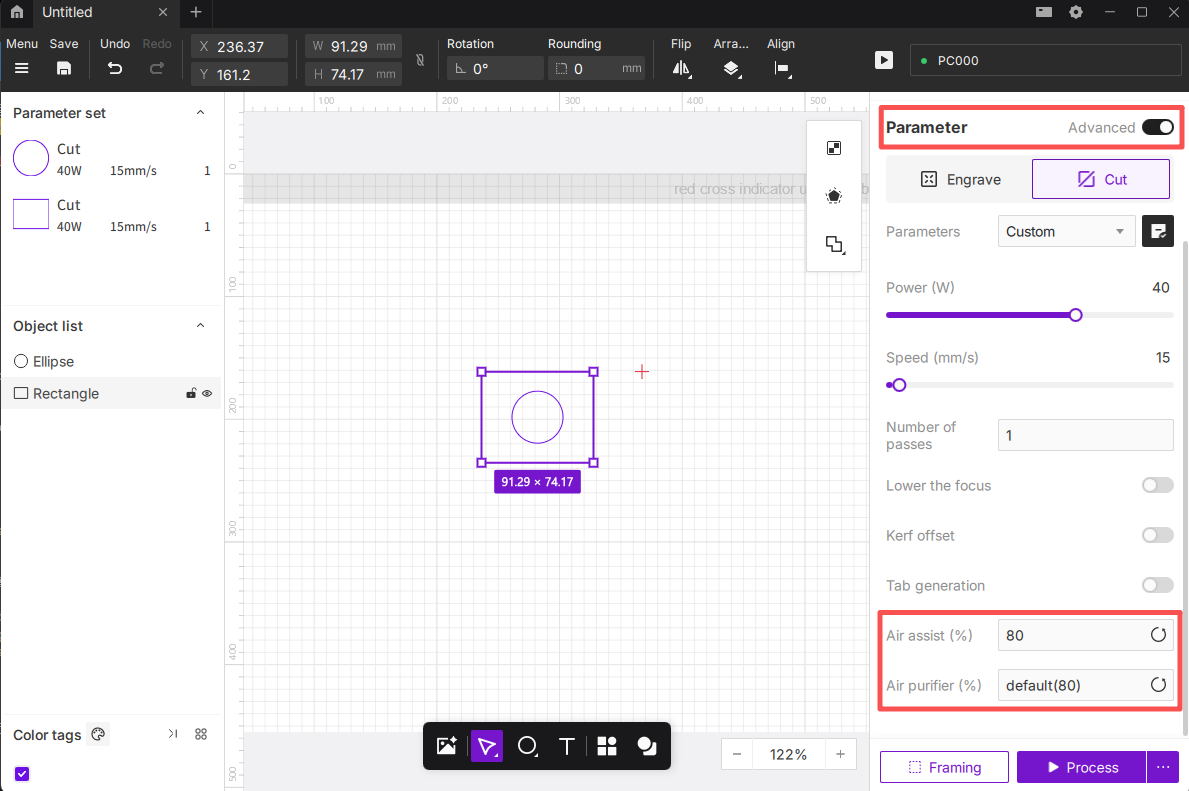
¶ 5.3.4 Control the Air Assist in Aliencell Space
In Aliencell Space software, you can set precise airflow percentages for different objects by enabling advanced features.
- Select Object: Click to select the graphic or layer you wish to process.
- Enable Advanced Mode: In the Parameter panel on the right, toggle the switch to Advanced.
- Set Airflow: Locate the Air assist (%) option at the bottom. Enter a value between 0 and 100 (e.g., enter
80for 80% airflow; enter0to turn off the pump for this layer).
¶ 5.4 Impact of Air Assist on Cutting & Engraving Results
During laser engraving or cutting, the role of the Air Assist is often underestimated. It continuously blows compressed air, effectively reducing smoke, charring, and burn marks, keeping the optical path clean and improving the quality of engraving and cutting edges.
¶ 5.4.1 Comparison Example
-
Blurred lines with dark edges: Without airflow to disperse smoke, fumes and heat accumulate around the processing area. Particles in the smoke redeposit on the material surface and cut edges, causing blurry lines and noticeable soot marks.
-
Severe carbonization and charring: Prolonged heat buildup at the cutting point causes excessive burning, darkening the lines and leaving obvious burn marks on surrounding areas.
 |
 |
|---|---|
Air Assist Enabled: Clear edges, minimal smoke |
Air Assist Disabled: Yellowed edges, obvious burn marks |
¶ 5.4.2 How Air Assist Improves Cutting & Engraving Quality
- Reduces smoke and burn marks: Airflow forms a protective layer along the laser path, preventing high-temperature smoke from settling.
- Enhances cutting penetration: High-pressure air helps blow away molten residues, leaving cleaner cuts.
- Prolongs optical component life: Reduces the chance of lens contamination.
- Improves safety: Minimizes the risk of smoke and sparks lingering inside the machine.
¶ 5.4.3 Practical Usage Recommendations
It is strongly recommended to use the Air Assist during processing!
-
Engraving Mode
- Use low airflow (if you are using the official Aliencell Air Assist, switch to manual mode at levels 1–2).
This removes smoke effectively without affecting engraving details. - Ideal for materials like wood and leather that are prone to charring.
- Use low airflow (if you are using the official Aliencell Air Assist, switch to manual mode at levels 1–2).
-
Cutting Mode
- Use medium to high airflow (if you are using the official Aliencell Air Assist, switch to manual mode at level 3).
This ensures smooth, clean cuts with minimal carbonization. - Recommended for acrylic, plywood, and thick wood boards.
- Use medium to high airflow (if you are using the official Aliencell Air Assist, switch to manual mode at level 3).
When using the Aliencell Space Air Assist, you can switch the pump to Auto Mode before processing.
The system will automatically adjust airflow levels according to the engraving or cutting mode.
- Maintenance & Safety
- Regularly clean the air nozzle on the Laser Module to prevent dust or wood debris from blocking airflow.
- Periodically inspect the Air Assist tubing and connectors to ensure there are no air leaks.
- Always confirm the Air Assist is turned on before starting a job to ensure consistent airflow.
¶ 6. Firmware Upgrade
To ensure the best compatibility and access new features, please keep the Air Assist firmware updated.
- Connect: You MUST use the Mini-B Data Cable to connect the pump to the machine for updates (Bluetooth updates are not supported).
- Access Menu: Tap the Settings icon and go to General > Firmware. If a small arrow appears next to Newest Firmware, an update is available.
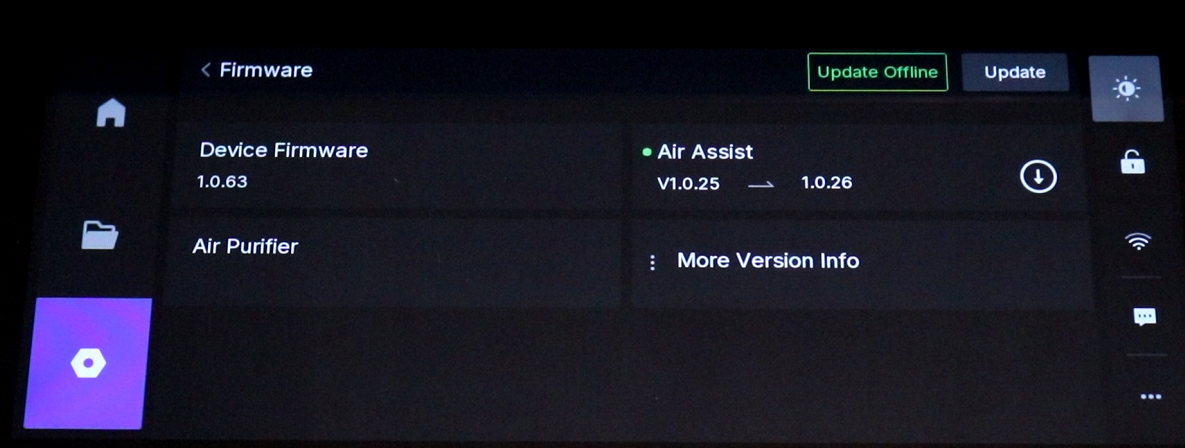
- Update: Tap the arrow next to "Air Assist" to start the update process.
- Wait: Do not power off or unplug the cable during the update. The pump may automatically restart once finished.
¶ 7. Troubleshooting (FAQs)
¶ Q1: The pump does not auto-start or auto-stop during processing?
- Please upgrade the Air Assist to the latest firmware.
- Check Connection: Ensure the data cable is plugged in securely or Bluetooth is connected (Solid Blue light).
- Check Software: In LightBurn, ensure the "Air" toggle is Green (ON) for the specific layer.
- Check Mode: Ensure the Touchscreen accessory setting is set to "Auto" or software control mode, not manually set to "OFF".
¶ Q2: Cannot connect via Bluetooth?
- Ensure the pump is powered on.
- Move the pump closer to the machine to ensure a strong signal.
- If the indicator is not flashing blue, try long-pressing the Bluetooth button (if supported) or power cycling the device to reset the pairing mode.
¶ Q3: Airflow is weak or the pump is noisy?
- Check Tube: Ensure the air tube is not bent, kinked, or crushed by the machine's gantry.
- Check Inlet: Make sure the air inlet fan on the side of the pump is not blocked by dust or debris.
- Check Nozzle: Inspect the laser head nozzle for clogging caused by debris or resin. Clean with alcohol if necessary.
¶ Q4: The status light is flashing Red?
- Air Tube Depth: If the air tube is inserted too deeply into the pump, it may block the internal airway. Press the black release ring at the connector and pull the tube out slightly to ensure smooth airflow.
- Fan Blockage: Immediately disconnect power and check if any foreign object is jamming the intake fan.
- Reset: Unplug power, wait for 1 minute, and restart. If the red light persists, please contact customer support.
¶ 8. IC Caution
This device complies with Industry Canada licence-exempt RSS standard(s). Operation is subject to the following two conditions:
(1) This device may not cause interference, and
(2) This device must accept any interference, including interference that may cause undesired operation of the device.
To maintain compliance with RSS-102 RF Exposure guidelines, this equipment should be installed and operated with a minimum distance of 20cm between the radiator and your body. Use only the supplied antenna.
¶ 9. FCC Warning
This device complies with part 15 of the FCC Rules. Operation is subject to the following two conditions:
(1) This device may not cause harmful interference, and
(2) this device must accept any interference received, including interference that may cause undesired operation.
Any Changes or modifications not expressly approved by the party responsible for compliance could void the user's authority to operate the equipment.
Note: This equipment has been tested and found to comply with the limits for a Class B digital device, pursuant to part 15 of the FCC Rules. These limits are designed to provide reasonable protection against harmful interference in a residential installation. This equipment generates uses and can radiate radio frequency energy and, if not installed and used in accordance with the instructions, may cause harmful interference to radio communications.
However, there is no guarantee that interference will not occur in a particular installation. If this equipment does cause harmful interference to radio or television reception, which can be determined by turning the equipment off and on, the user is encouraged to try to correct the interference by one or more of the following measures:
- Reorient or relocate the receiving antenna.
- Increase the separation between the equipment and receiver.
- Connect the equipment into an outlet on a circuit different from that to which the receiver is connected.
- Consult the dealer or an experienced radio/TV technician for help.
To maintain compliance with FCC’s RF Exposure guidelines, This equipment should be installed and operated with minimum distance between 20cm the radiator your body: Use only the supplied antenna.