¶ 1. Canvas Overview
The canvas—also called the workspace—is where you create, edit, and preview your engraving designs. It visually represents your machine’s working area and provides precise tools for positioning, measuring, and zooming.
¶ 2. Working Area & Coordinate System
- Default Working Area: The canvas size automatically matches the maximum working area of the connected device.
- Coordinate System: The workspace uses a coordinate system with the top-left corner as the origin (0, 0).
- X-axis: Values increase to the right.
- Y-axis: Values increase downward.
- Object Coordinates: An object’s coordinate refers to the position of its bounding box’s top-left corner in the coordinate system.
When the object rotates or moves, this reference point stays relative to the object, but its absolute position changes accordingly.
- Units & Precision:
The default unit is millimeters (mm) with two decimal places of precision.
If you prefer inches (in), you can switch units in the software settings.
- Reference Point:
An object’s position is always defined by the top-left corner of its bounding box.
¶ 3. Rulers & Grid
To help you align and position your design with precision, the canvas includes horizontal and vertical rulers along with a background grid. You can toggle them on or off from the right-click menu.
- Rulers: Shown along the top and left edges of the workspace.
- Grid: A background network of lines that provides visual alignment cues.
- Show/Hide: Right-click any blank area on the canvas and select the ruler or grid options to show or hide them.
¶ 4. Objects on the Canvas
Each object, or group of objects, is outlined by a rectangular bounding box when selected.
- The bounding box is highlighted in purple.
- The width and height of the selected object’s bounding box are displayed in real time.

¶ 5. Red Crosshair
-
When the device is connected and in Idle mode, a red crosshair appears on the canvas. This icon indicates the current physical position of the laser module’s red positioning laser inside the machine. Note: The red crosshair is for positioning only (low-power red light) and is not the active laser used for engraving or cutting.
-
The red crosshair on the canvas syncs in real-time with the physical position of the laser module.
¶ 5.1 How the Red Crosshair Works
- The red crosshair will not appear if the device is disconnected, busy, or if its position cannot be retrieved.
- You can toggle the red crosshair on or off in the software settings.
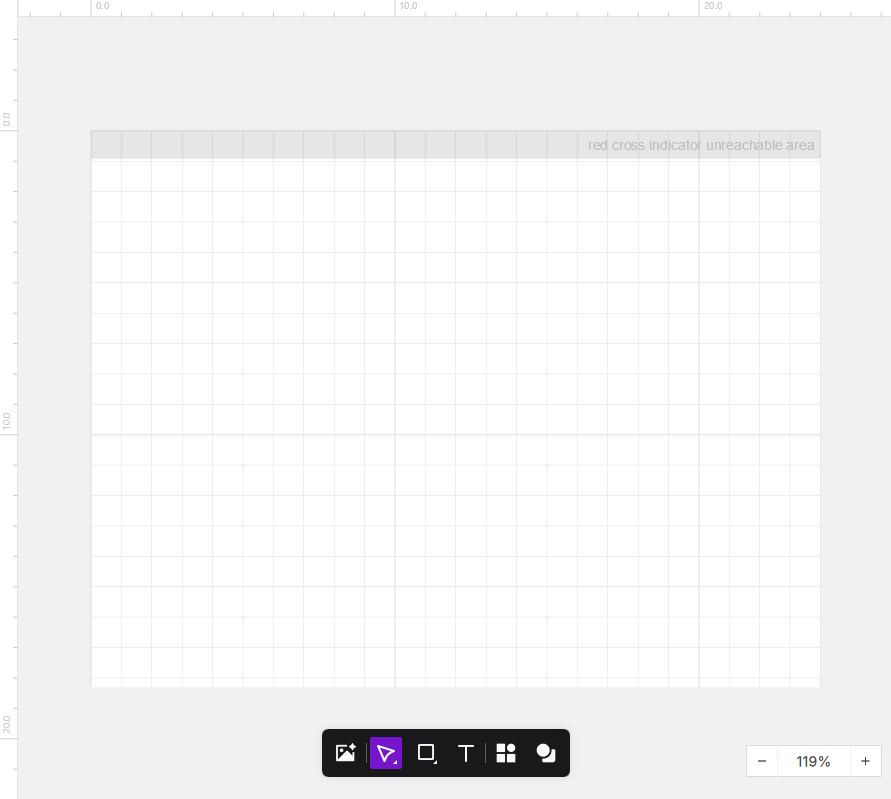
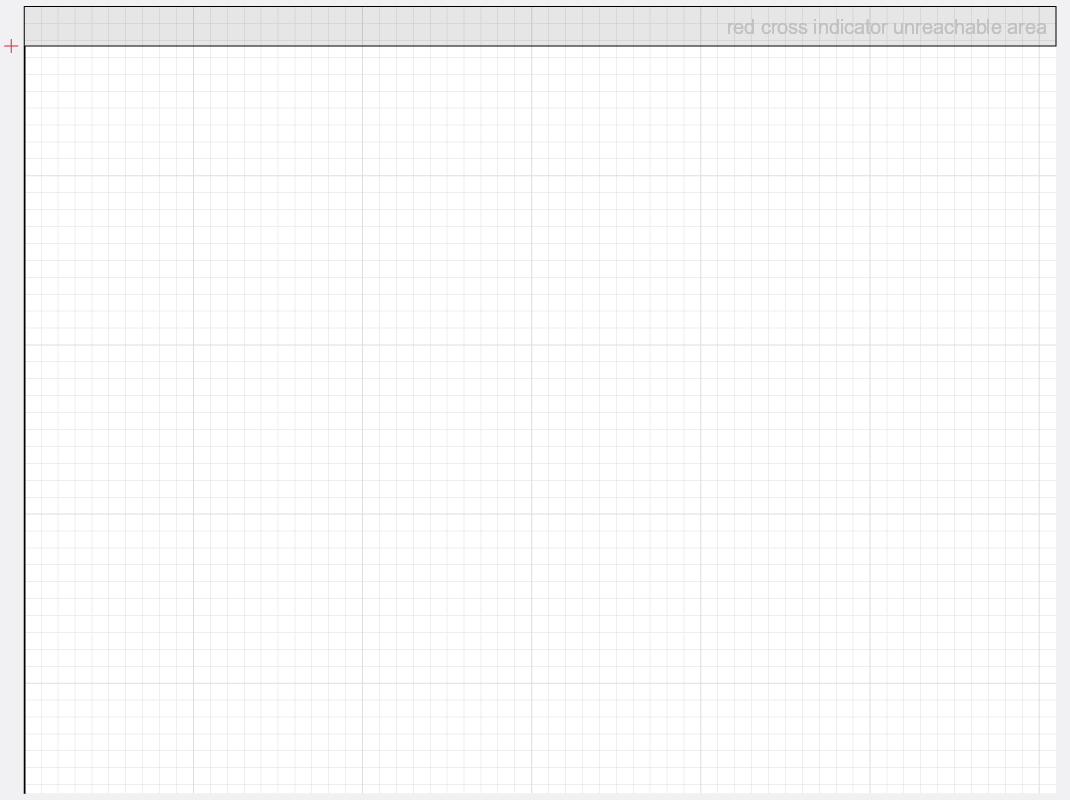
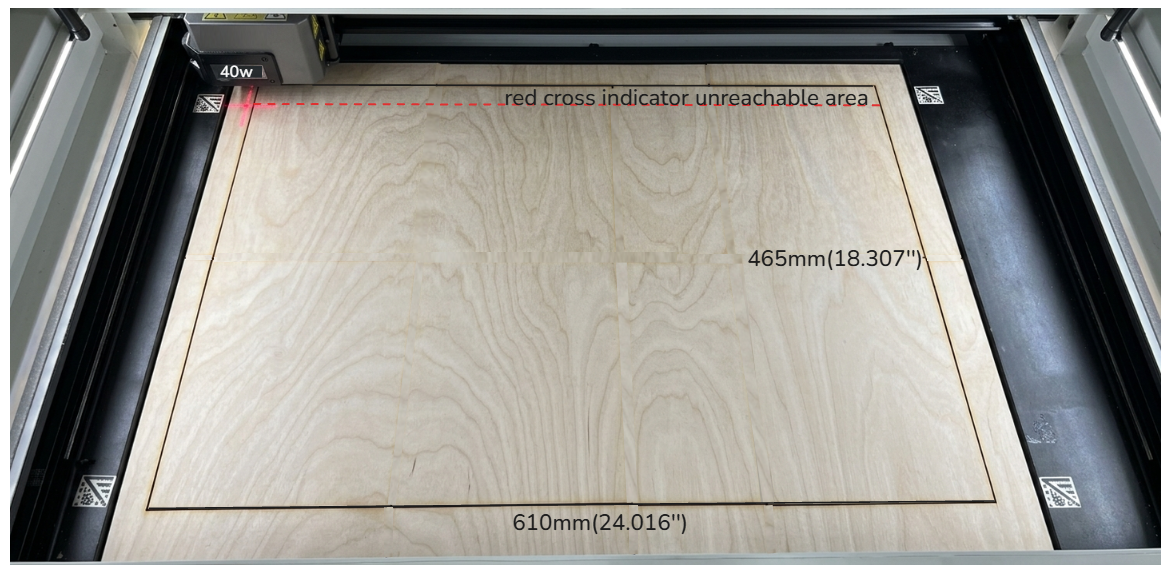
Red cross indicator unreachable area:
-
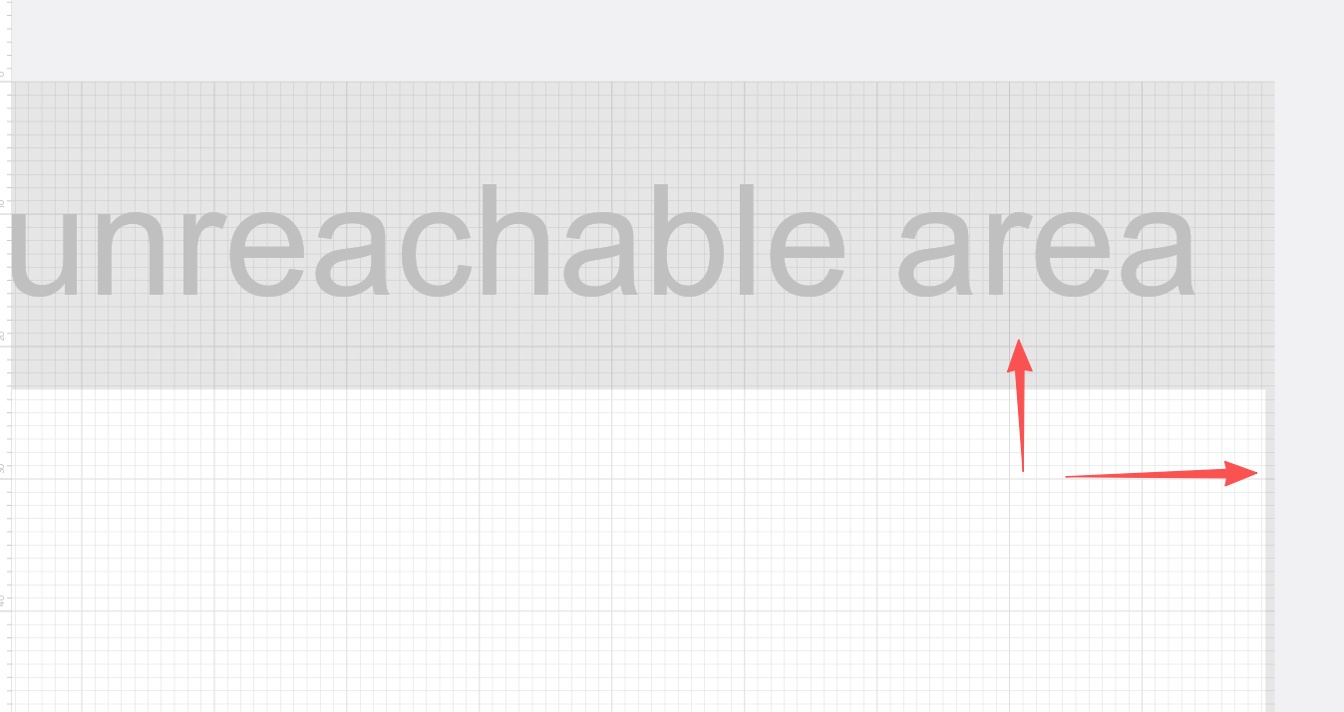
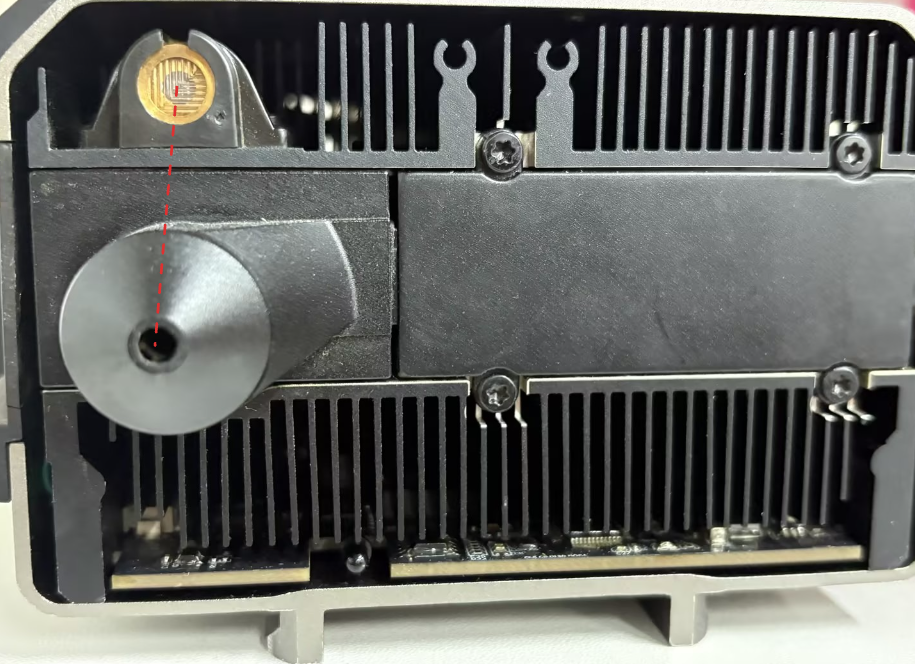
Top Area (All Devices): The red alignment beam is emitted from a point slightly in front of the main laser output. This physical positioning prevents the red crosshair from reaching the very top edge of the workspace.

-
Left or Right Area (Device-Specific): Due to manufacturing tolerances in each laser module, there may be a slight horizontal offset between the red crosshair and the actual laser beam. As a result, some devices may also show an unreachable area on the left or right edge of the canvas.
Left Unreachable Area Right Unreachable Area 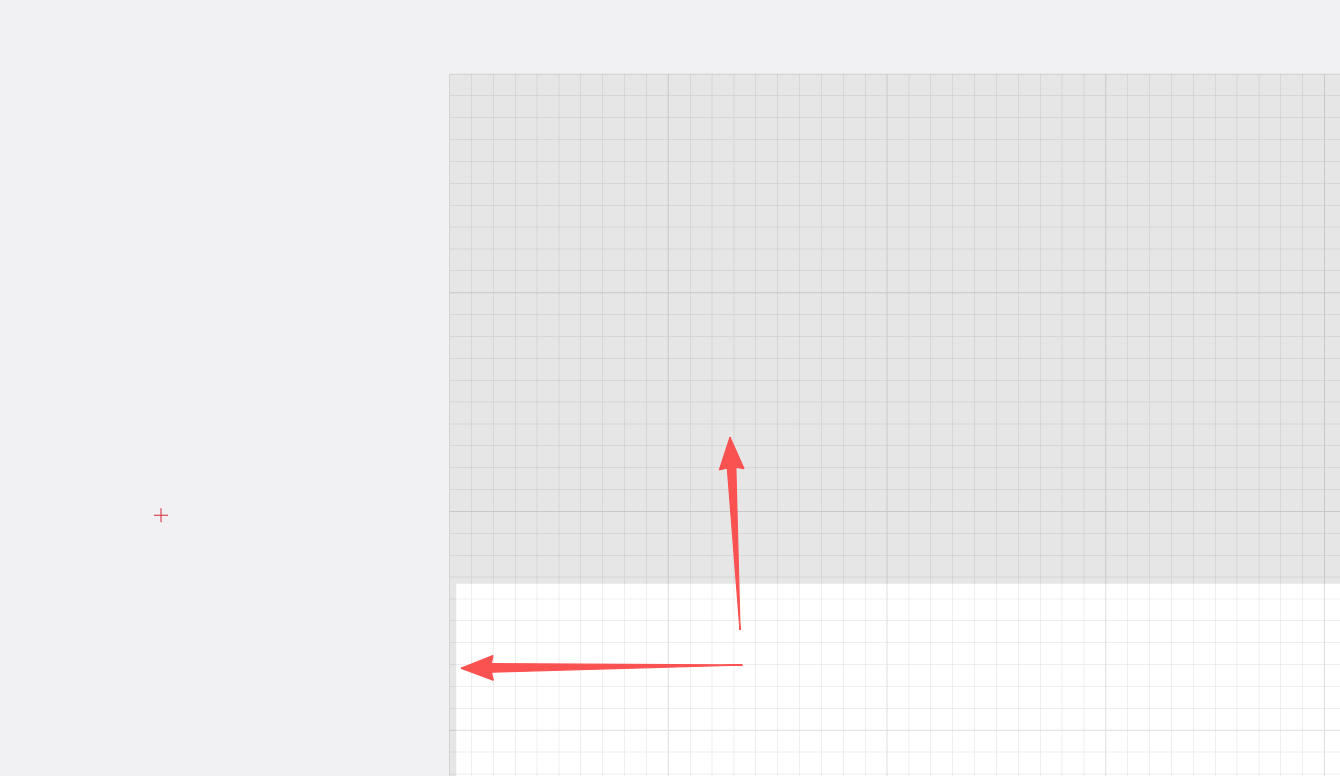
Physical Offset Source: The relative position between the red crosshair emitter and the main laser outlet has micron-level manufacturing tolerances, causing unreachable areas on the left/right edges of some devices. You may need to zoom the canvas to maximum to clearly see these narrow grey areas. This tolerance is within factory calibration specifications and does not affect actual engraving accuracy.
This is a normal physical characteristic—the main laser can still operate across the entire working area of the canvas.
¶ 5.2 Common Errors and Notes
¶ Error: Object placement exceeds the walking border area
When you click the “Frame” button, if any part of your design is located in the red crosshair unreachable areas (top grey region, or left/right grey regions on some devices), the software will display this error message.
Error appearance:
Cause explanation:
The red crosshair emitter and main laser output have a physical offset. Therefore:
- Actual engraving/cutting laser: Can reach the entire canvas area
- Red positioning light (Frame): Cannot reach the grey areas at the canvas edges
Usage Recommendations:
-
Normal processing is unaffected: Even if objects are in unreachable areas, you can still engrave or cut normally as long as you don't use the Frame function
-
If you need to use Frame: Move your objects completely out of the grey areas before running the Frame preview
-
For detailed troubleshooting: Please refer to the Object Placement Exceeds Walking Border Area Troubleshooting article
-
Maximum working area verification: With a 40W laser module, the device supports a maximum processing size of 610mm × 465mm. The laser can process normally even if objects cover the entire canvas area:

- Actual engraving result:
Positioning Note:
During setup and design, you can treat the red crosshair as the target location for your engrave or cut.
Although the red positioning beam and the main laser exit from slightly different positions, the device automatically compensates for this offset during both processing and “Frame” (outline) runs.
This ensures the main laser fires exactly at the location indicated by the red crosshair.
¶ 6. Navigating the Canvas
The software includes several tools to help you move around the workspace efficiently.

¶ 6.1 Manual Zooming & Panning
¶ 6.1.1 With a Mouse Wheel
Windows Laptop:
- Zoom: Hold Ctrl and scroll the mouse wheel.
Zooming is centered on your cursor. Range: 20%–4000%. - Pan: Hold Shift and scroll to move left or right.
Scroll normally to move up or down.
Mac Laptop (Apple Mouse):
- Zoom: Hold Cmd and swipe up or down on the Apple Mouse.
Zoom is centered on your cursor. Range: 20%–4000%. - Pan: Swipe in any direction on the Apple Mouse—no modifier key needed.
¶ 6.1.2 With a Touchpad
Windows Laptop:
- Zoom: Hold Ctrl and use a two-finger pinch gesture.
- Pan: Hold Shift and use two-finger swipe to move left or right.
Without modifiers, two-finger swipe moves up and down.
Mac Laptop:
- Zoom: Hold Cmd and use a two-finger pinch gesture.
- Pan: Swipe directly on the touchpad—no keys required.
¶ 6.2 Quick Zoom Options
For fast and repeatable zoom control, click the zoom percentage in the bottom-right corner of the canvas to open preset zoom levels.
-
Fit to Canvas:
Adjusts the zoom so the entire working area and all objects are visible with slight margins.
This is the default view when the software starts. -
Fit to Selection:
Zooms in on the currently selected object(s).
If nothing is selected, this option does nothing. -
Preset Levels:
20%, 50%, 100%, 200%, 400%, 800%, 1600%, 4000%. -
Zoom In (+) / Zoom Out (–):
Click + or – to snap to the next preset level.
For example, at 95%, + snaps to 100%, while – snaps to 50%.
These adjustments center on the canvas view.