¶ 1. Device Connection
Connecting your device allows the software and machine to communicate. Once connected, you can quickly and stably manage file transfers, adjust settings, and control jobs directly from the interface.
¶ 1.1 USB Connection
Using a USB cable is one of the most stable ways to communicate with your machine. It is perfect for:
- Setting up your device for the first time
- Environments with unstable Wi-Fi
- Firmware updates or maintenance
¶ 1.1.1 Before You Connect
- Connect your machine to your computer using the original USB cable provided by Aliencell.
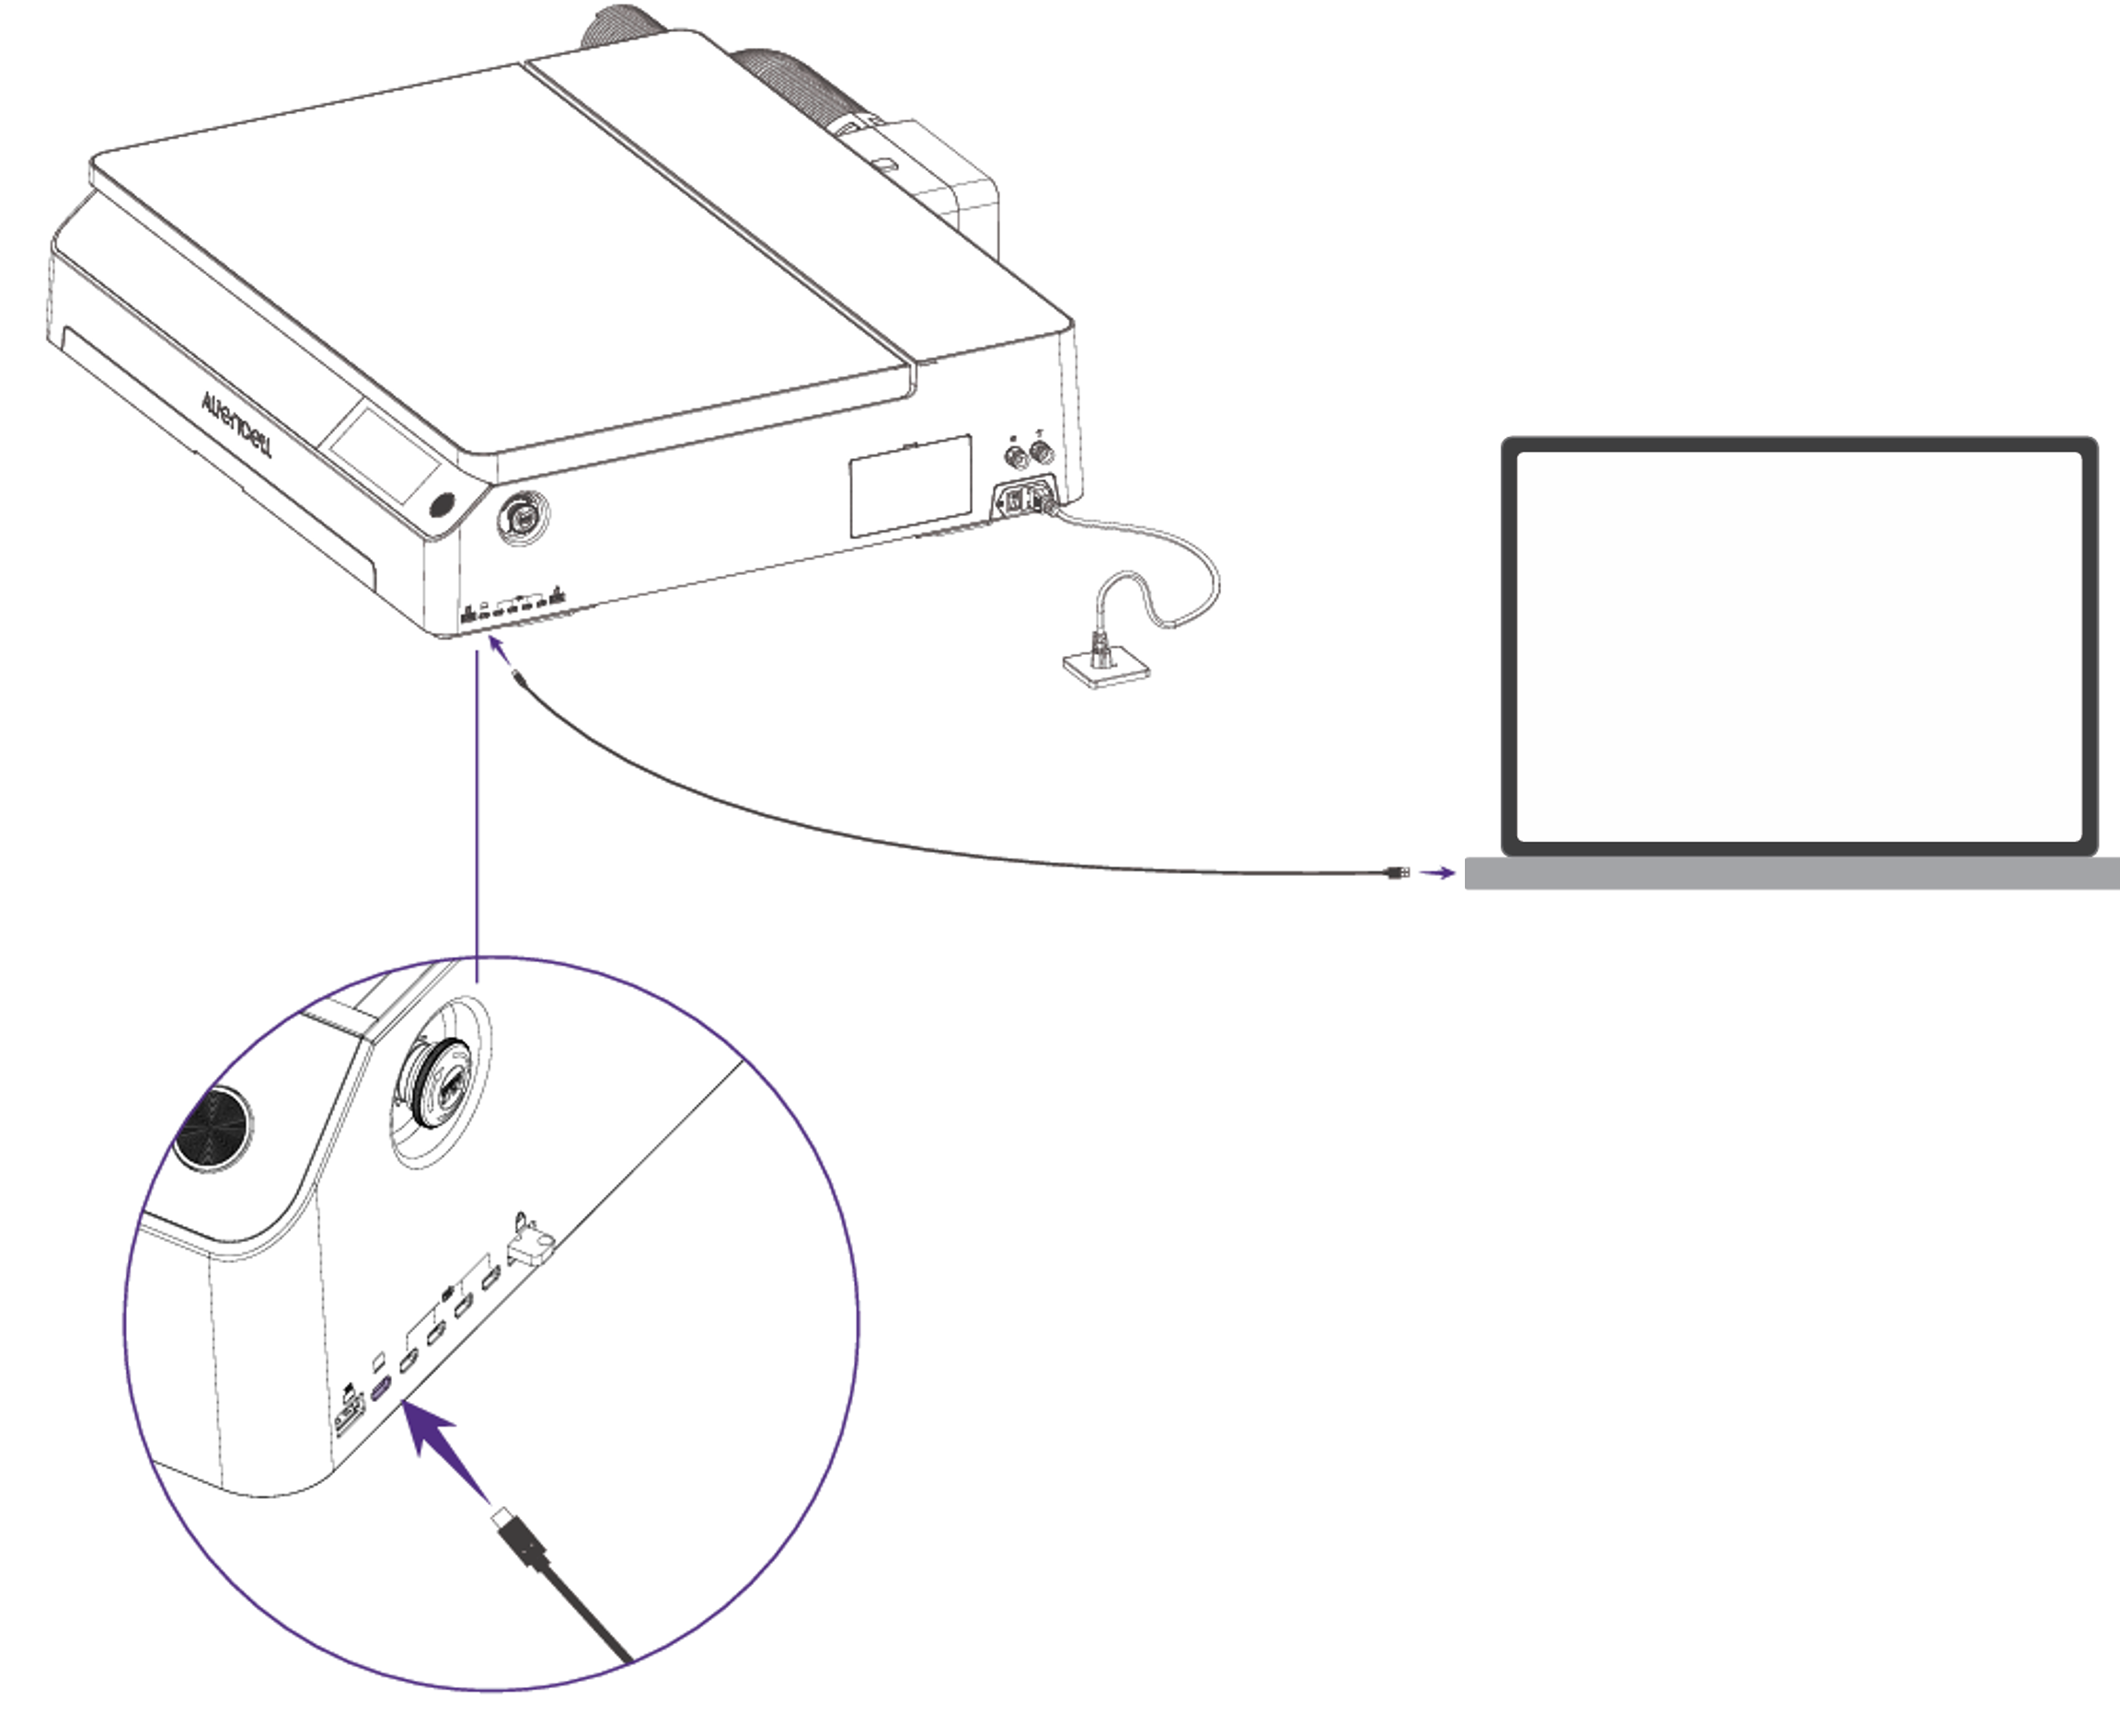
- Make sure the machine is powered on and in standby mode.
We recommend using the provided cable. Long or damaged third-party cables may cause data transmission instability.
¶ 1.1.2 Selecting Your Device
- Open Aliencell Space and click Device List in the top toolbar.
- The software will automatically detect any machine connected via USB and display its name in the list.
- Click on your device to connect. Once connected, the status indicator will turn green.
Once connected, your device appears as a card in the Device List. You can manage all available devices here.
¶ 1.2 Connecting via Wi-Fi
Wi-Fi allows your computer and laser engraver to communicate wirelessly over the same local network. This gives you the freedom to send files and control the machine without being tethered by a USB cable.
There are currently two ways to configure Wi-Fi:
- Via the Touchscreen (No USB cable needed)
- Via the Software (USB cable required for initial setup)
¶ 1. Connect Machine to Wi-Fi
You can configure Wi-Fi directly on the machine's touchscreen to get online. Once set up, simply ensure your computer and machine are connected to the same Wi-Fi network to enable wireless communication.
No USB cable is required for this method.
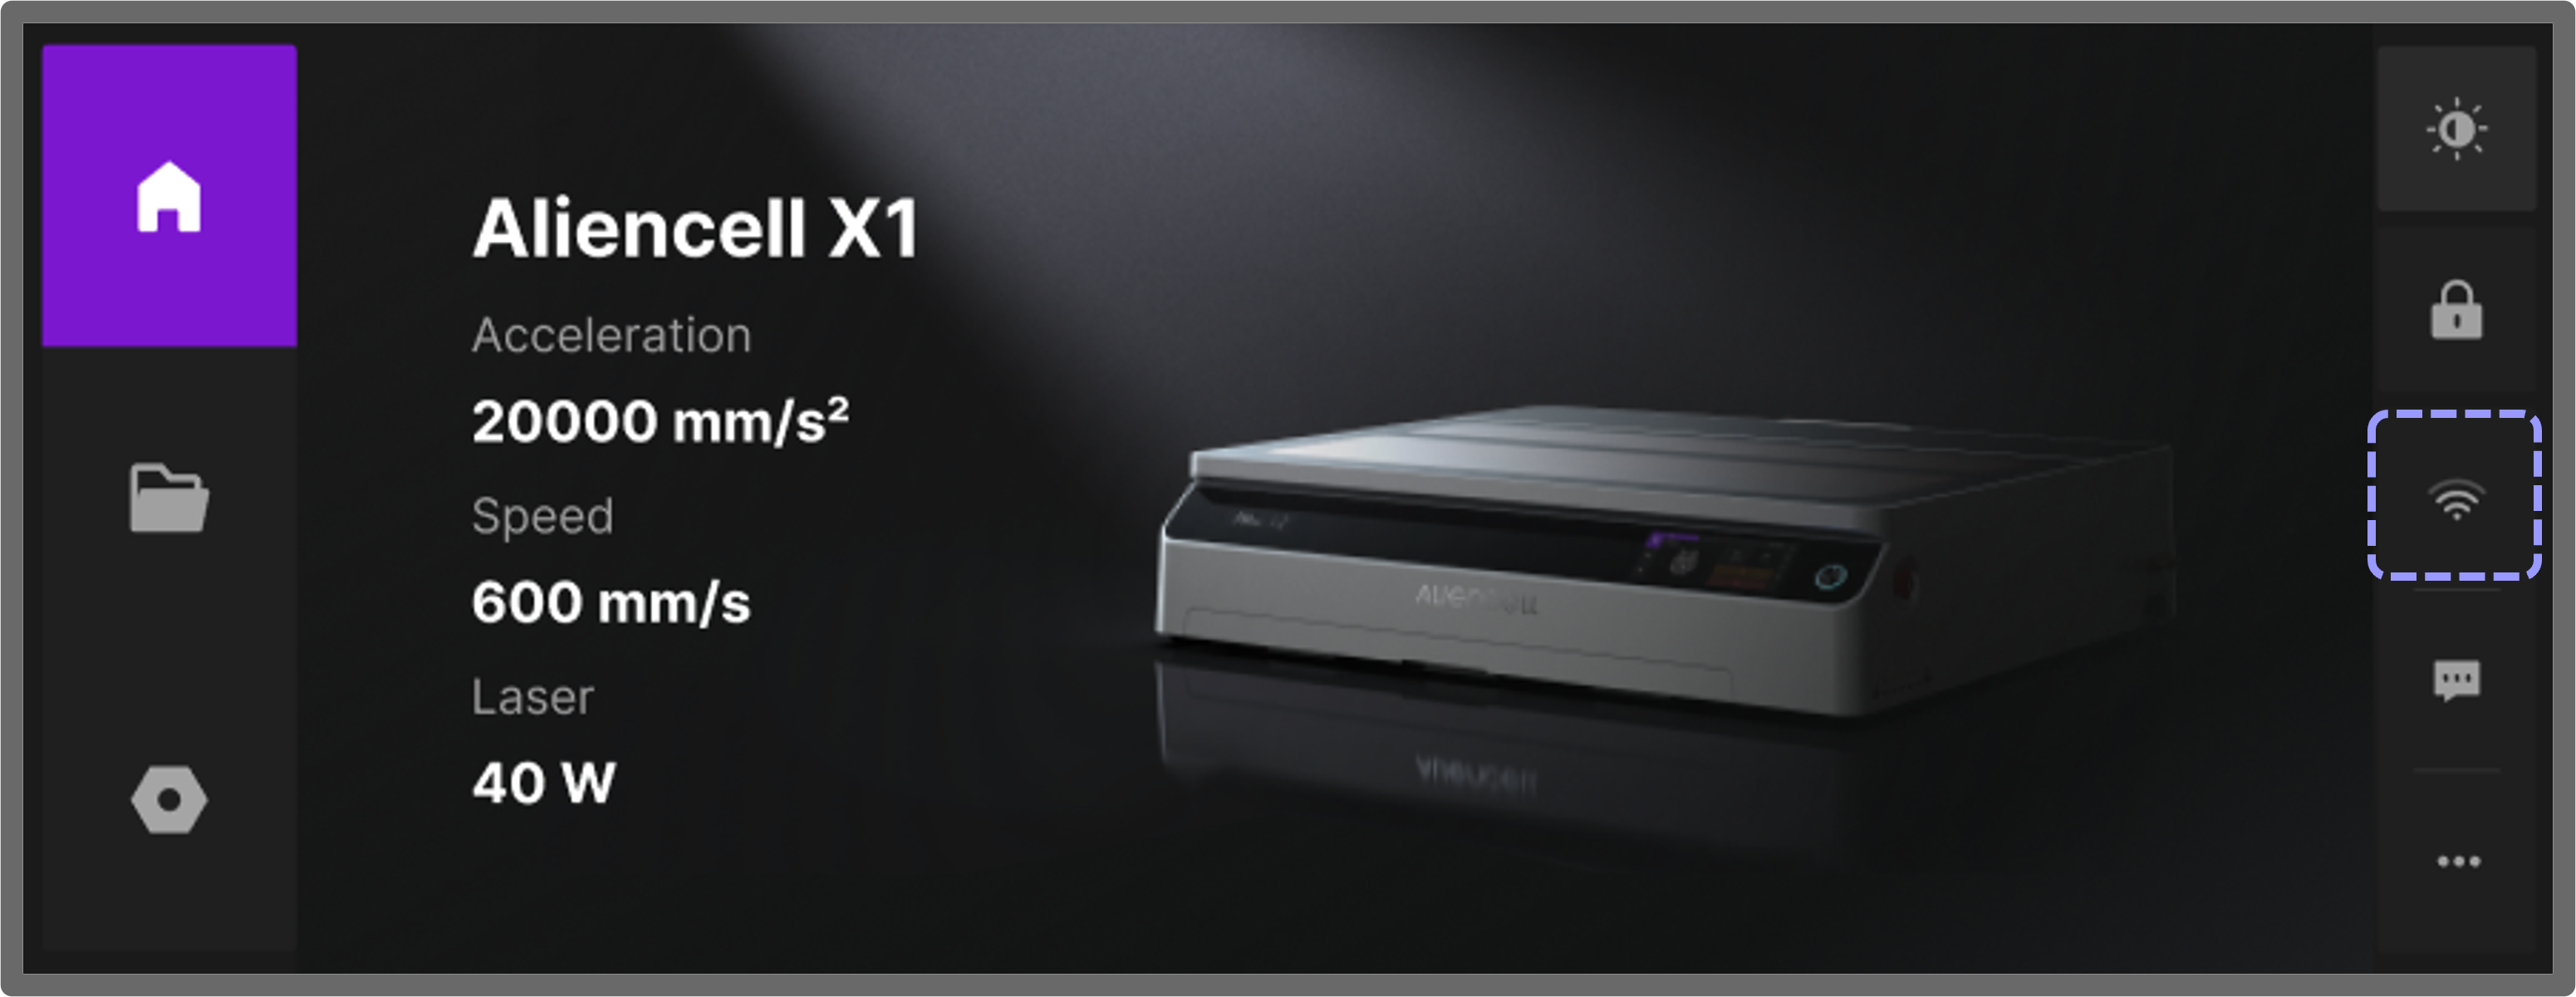
- 1.1 Enable Wi-Fi
- Tap the
 icon on the touchscreen, then select the
  icon to enter Wi-Fi settings.
- If the status says Close, or the icon on the right looks like
 , tap the toggle switch at the top to turn it on. The machine will automatically scan for and display a list of available networks.
- Tap the
- 1.2 Select and Connect
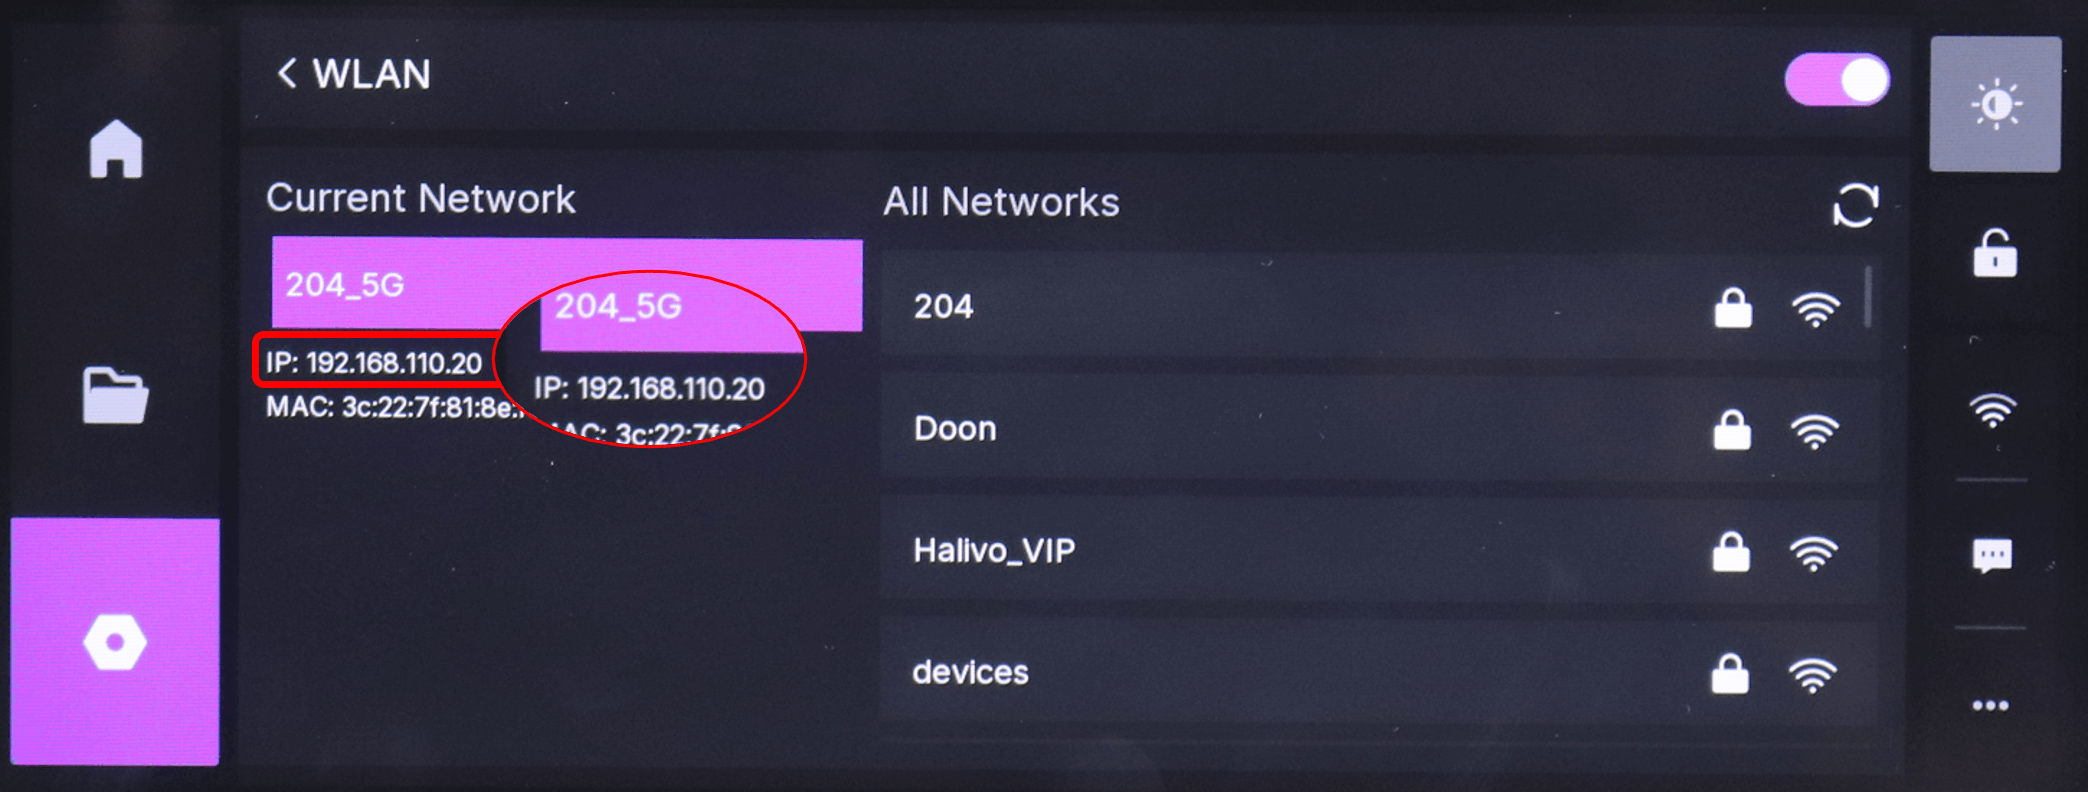
- Choose your network from the list. Enter the correct Wi-Fi password and tap Next.
- A success message will appear on the screen confirming the device is connected.
¶ 2. Connect in Software via Wi-Fi
Ensure your computer and machine are connected to the same Wi-Fi network.
- Check the IP address on the machine's Wi-Fi screen (e.g., "192.168.110.20").
- Open Aliencell Space. Click Add in the Device List, or click the Live View
 icon in the top menu.

- In the popup window, select the device matching your IP address and click the connection icon on the right.
- Once connected, you will see the Wi-Fi name displayed.

Use this method if you are setting up the network for the first time. You will need a USB cable initially, but you can switch to wireless once configured.
¶ 1. Connect Machine to Wi-Fi
- Connect the machine to your computer via USB.
- Click the Live View icon in the top menu.
- Locate the Wi-Fi configuration section and click Configure.
- Select your target Wi-Fi network, enter the password, and click Configure.
- Once successful, the Wi-Fi configuration section will display the connected network name.
¶ 2. Connect in Software via Wi-Fi
After the Wi-Fi is successfully connected, you can unplug the USB cable. The software will automatically refresh and switch to the Wi-Fi connection.
¶ 2. Real Devices
Real Devices refer to physical machines that are currently connected or have been connected in the past. The list displays the device icon, name, connection method, and status.
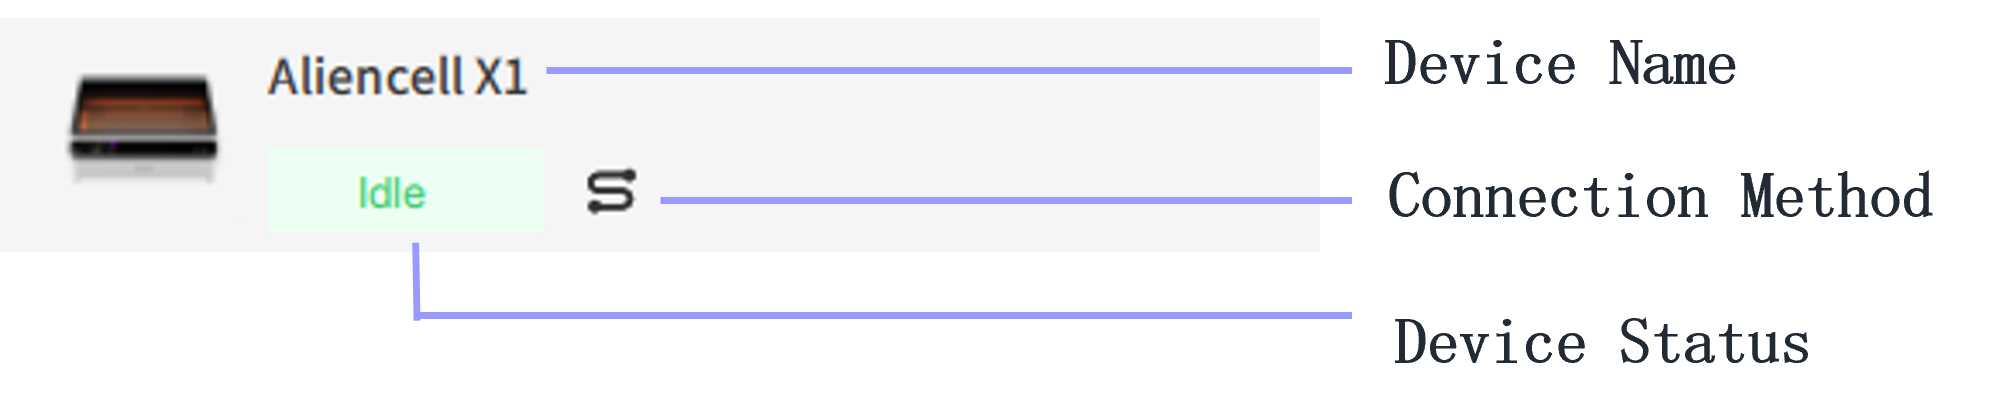
- Device Name: The name of your machine. You can rename it by clicking the Live View icon in the top-right corner of the software.
- Connection Method: Shows whether the device is connected via Wire (USB) or Wireless (Wi-Fi).
- Device Status: Updates in real-time based on activity.
| Status | Color | Description |
|---|---|---|
| Idle | Green | Device is connected, ready, and waiting for a new job. |
| Busy | Purple | Device is currently running an engraving or cutting job. |
| Paused | Orange | The current job has been paused. |
| Offline | Gray | Device is not connected to the computer. |
¶ 3. Virtual Devices
A Virtual Device is a built-in simulator (named X1; this name cannot be changed). It supports laser power settings, material selection, and parameter adjustments. You can set the Virtual Device as your active machine to test parameters and verify settings without needing a real machine connected.
If you launch the software without ever connecting a real machine, only the Virtual Device will appear in the device list.