After clicking the Process button, the system will detect the device status, verify focal distance, and generate the job file to be sent to your machine.
¶ 1. Operation Workflow
¶ 1.1 Status Check
The software first detects the connection status and displays a notification if action is required:
- Please connect the device first: No device detected. Ensure your machine is powered on and connected properly.
- Device busy: The machine is currently performing another task. Please wait for it to finish.
- Protective cover open: For safety, the protective cover must be fully closed before starting a job.
¶ 1.2 Auto-Focus and Height Measurement
The software validates the focal height to ensure crisp and precise results.
- Baseline distance measured: If you have already set the Distance in the parameter panel, the software uses this value to calculate the laser module's working height and writes it into the job file.

- Baseline distance not measured: If the distance field is empty, the Auto-Focus process will start automatically.
- You will see the prompt: "Measuring reference height…"
- The machine will perform the measurement, save the baseline value, and calculate the correct working height for the current job.
¶ 1.3 Job Preparation and Transmission
Once all checks pass and the focus is set, the software prepares your design file for the machine.
- You will see status updates such as "Generating assignment file..." and "Transferring assignment file...".
¶ 1.4 Final Confirmation
Once the file is successfully sent to the device, a final confirmation dialog will appear:
"Ready: Press Start on Device"
- Simply press the physical Start button on your machine. Once focused, the software interface will switch to "Working" status, and your job will begin.
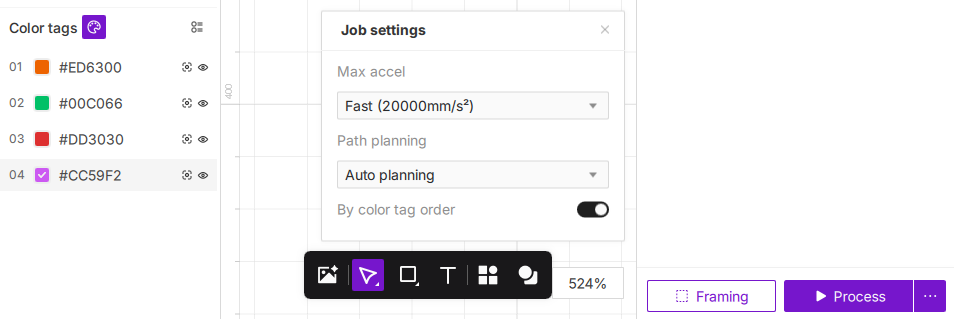
¶ 2. Job Settings
Before starting, you can adjust optional Job settings such as Max accel or Path planning. These settings help you optimize processing efficiency, sequence, or trajectory.
- Click the ... (three-dot) icon next to the Process button to open the Job settings window.

If you are unsure, you can leave these settings at their defaults; the system will automatically plan an optimal processing method.
¶ 3. Max Accel
This setting defines the acceleration used during the job, directly affecting the balance between speed and precision.
- Click the Max accel dropdown menu to select the desired acceleration mode:
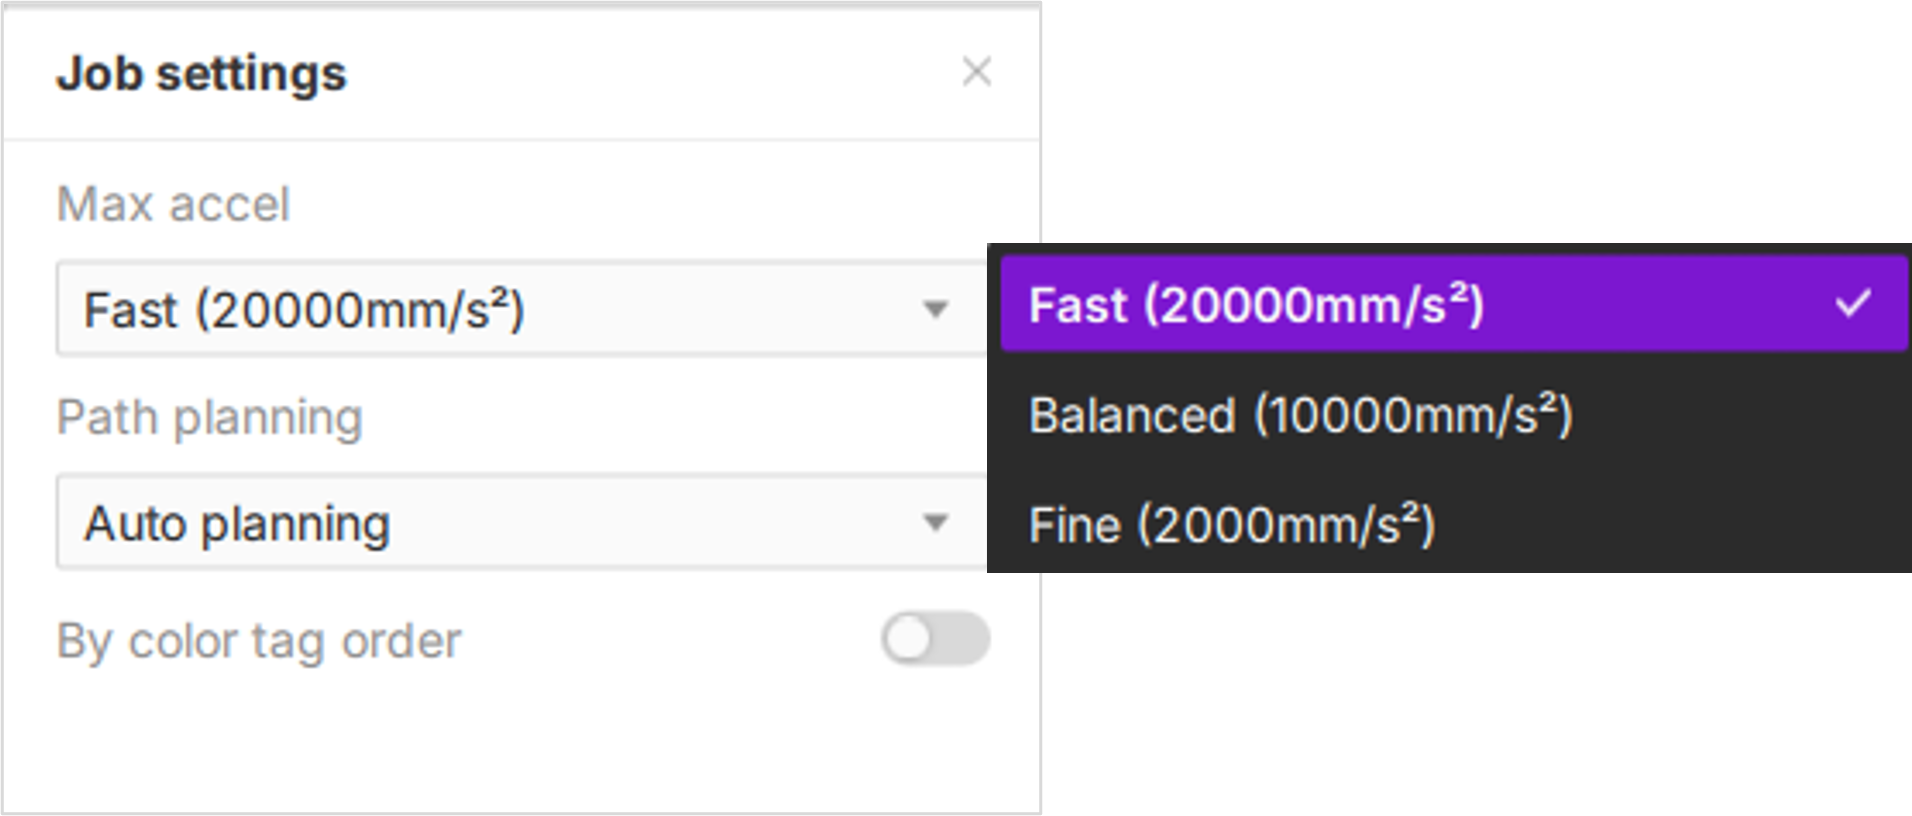
¶ 3.1 Fast (20000mm/s²)
Ideal for efficiency. The machine accelerates and decelerates rapidly to minimize total job time. Recommended for large-area fills or simple designs where high detail is not critical.
¶ 3.2 Balanced (10000mm/s²)
Provides a reliable trade-off between speed and precision, suitable for most general projects.
¶ 3.3 Fine (2000mm/s²)
Prioritizes fine details. The machine uses lower acceleration, allowing for smoother movement when handling corners and complex shapes. Best for high-detail engraving, intricate cutting, or delicate materials.
- These values are control parameters for "Job settings" and are distinct from the hardware's maximum physical acceleration capabilities----refer to Acceleration Performance Analysis.
¶ 4. Path Planning
You can choose how the laser navigates your design to optimize efficiency.
You can click the
icon in the top toolbar to preview the laser's movement path before processing.
- Click the Path planning dropdown to select your preferred strategy:
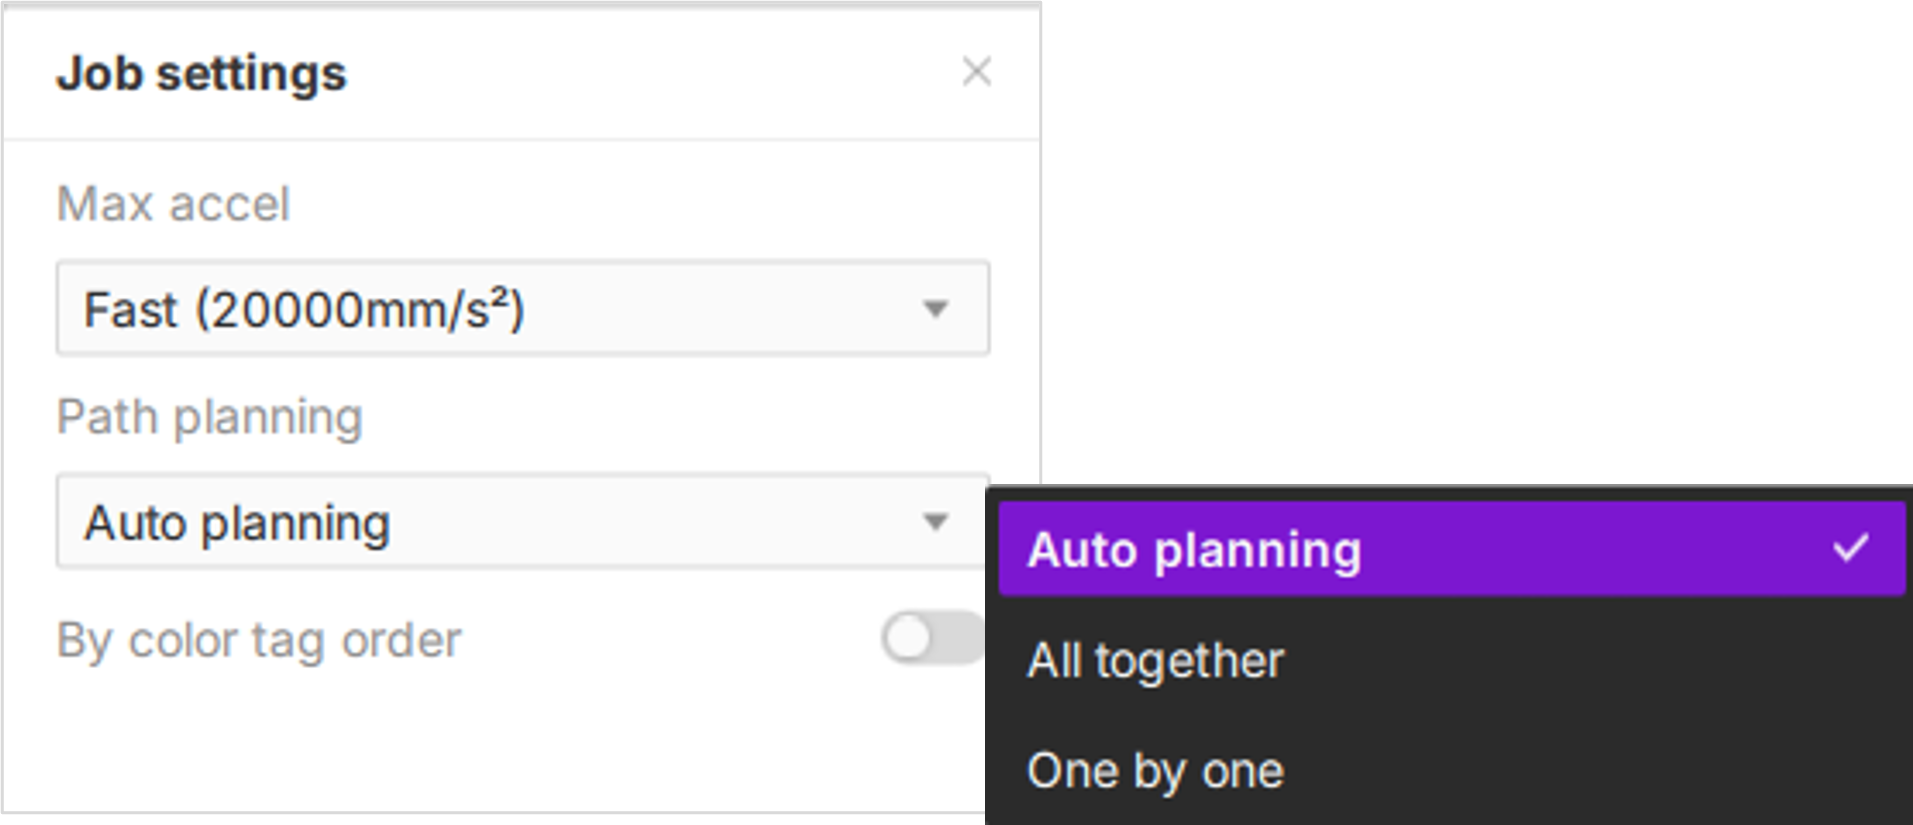
¶ 4.1 Auto Planning
The system automatically plans the most time-efficient path based on object layout and distance.
- Smart Pathing: Intelligent identification of the shortest path.
- Minimized Travel: Maximizes efficiency by reducing non-processing movement (air moves).
- Versatility: Suitable for most daily engraving and cutting tasks.
¶ Processing Priority Rules
When "Auto Planning" is active, the system follows a predefined processing hierarchy to ensure optimal results:
- Hierarchy: Fill Engraving > Line Engraving > Cutting.
- Inside-Out Cutting Strategy: To ensure material stability and prevent shifting, the system automatically prioritizes cutting internal features (cutouts/holes) before the outer contour.
- Why? By cutting internal shapes first, the material remains secured in place until the final outer frame cut is completed, minimizing vibration and potential misalignment.
¶ 4.2 All together
Combines all areas requiring the same process into a single scan.
- Executes all fill scans first.
- Followed by all line engravings and cuts.
- Ideal for reducing movement and completing entire areas in one pass.
¶ 4.3 One by one
Processes each object sequentially.
- Finishes one object entirely before moving to the next.
- Best for projects requiring independent processing per object.
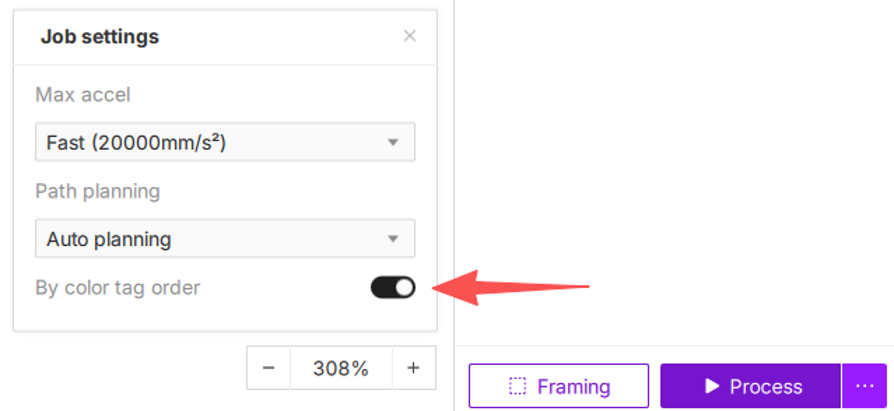
¶ 5. By Color Tag Order
You can customize the processing sequence by enabling the By color tag order toggle. This switch is disabled by default.
-
The order of the tags in the list represents the machine's execution sequence—the topmost tag is processed first, followed by the others in descending order.
-
Disabled (Default): The system automatically optimizes the processing path for maximum efficiency. In this mode, the system defaults to: Fill Engraving > Line Engraving > Cutting.
-
Enabled: The processing sequence will strictly follow the order of your tags in the Color tags panel. You can adjust the sequence by dragging and dropping individual tags.
Important Note: Enabling "By color tag order" overrides the system's default intelligent optimization logic (Fill > Line > Cut). The machine will process objects exactly in the sequence you have arranged. Please verify your order to ensure optimal results and avoid processing errors.
¶ 5.1 Operation Steps
- Enable the function: Ensure the By color tag order toggle is enabled (this is a prerequisite).
- Select tag: Locate the color tag you wish to reorder in the color bar at the bottom of the interface.
- Drag to reorder: Click and hold the color tag, then drag it to your target position and release.
- Verify sequence: The processing sequence will strictly follow the order of the tags from left to right.
¶ 5.2 Ideal Use Cases
This feature is suitable for complex, multi-step projects requiring precise control over the processing hierarchy, such as:
- Advanced Engraving: Performing shallow engraving before deep engraving.
- Detail Management: Engraving fine details before proceeding to large-area fills.
- Custom Workflows: Any project requiring granular control over the execution order of multiple processes.