Material testing is the process of using different parameter combinations on the same material before the final job. It helps you find the best power, speed, and pass settings.
¶ 1. Why Material Testing Matters
Different materials react to the laser in different ways. Even for the same material, color, thickness, coating, density, and surface finish can change the final result.
Use a material test to quickly check:
| Test Goal | What to Check |
|---|---|
| Engraving result | Whether the pattern is clear, the color is suitable, and the edges are not over-burned |
| Cutting result | Whether the material is cut through, whether the edge is carbonized, and whether the back-side burn mark is acceptable |
| Tone variation | Whether the shade changes smoothly under different power settings |
| Stable parameters | Which parameter set is suitable for final processing or batch production |
¶ 2. How Material Testing Works
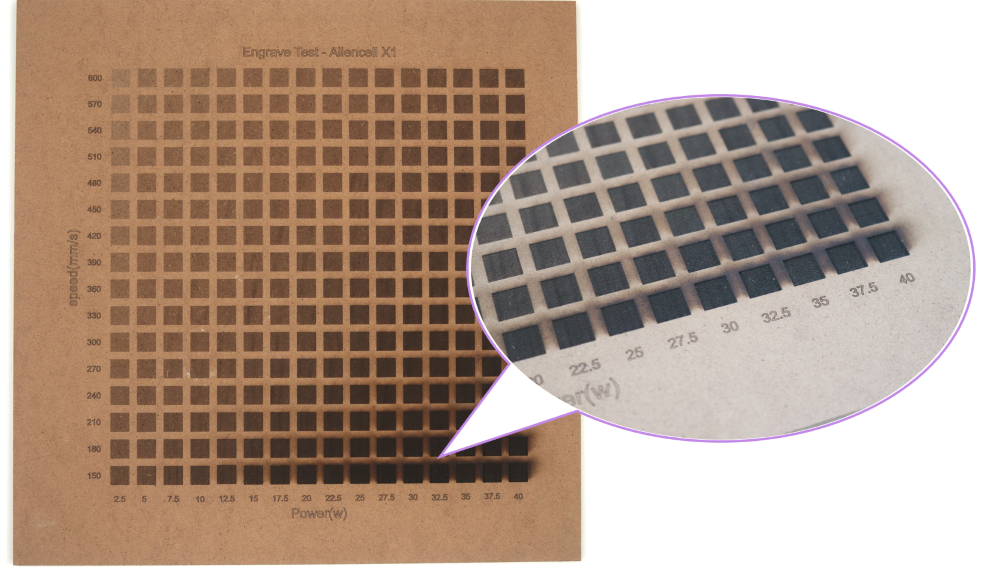
A material test usually uses a parameter matrix.
- Change Power across the horizontal axis.
- Change Speed across the vertical axis.
- Process the same graphic in each cell.
- Compare the color, depth, edge quality, and cut-through result after processing.
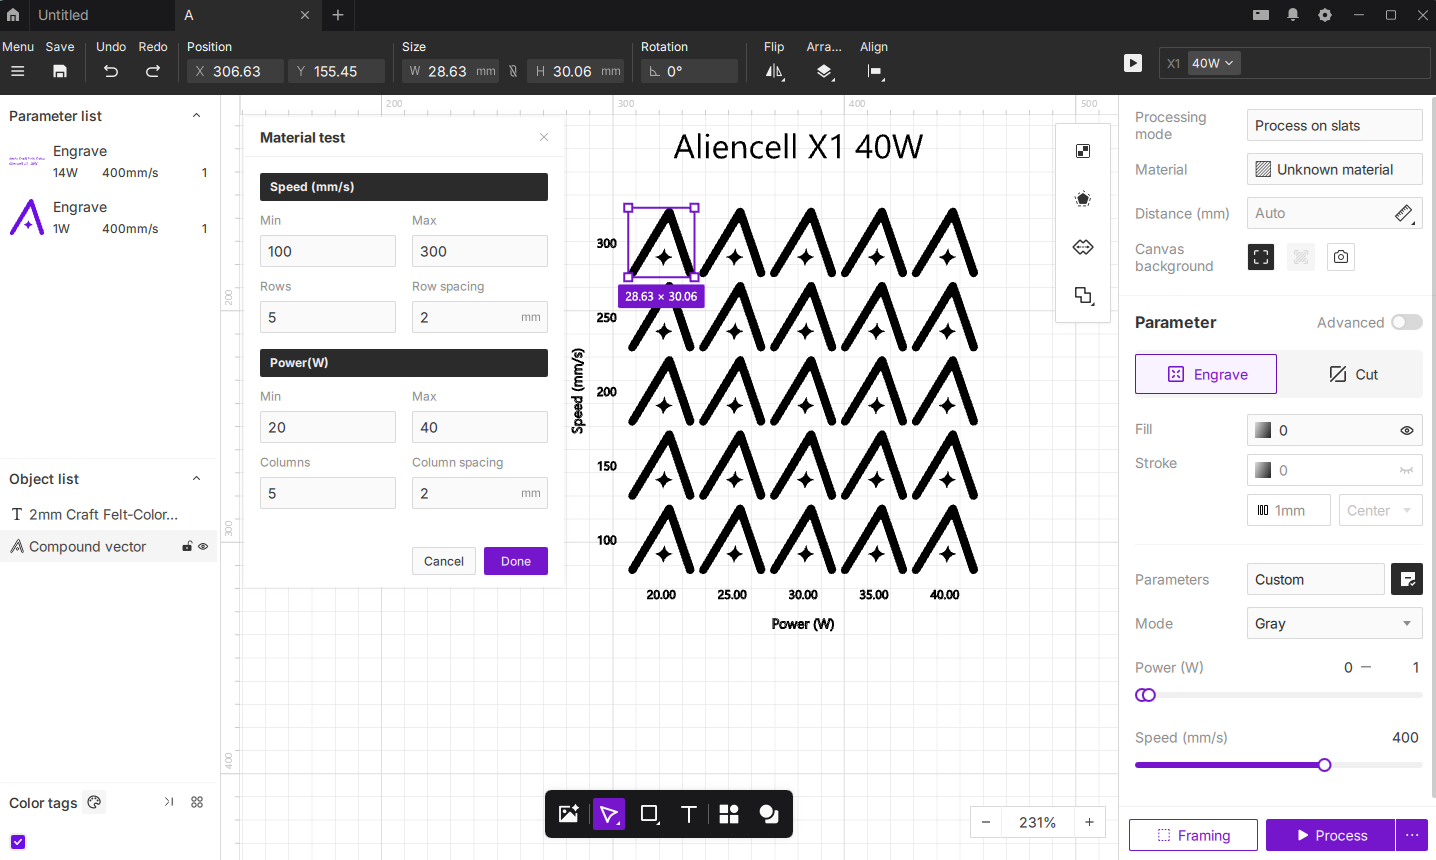
¶ 3. How to Design a Material Test File
A good test file should include the test graphic, parameter labels, and matrix layout. After processing, users should be able to read the parameter for each cell directly from the material.
¶ 3.1 Design Steps
-
Define the test goal
Decide whether the test is for engraving, cutting, marking, or grayscale image processing. -
Choose the test graphic
Use a simple and repeatable graphic. In this example, the test uses 2 mm / 0.08 in colored craft felt and an Aliencell logo outline. This makes it easier to check whether the material is cut through, whether the edge turns black, and whether the inner details remain complete. -
Set the parameter matrix
Select two main variables. For the 2mm Craft Felt-Color.alp test file, set the horizontal power values to 20 W, 25 W, 30 W, 35 W, and 40 W. Set the vertical speed values to 300 mm/s, 250 mm/s, 200 mm/s, 150 mm/s, and 100 mm/s. -
Add parameter labels
Label Power (W) at the bottom of the matrix and Speed (mm/s) on the left side. Each column corresponds to one power value, and each row corresponds to one speed value. -
Save the test file
Name the file by material and thickness so it can be reused later. -
Save the suitable processing parameters
After testing, choose a stable parameter set and save it to the material parameter library in the software. For detailed steps, see How to Save and Manage Custom Material Parameters.
Tips: Use the same test graphic across the matrix. If too many different graphics are used in one matrix, it becomes difficult to tell whether the result changed because of the parameter or because of the graphic itself.
¶ 4. How to Perform a Material Test
- Place the test material at the center of the work area.
- Secure the material and set the correct focus.
- Open the material test file.
- Confirm the settings for each test grid.
- Turn on the exhaust system and air assist.
- Run a frame preview to verify the processing area.
- Start the job and monitor the machine throughout the process.
- After processing is complete, record the optimal settings.
Warning: Do not process PVC, chlorine-containing plastics, unknown coated materials, or any material that may release toxic fumes. Never leave the machine unattended during testing.
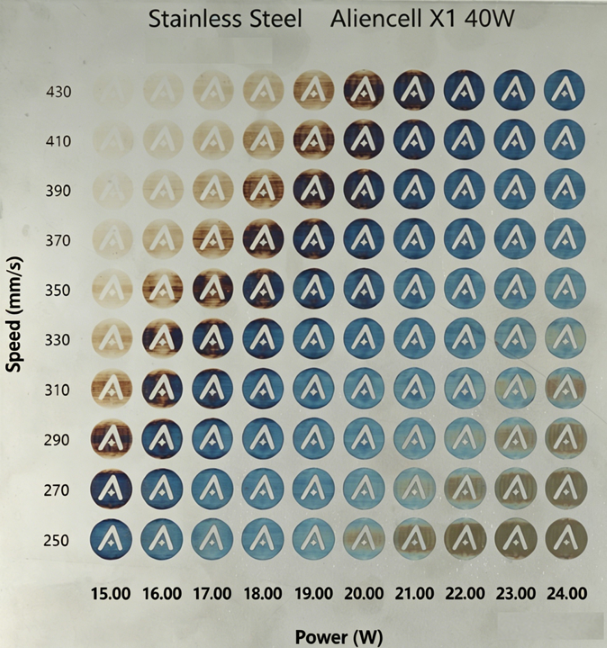
¶ 5. How to Read the Material Matrix
Do not choose a cell only because it is the darkest or fastest. Look for a parameter range that can be used reliably.
Check the matrix in this order:
- Remove failed cells: no visible result, over-burning, ignition, incomplete cut-through, or blurred details.
- Find the stable range: if several adjacent cells perform well, the parameter range has better tolerance.
- Choose the final parameter: for batch processing, choose a middle value within the stable range. Do not use a borderline setting.
| Processing Goal | Recommended Choice |
|---|---|
| Clear engraving | A cell with clean edges and strong contrast |
| Light marking | A cell with even color and no burn marks |
| Cutting | A cell that cuts through reliably with light back-side burn marks |
| Batch processing | A middle value within the stable range |
¶ 6. Material Testing Tips
- Start with low power and high speed, then increase energy gradually.
- Change only one or two main variables at a time.
- Keep the material, focus, exhaust, and air assist conditions consistent.
- For engraving tests, check clarity, color, and edge burning.
- For cutting tests, check cut-through, edge carbonization, and back-side burn marks.
- If several adjacent parameter sets produce good results, choose the middle value first.
- Retest after changing the material batch, color, thickness, laser module, or lens.
- Save your test results to build your own material parameter library.
Record the following information:
| Item | Example |
|---|---|
| Material | Stainless Steel / MDF / 2 mm Craft Felt |
| Thickness | 2 mm / 0.08 in |
| Process Type | Engraving / Cutting |
| Recommended Parameters | Power, Speed, Passes |
| Result Notes | Clear, over-burned, not cut through, clean edge |