¶ 1. Startup & Setup
¶ 1.1 Launching the Software
Double-click the icon to launch Aliencell Space.

¶ 1.2 User Account Login (Optional)
¶ 1.2.1 Log In
- You can log in to sync your preferences, or skip this step to use the software locally.
¶ 1.2.2 Create Account
- If you don't have an Aliencell Space account yet, you can create one directly within the software. Click Log in at the top left, then select Create account and enter your information to register.
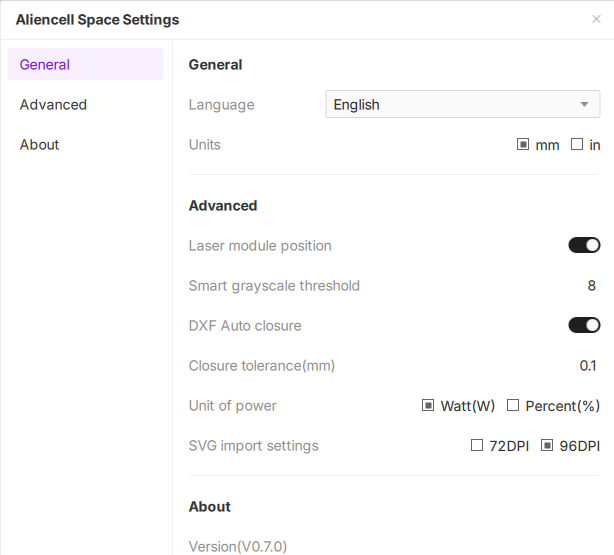
¶ 1.3 Language Settings
If the interface is not in your preferred language:
- Click the Settings icon
 in the top right corner. In the pop-up window, find the Language option and select your desired language from the dropdown menu.
¶ 2. Creating a Project & Connecting
¶ 2.1 Create a New Project
-
Click New Project in the top right corner of the home page to enter the workspace.
¶ 2.2 Connect Device
When launching the software for the first time, a connection prompt will appear.
- Method A: Connect Physical Device (Recommended)
- Turn on the machine and connect it to your computer using the USB cable.
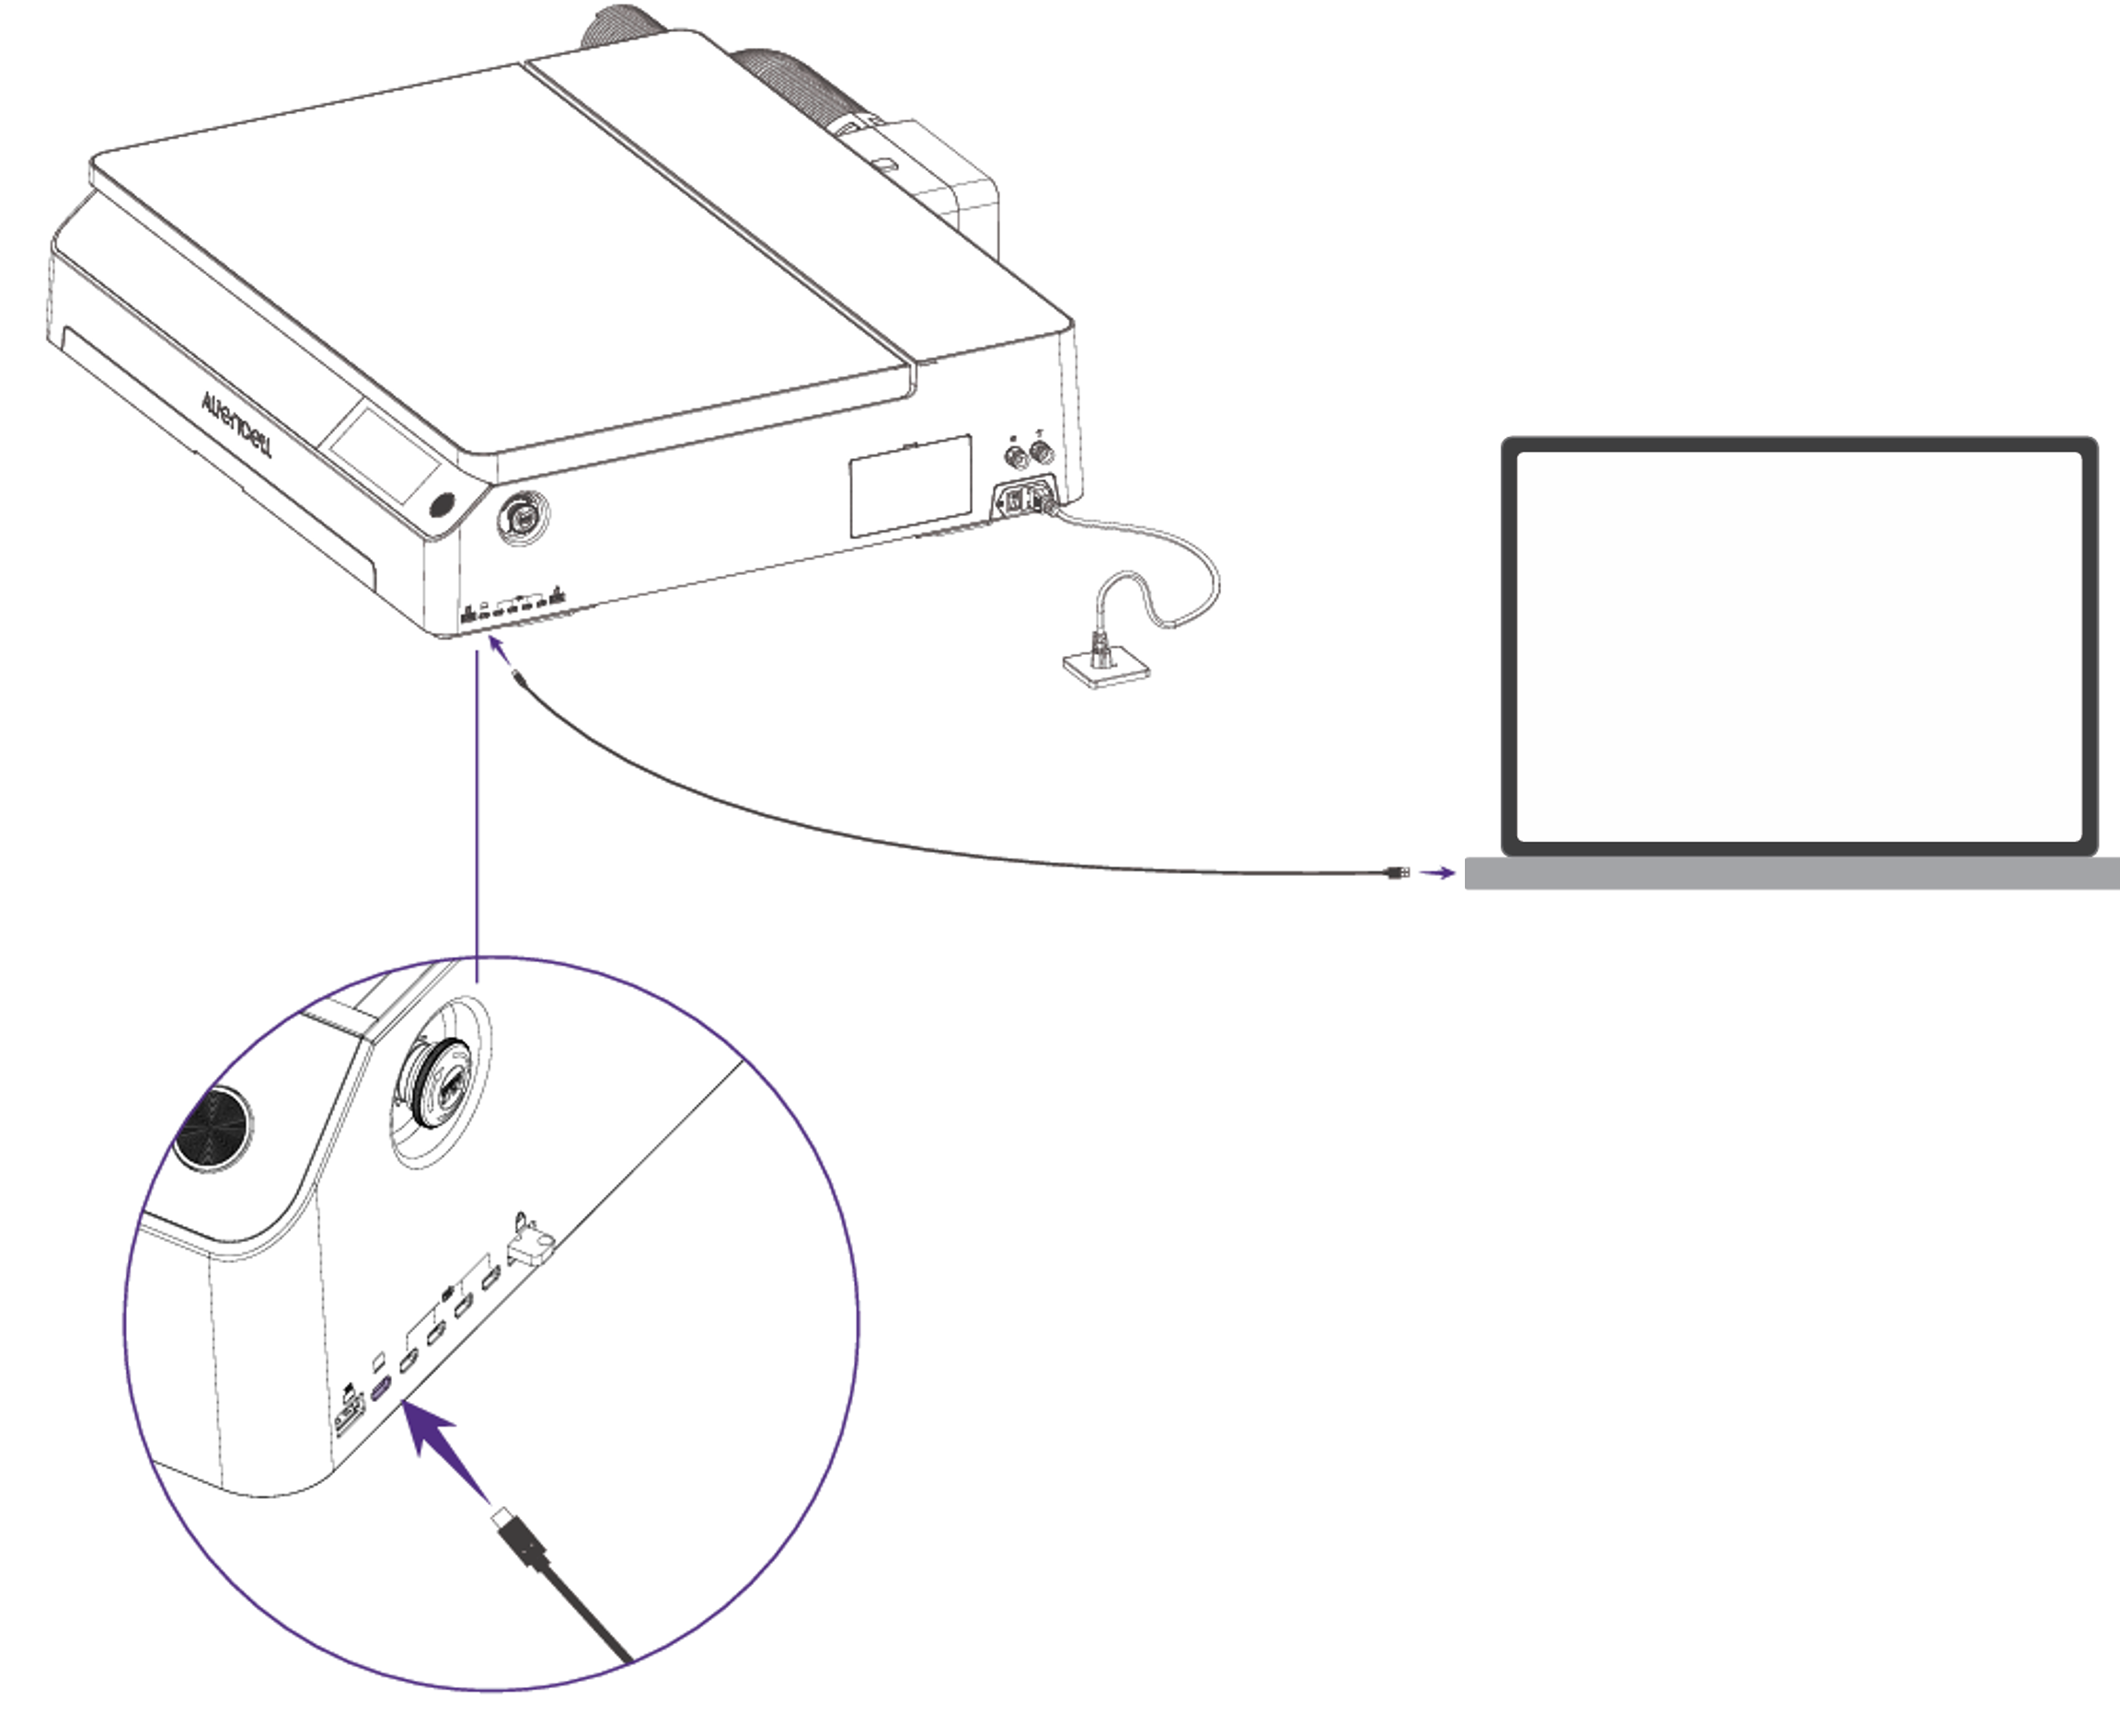
- The software will automatically detect the USB-connected device. Select your machine in the pop-up window to complete the connection.
- Turn on the machine and connect it to your computer using the USB cable.
In addition to the USB cable, you can also configure a wireless connection via Wi-Fi. Once configured, ensure both your computer and the device are on the same network to connect wirelessly.
- Method B: Connect Virtual Device
- If you don't have a machine nearby, you can select a Virtual Device. This allows you to familiarize yourself with the interface, test parameters, and simulate the engraving process without hardware.
- Select your laser module power (e.g., 20W, 40W, 60W).
The canvas size will automatically adjust based on the working area of the selected module.
¶ 3. Interface Overview
¶ 3.1 Project Interface
The project interface consists of several key areas, as shown in the layout below. You can find detailed descriptions of each function in the Interface Overview.
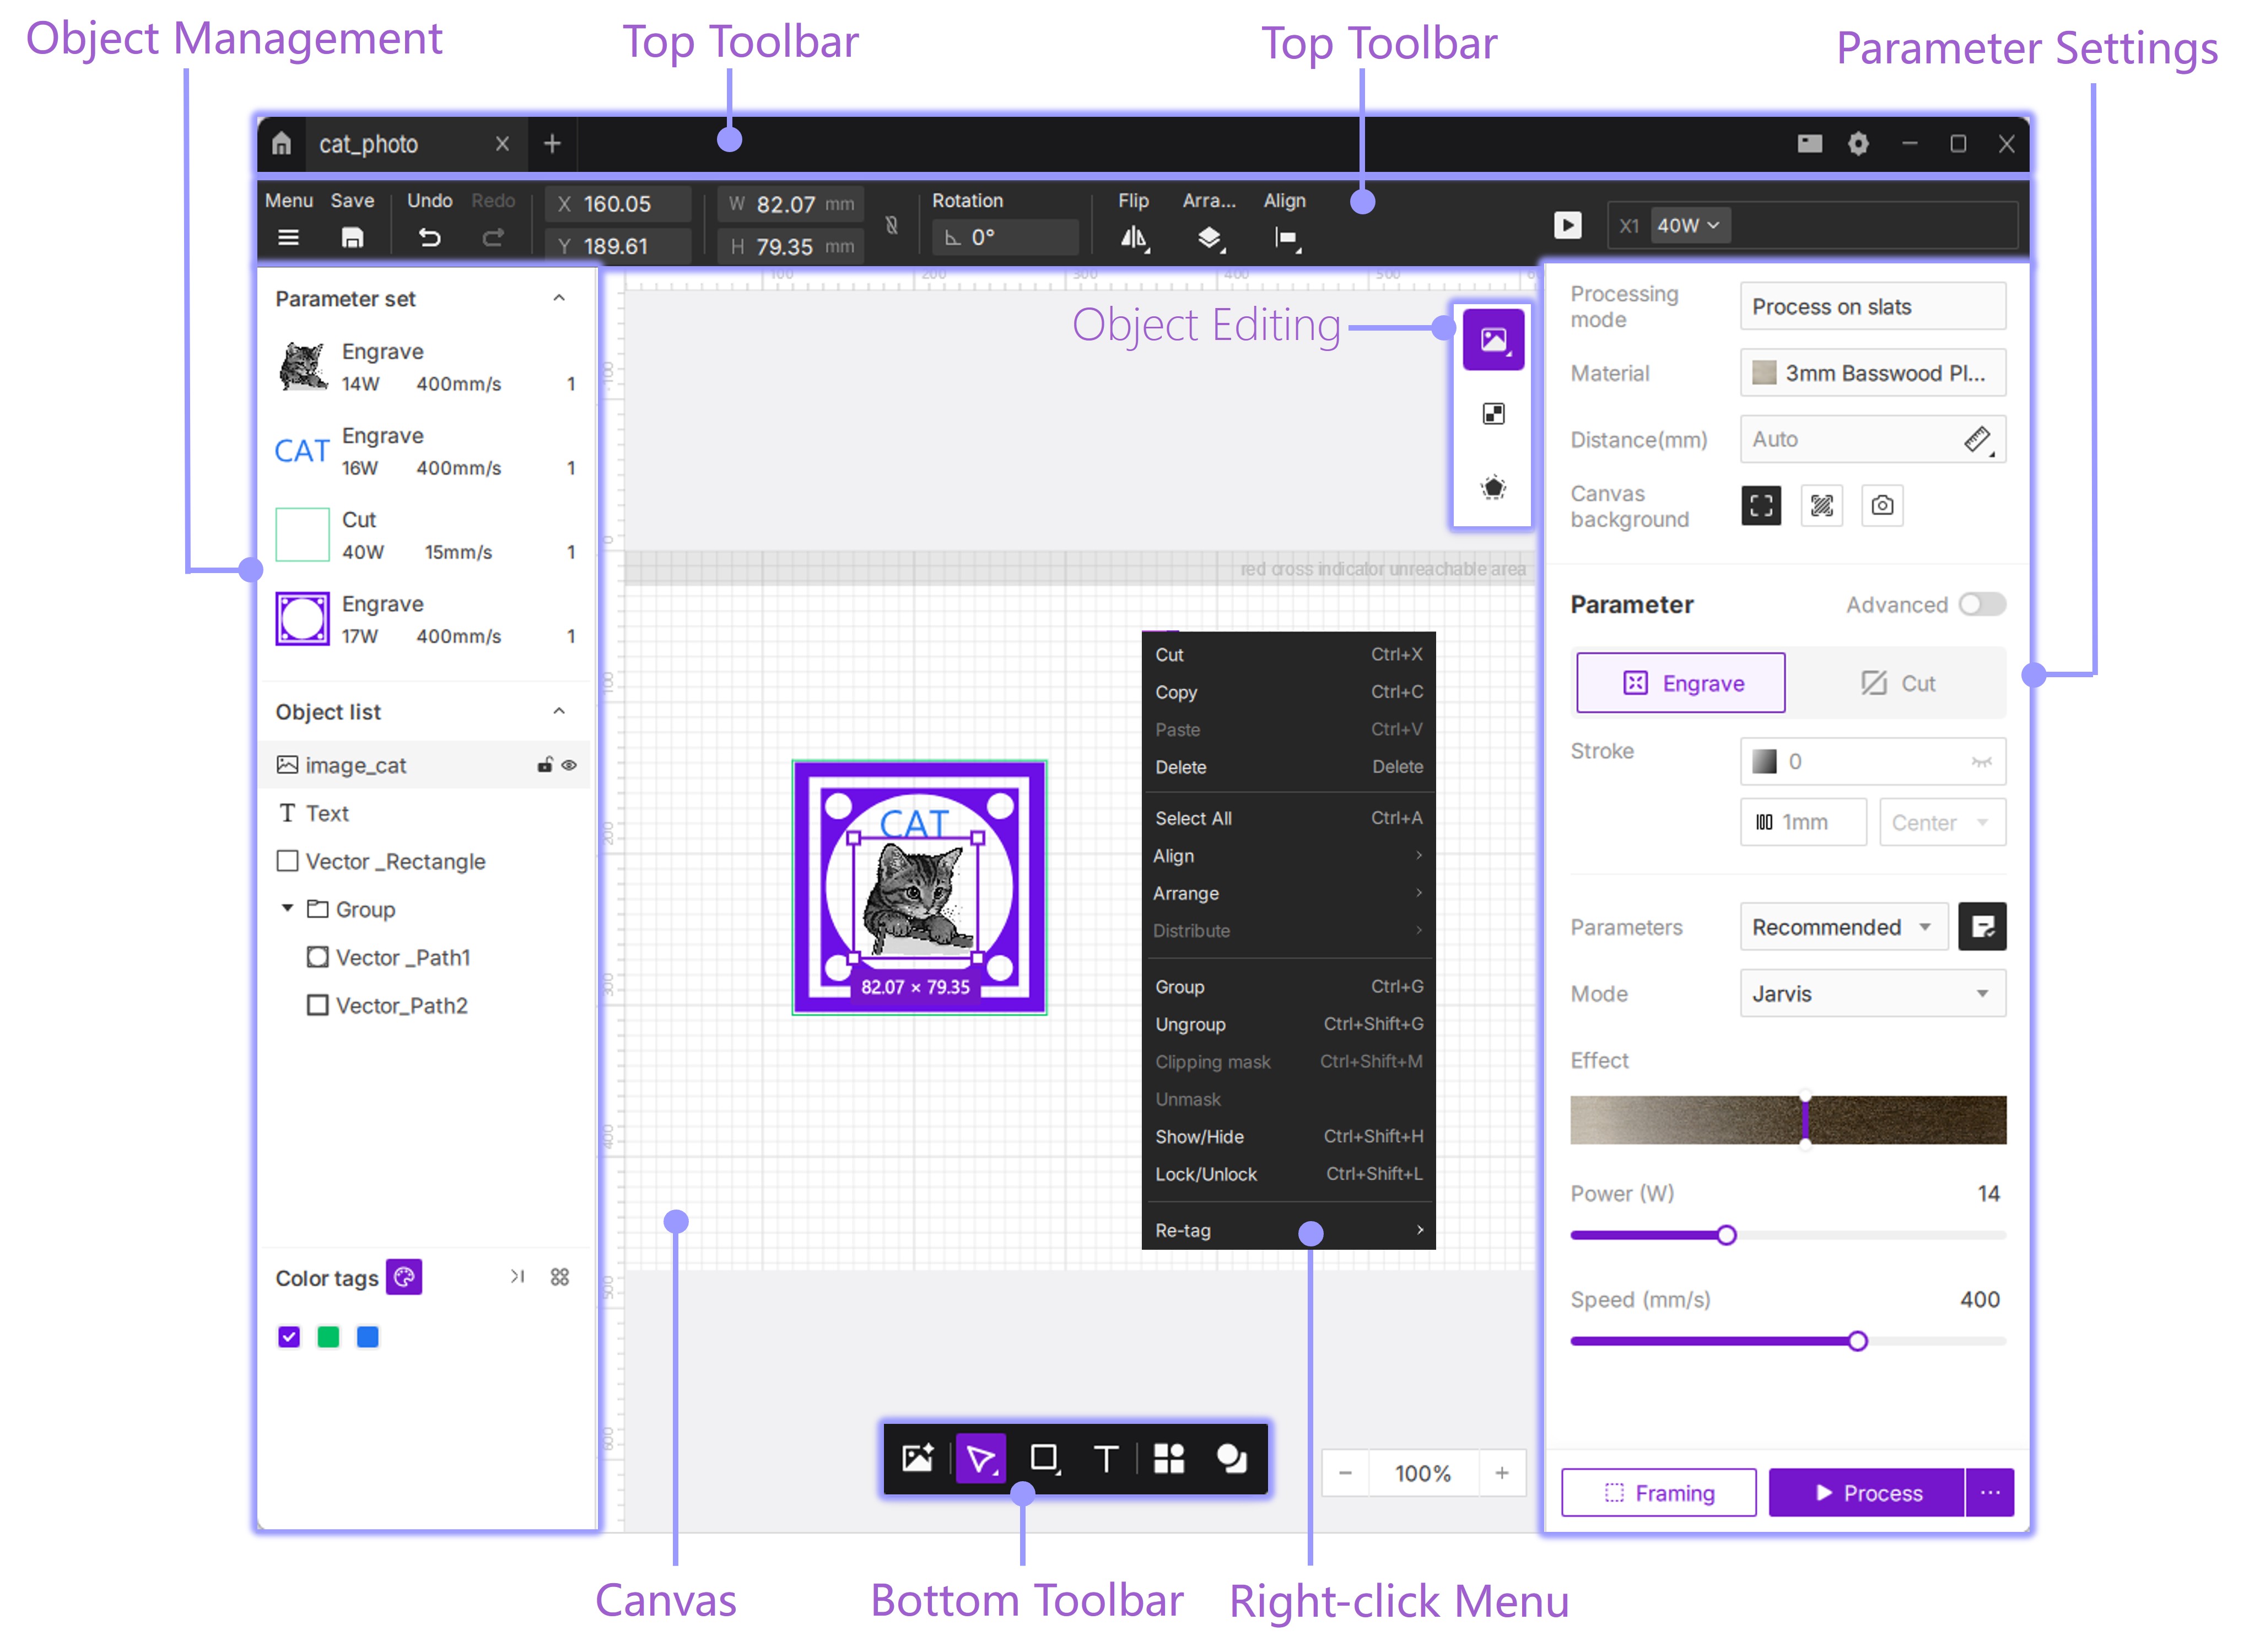
Object Editing: The properties available for editing will change depending on the object selected (image, vector graphic, or text).
¶ 4. Design & Preparation
¶ 4.1 Import or Create Designs
¶ 4.1.1 Import Files
- Simply drag and drop your design files directly onto the canvas.
- Supported Formats: SVG, DXF, PNG, JPG, BMP.
¶ 4.1.2 Create Simple Shapes
-
Use the bottom toolbar to create geometric shapes, add text, or click Asset Library to use pre-made designs. The video below demonstrates importing a file from the Asset Library.
¶ 4.1.3 Using Color Labels
- Function: Color labels are used to distinguish and manage different object layers. You can view all active color labels on the left side of the interface.
- Batch Operation: Quickly select all objects of the same color to unify their processing parameters (e.g., select all red lines and set them to "Cut"). This significantly improves efficiency.
- How to Use:
- Click the Display Color Label icon
 in the object management panel.
 - Select one or more objects on the canvas.
- Click the Change Color Label icon
 on the left, then choose a color to tag them.
- Set Parameters: Once tagged, you can assign different processing methods to different colors. For example, set Green objects to "Engrave" and Red objects to "Cut" to complete a complex job in a single run.
- Click the Display Color Label icon
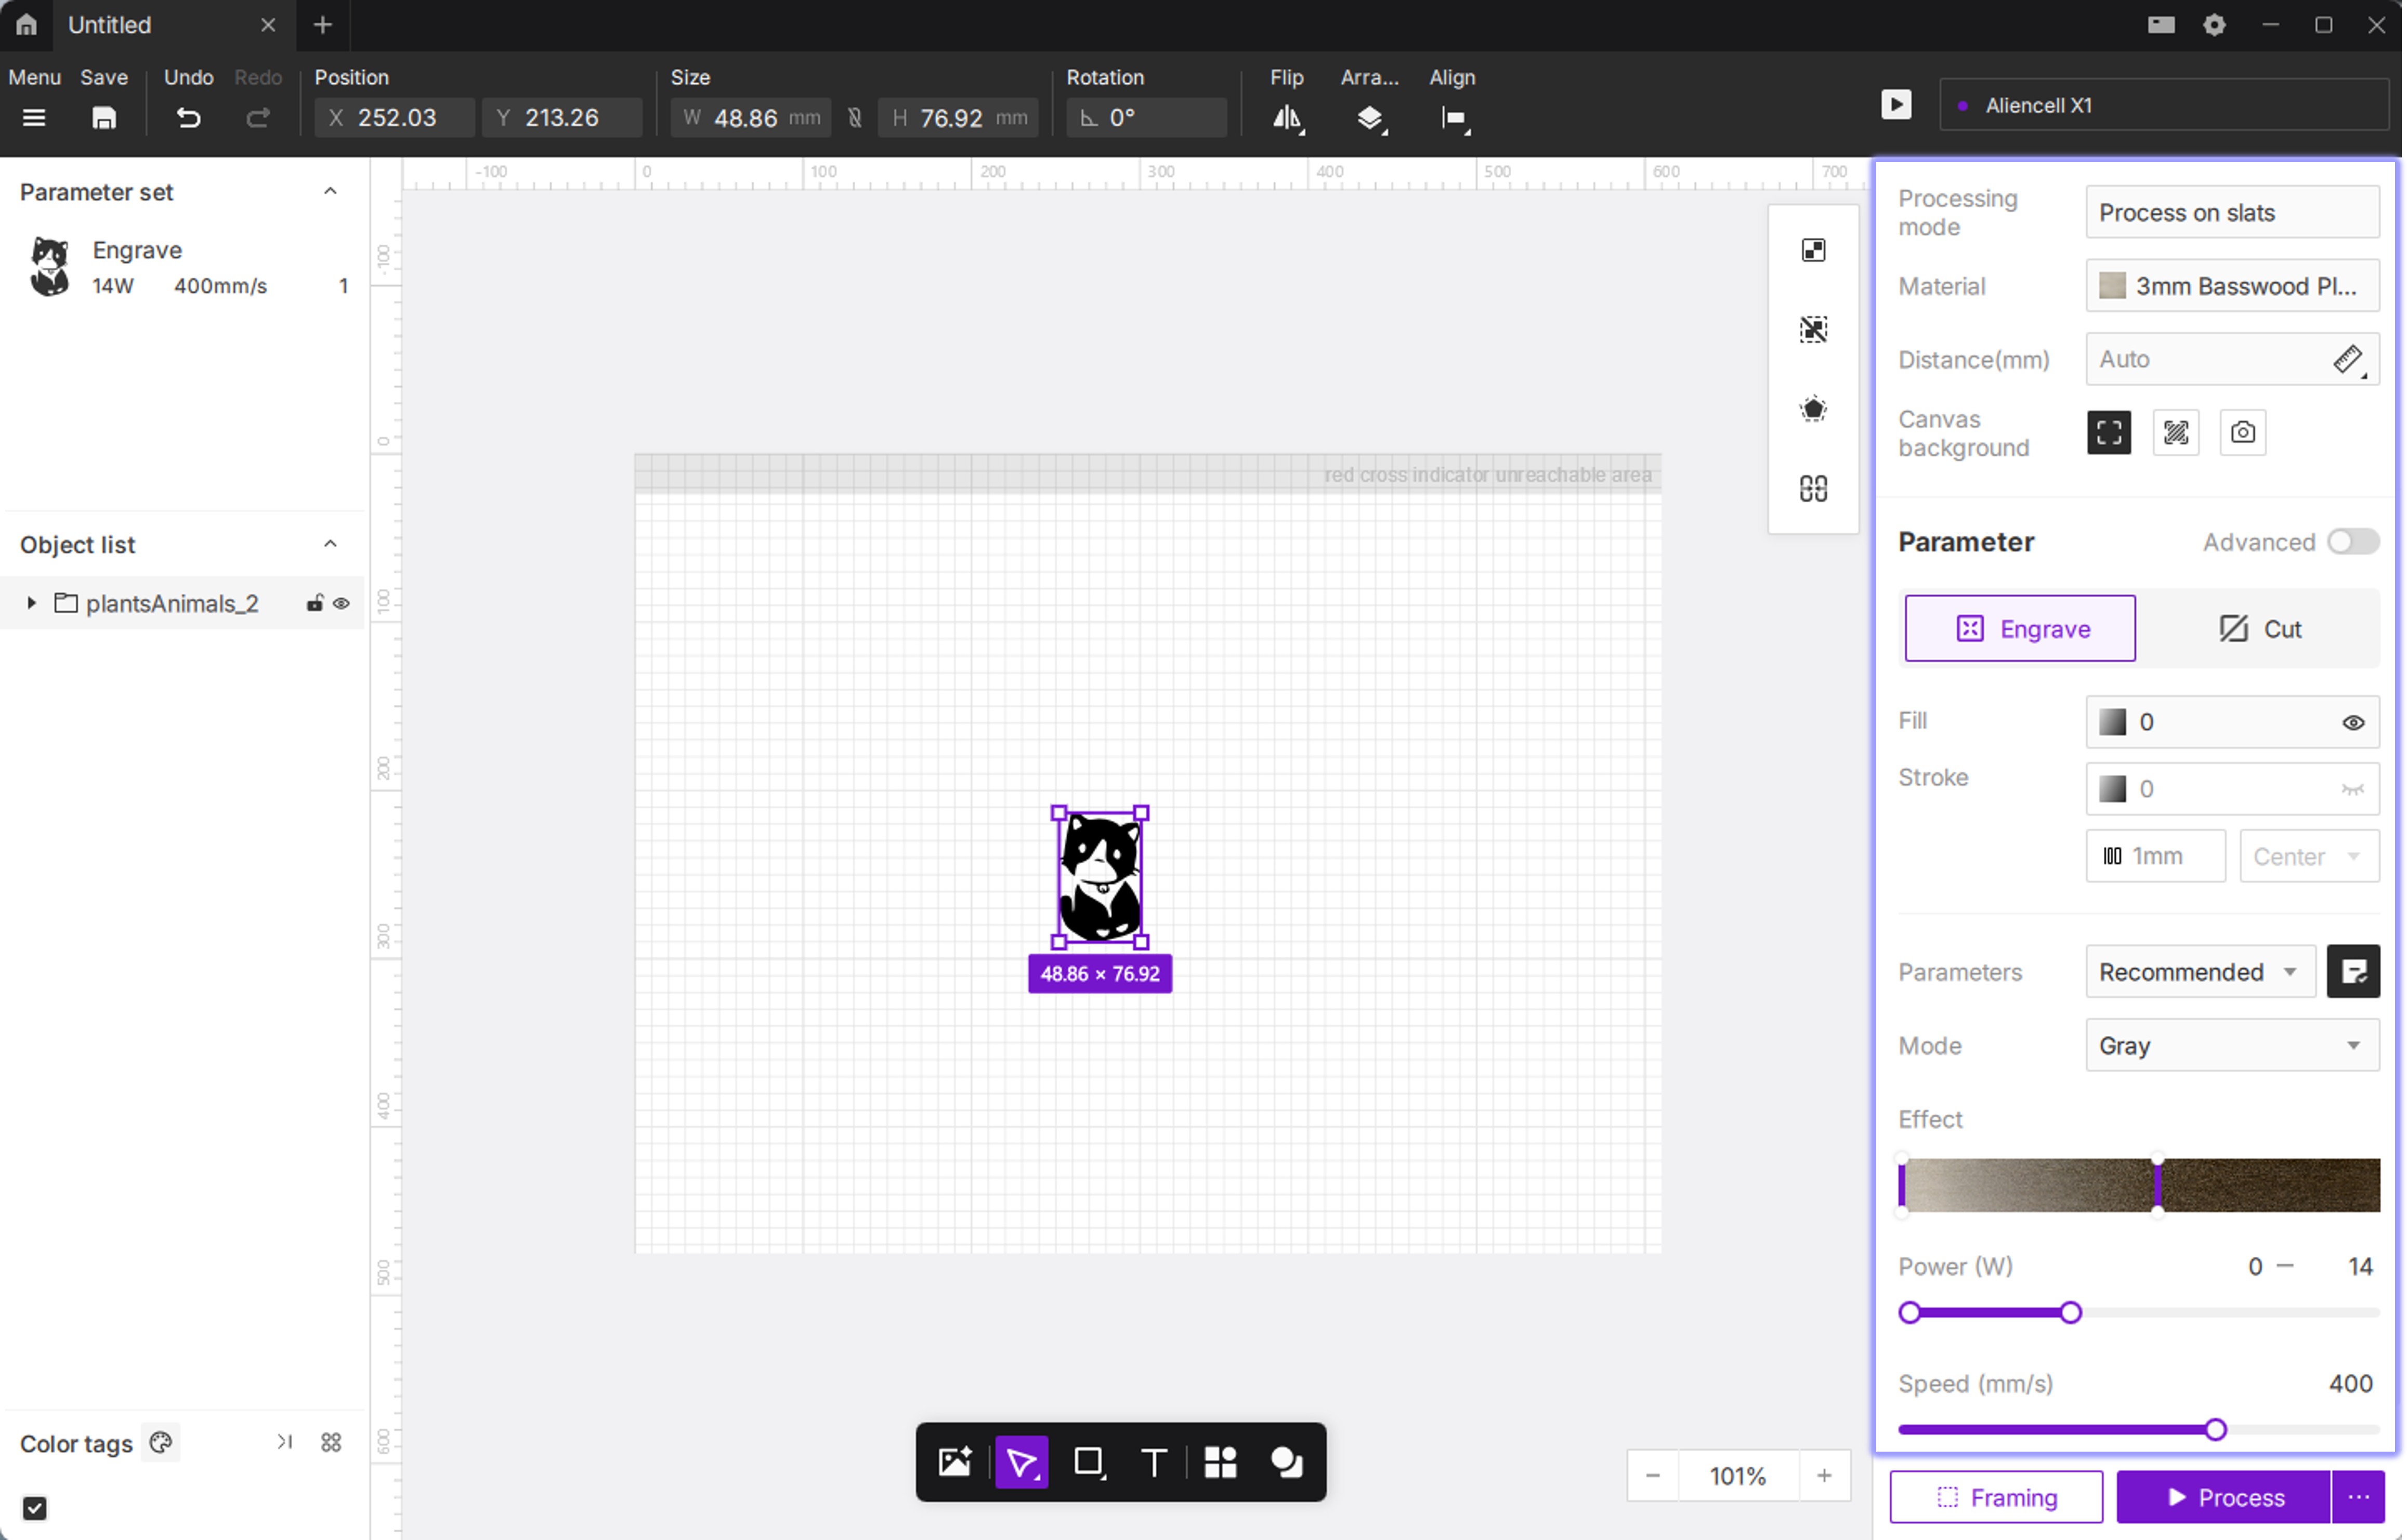
¶ 4.2 Material & Parameter Settings
- Job Mode: Select your design on the canvas and choose the appropriate mode based on your processing platform, such as Slats Flat Processing.
- Material: Select the material you are using from the library (e.g., 3mm Basswood).
- Distance: This refers to the vertical height between the laser module and the material surface. This value helps the device focus precisely, ensuring the laser focal point lands on the material surface for clearer engraving and cleaner cuts.
- Canvas Background: Controls how the workspace is displayed. Options include a blank (grid) background, Material Simulation, or a camera capture background.
- Processing Type: Confirm the type in the right-hand panel (Engrave, Cut).
- Auto Parameters: Once a material is selected, the software automatically applies the recommended speed and power settings.
- Custom Settings: You can also manually adjust the Power and Speed for finer control.
¶ 4.3 Material Simulation
If you are unsure how the engraving will look, use the Material Simulation feature to preview and adjust before processing.
- Select Material Simulation as the canvas background fill. The system will generate a realistic preview based on current parameters.
- You can adjust the Effect slider in the parameter panel to change the simulated depth. This updates in real-time on the canvas, giving you a better idea of the final result.
While the Material Simulation is highly realistic, it cannot be 100% identical to the physical result. Laser engraving involves variables like laser variance and material absorption. Aliencell Space aims for a "What You See Is What You Get" experience, but we recommend treating the simulation as a "best reference" rather than a physical copy.
¶ 4.4 Save or Export Project
¶ 4.4.1 Save Project
- Click the Save icon
 in the top toolbar, or go to the menu bar to save your project file locally.
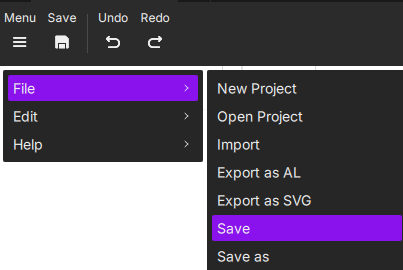
The file will be saved in
.alpformat, which is the project file type that can be opened directly by Aliencell Space.
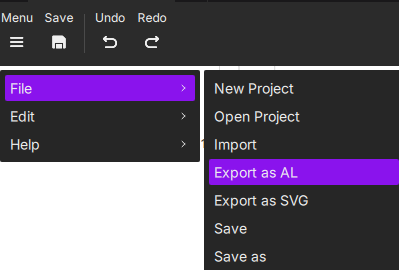
¶ 4.4.2 Export to USB (Offline Processing)
If you wish to process without a computer connection, you can export the project to a USB drive for Offline Processing.
The file will be exported in
.alformat, which is the machine-readable format required for processing.
- After setting up your file, go to Menu > File > Export as AL, and save the file to your USB drive.
- Insert the USB drive into the machine's USB port.
- On the machine's touchscreen, go to Files > External Storage to find your imported project.
- Select the project and start processing—no computer connection required.
¶ 5. Positioning & Framing
Ensure the physical device is connected before performing these steps.
¶ 5.1 Live Preview
Use the built-in camera for precise positioning.
- Place your material inside the machine's processing area.
- Click Snapshot
 button above the canvas.
 - The software will take a photo of the workspace and display it as the canvas background.
- Drag your design over the material shown in the background to ensure perfect alignment.
¶ 5.2 Framing
Before you start engraving, verify that the physical processing area is accurate.
- Click the Framing button
 in the bottom right corner.
 - The laser module will move along the outer contour of your design to show you the exact processing area.
- Observe the laser's path to confirm it stays entirely on the material. If it deviates, adjust the material position or move the design in the software.
¶ 6. Execution
¶ 6.1 Start Job
- Click the Process icon
 in the bottom right corner. The software will slice the file and generate the necessary data. Once processed, the job file is transferred to the machine.
 - Safety Confirmation: After the file is sent successfully, press the physical Start Button on the machine (located next to the touchscreen) to begin the laser job.