¶ 1. Home Overview
The Home Page focuses on account information management and displaying recent project records.
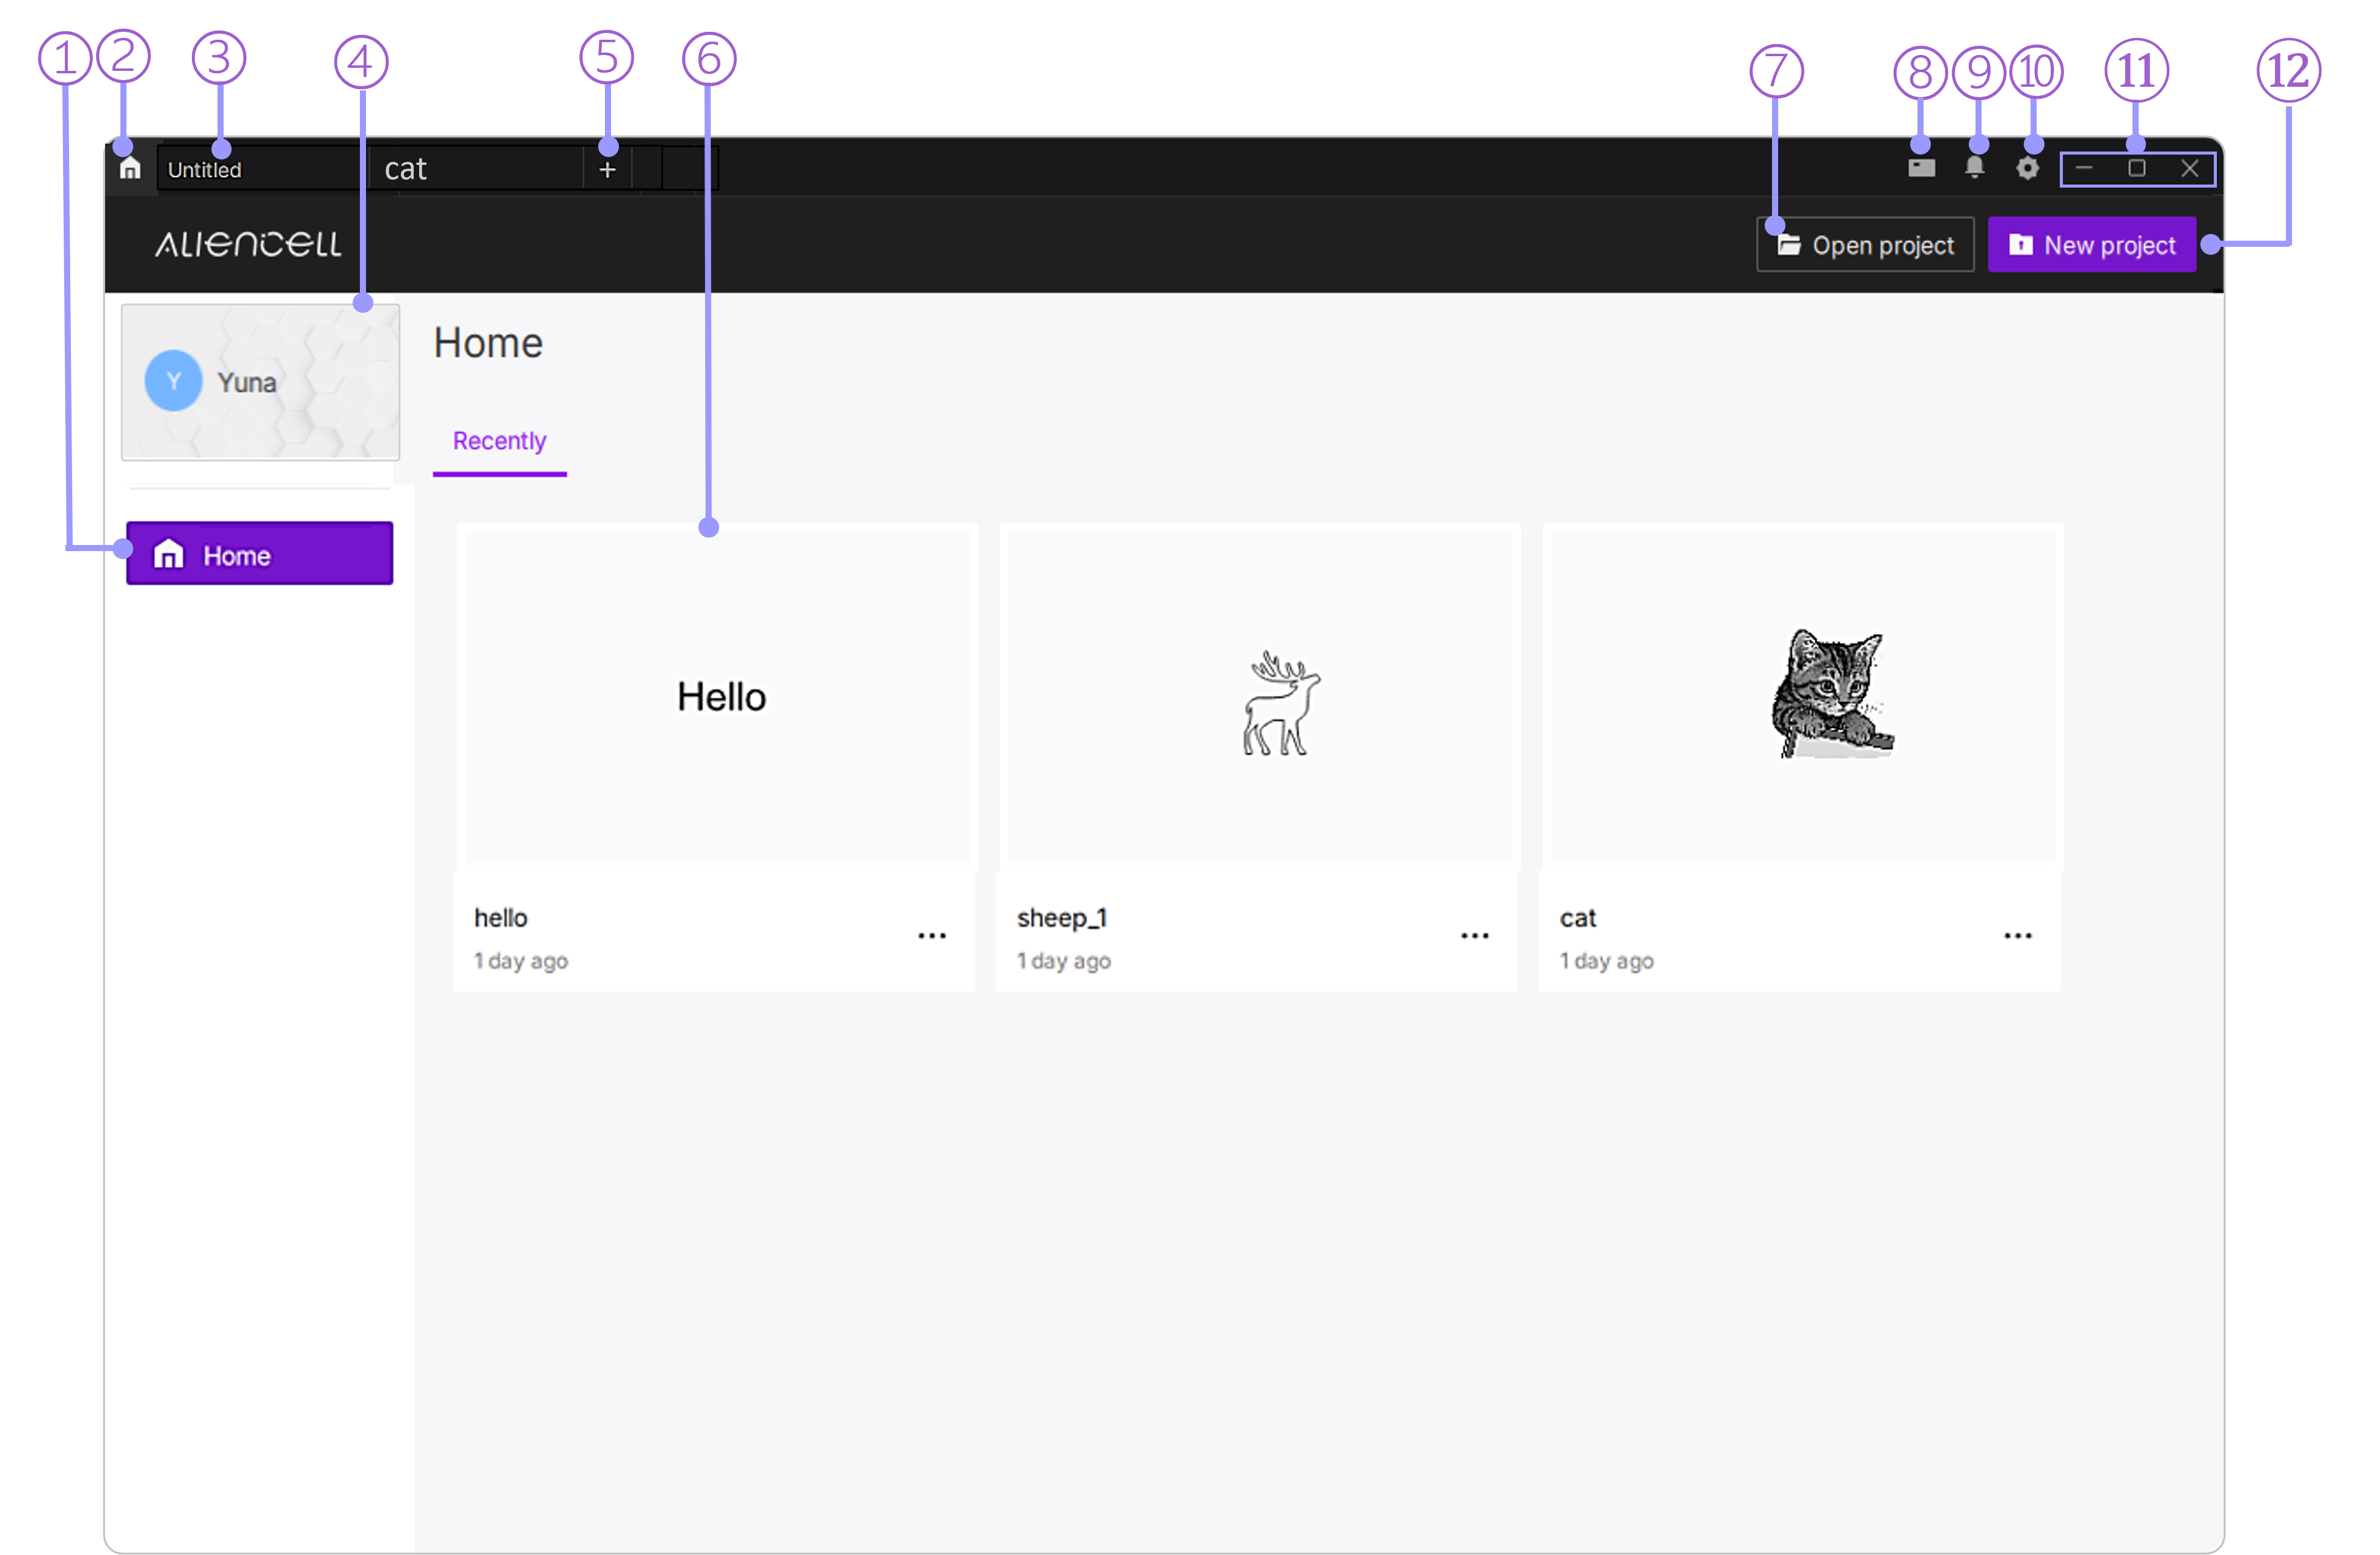
- ① Home: Indicates that the current page is the software’s main homepage.
- ② Home Icon: No matter which module you are in, clicking this icon quickly brings you back to the main interface—useful for starting from scratch or selecting a new project.
- ③ Page Tabs: Display the names of currently open projects. “Untitled” means the document has not been named. You can click here to open or close a project. The software supports up to six projects open at the same time. You can also double-click the tab to rename a project.
- ④ User Information: Shows your current avatar and nickname. Click this area to enter the User Center, where you can view or edit your account information, or log in / log out.
- ⑤ New Project Button: Click the + button to start a new laser engraving task and enter the engraving workspace.
- ⑥ Recent Projects: The center section of the home page displays recently opened projects as cards, showing thumbnails and project names for quick access and continued editing.
- ⑦ Open Project: Click to browse and open existing laser engraving project files.
- ⑧ Device Manager: Enables software connection to multiple laser engraving machines. Easily identify and manage connected devices, including viewing device information, Live View, parameter configuration, and remote monitoring.
- ⑨ Notification : A centralized notification hub accessible via the bell icon that aggregates system alerts, real-time device status, and backend push messages into a unified management interface.
- ⑩ Software Settings: Click the gear icon in the top-right corner to open system settings. You can change interface language, units, default save paths, and other preferences.
- ⑪ Window Controls: Includes minimize, maximize / restore, and close buttons to adjust the display state of the software window.
- ⑫ Create New Project: This button works the same as item ⑤. Click it to create a brand-new laser engraving project and start your next design.
¶ 2. Window Layout
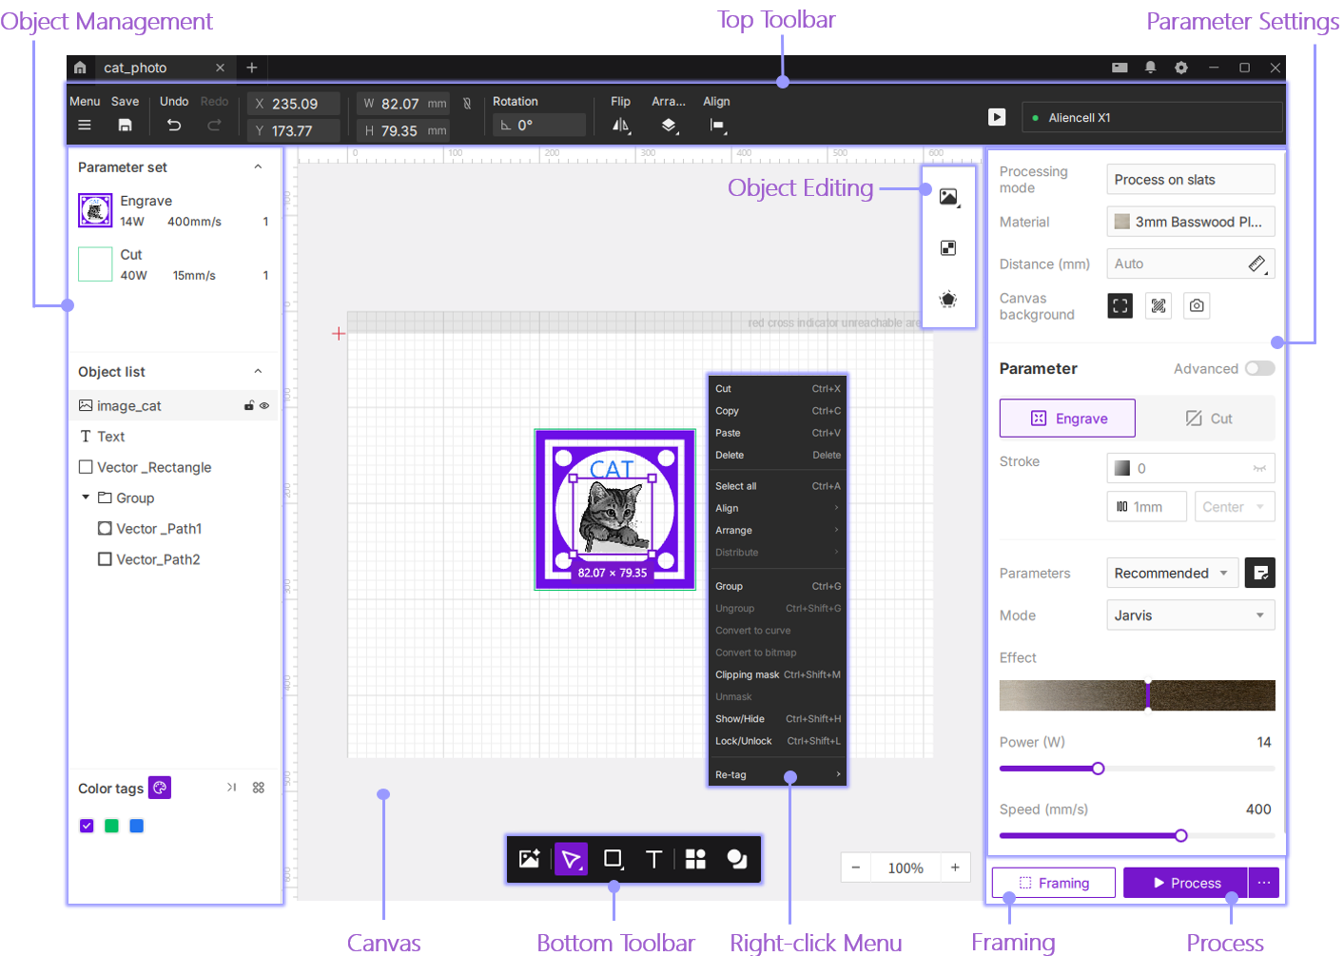
UI Update: The interface has been updated. The "Fill Canvas" feature has been moved to the "Parameter" panel on the right (renamed to "Canvas background").
¶ 2.1 Top Toolbar
¶ 2.2 Object Management
¶ 2.3 Parameter Settings
- Processing Mode
- Material
- Spot Distance Measurement
- Basic Parameters
- Advanced Engraving Parameters
- Advanced Cutting Parameters