The Object Editing panel is a dynamic toolbox located on the right side of the canvas. It automatically adapts to the type of object you select—bitmap, text, or vector—and presents the relevant editing options, including Group/Ungroup, Image Editing, Vector Editing, and Text Editing.
¶ 1. General Editing
Grouping allows you to combine multiple objects on the canvas into a single unit. This makes it easier to move, scale, and manage object layers as a whole.
¶ 1.1 Group Objects
You can group multiple selected shapes, text, or image objects into one group. Once grouped, all items act as a single unit for movement and scaling, and appear as a single Group in the object list.
¶ 1.1.1 How to Group?
- Method 1: Select one or more objects on the canvas, then click the Group button
 at the top-right of the canvas. The selected objects will be merged into one group and displayed as Group in the object list.
- Method 2: Select one or more objects on the canvas or in the object list, right-click the selection, and choose Group from the context menu.
¶ 1.1.2 Grouping Notes
-
You can group even a single selected object. This allows adding more items into the same group later, making naming and locating objects easier.
-
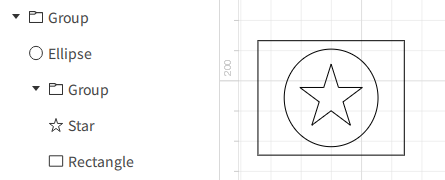
Nested groups: You can group existing groups together, or group individual objects with an existing group. The same layer-ordering rules apply.
-
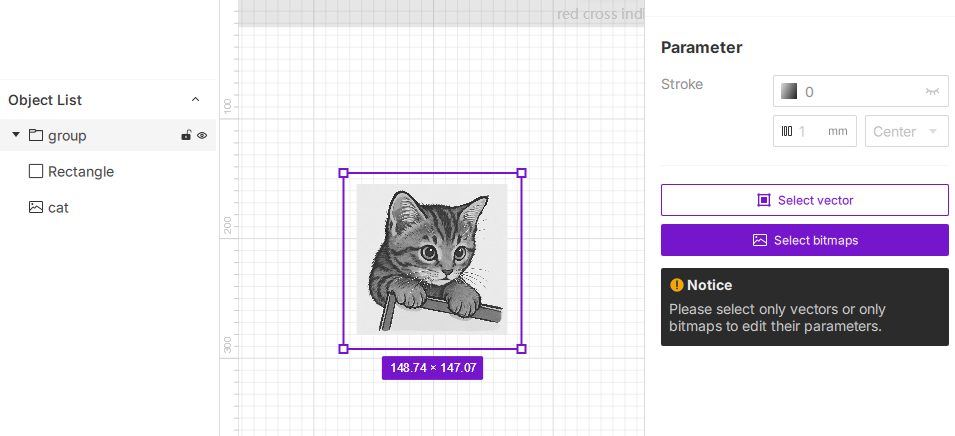
Independent attributes: After grouping, all objects keep their own engraving/cutting parameters—such as power, speed, and visual properties (color, fill, etc.).
-
Group attribute behavior: If you select the whole group and it contains different object types (bitmap, vector), you will need to select each type individually to edit their specific parameters.
-
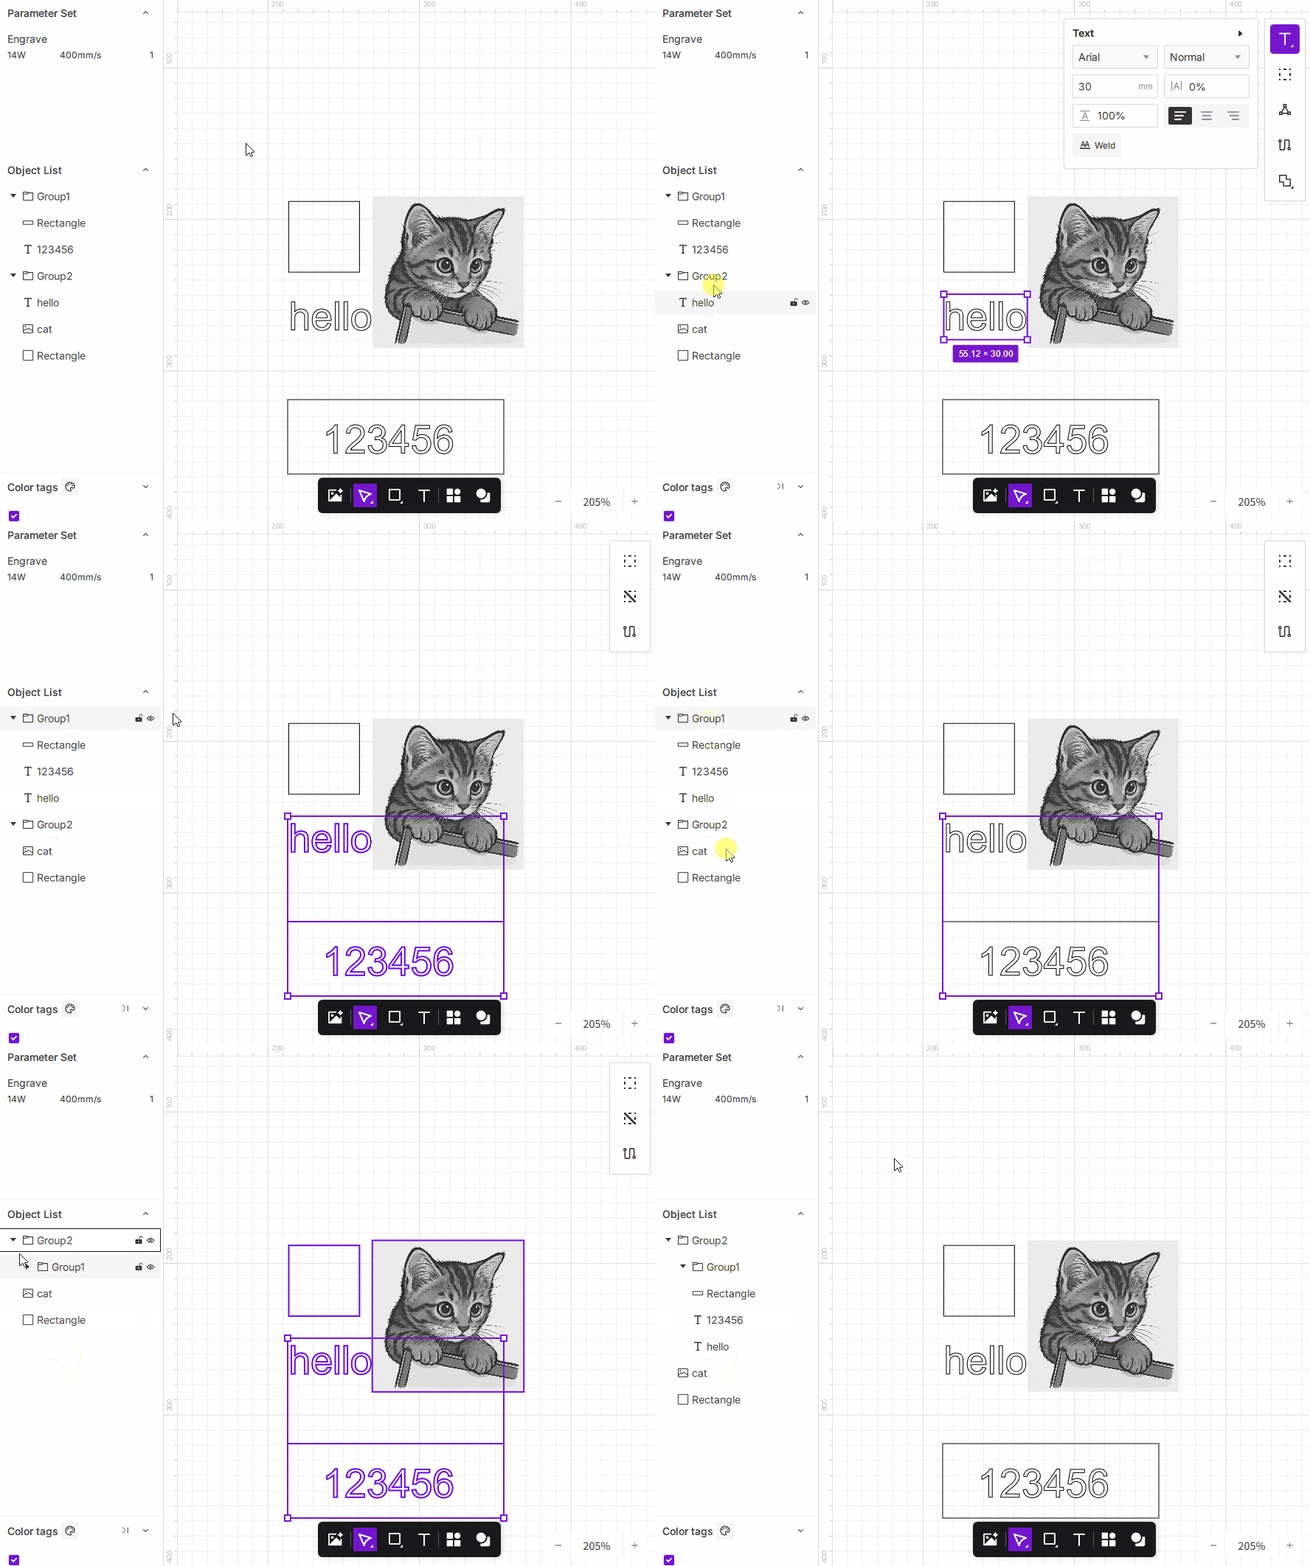
Both objects and groups can be dragged into other groups.
¶ 1.2 Ungroup
Ungrouping breaks a grouped object back into individual items or smaller groups.
¶ 1.2.1 How to Ungroup?
- Method 1: Select one or more groups on the canvas, then click the Ungroup button
 at the top-right of the canvas. All items in the group will be separated as independent objects.
 - Method 2: Select one or more grouped objects on the canvas or in the object list, right-click the selection, and choose Ungroup from the context menu.
¶ 1.2.2 Ungroup Notes
- If the selected group contains nested sub-groups, ungrouping the outer group will not break apart the internal sub-groups.
- The Ungroup button only appears when a group is selected.
¶ 2. Bitmap Editing
The bitmap editing tools allow you to perform basic image preprocessing after importing an image—such as cropping, adjusting brightness and contrast, inverting colors, sharpening, and more. These adjustments help enhance image detail before engraving, resulting in clearer and more defined output.
Pre-processing your bitmap before engraving reduces rework and improves engraving quality and efficiency.
When you select a bitmap on the canvas, the right panel displays the Image Adjustment panel. This panel helps you optimize the visual appearance of the imported picture, improving clarity and tonal range during engraving.

The bitmap editing panel includes the following two modules:
¶ 2.1 Image Adjustment
¶ 2.2 Image Editing
¶ 3. Vector Editing
Vector editing refers to modifying and combining shapes made of paths, segments, and nodes. By adjusting shapes, performing Boolean operations, or creating compound paths, you can build more complex and precise vector designs.
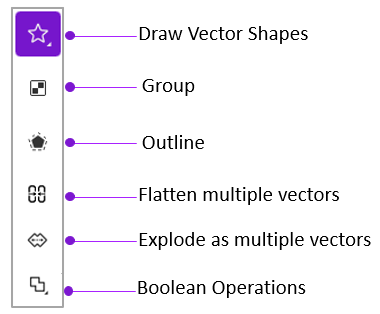
¶ 3.1 Draw Vector Shapes
Click any tool in the Bottom Toolbar to draw various vector shapes, including rectangles, lines, ellipses, polygons, stars, and triangles. These shapes support both style and parameter adjustments.
- Style Settings: For shapes with special attributes, you can adjust parameters such as number of polygon sides or star point count in the Vector panel.
| Modify Polygon Sides | Modify Star Points |
- Vector Parameters: You can modify basic appearance properties such as Fill, Stroke, and Corner Radius.
¶ 3.2 Compound path
Compound Path tools include two vector operations: flattening multiple vectors into one compound vector, and exploding a compound vector back into separate vector objects.
¶ 3.2.1 Flatten multiple vectors
Flatten two or more separate vectors into one compound vector object. After flattening, the selected vectors behave as one object for selection, movement, and editing. This is useful when you want to organize complex graphics or keep several paths together as one structure.
¶ 3.2.2 Explode as multiple vectors
Explode a compound vector into multiple independent vector objects. After exploding, you can select each vector separately and adjust its position, size, style, or laser processing parameters.
¶ 3.3 Boolean Operations
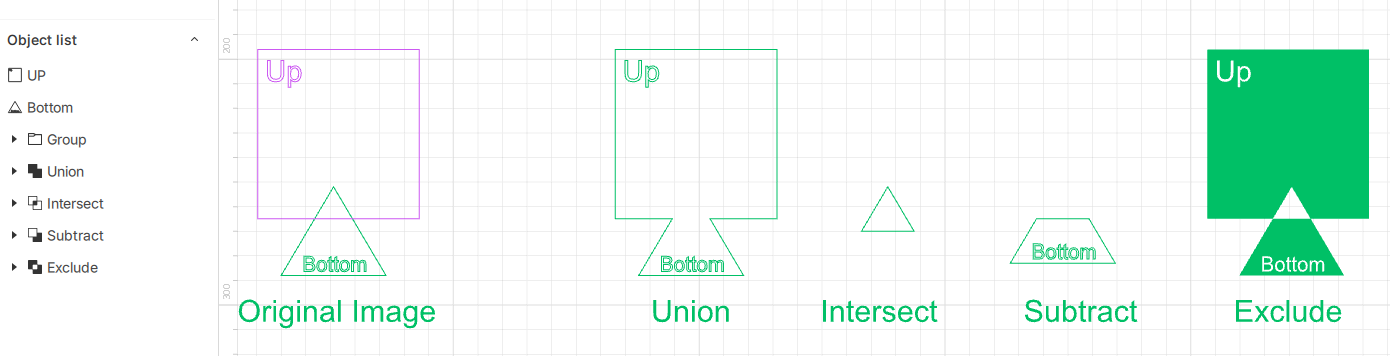
Boolean operations allow you to combine, intersect, or subtract multiple vector shapes. This is useful for quickly creating complex shapes—for example, merging two shapes into one, or cutting one shape out of another.
Aliencell Space provides four Boolean operation types: Union, Intersection, Subtract Front, and Exclude Overlap.
¶ 3.4 Outline
Generating an outline creates a new vector path that expands outward or inward from the selected vector object. Use it to add a cut line, create a sticker border, make a backing plate, or create one outer boundary around multiple decorative elements.
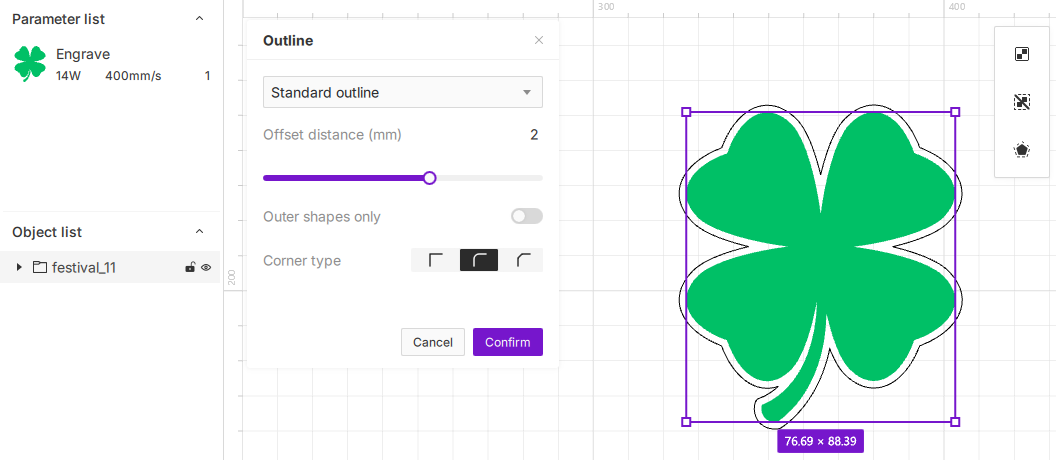
¶ 3.4.1 Basic Steps
- Select the vector object you want to outline.
- Click the Outline icon in the toolbar.
- Select an outline mode and set the outline size.
- Enable Include outer outline if needed.
- Click Confirm to generate the new outline path.
Tips:
Use Standard Outline when you need a precise cut line for a single vector object. Use Rubber Band Outline when you want to wrap multiple separate vectors, text objects, or decorative elements into one backing shape. For more parameters and mode comparisons, see How to Create Object Contours.
¶ 4. Text Editing
¶ 4.1 Drawing Text
¶ 4.1.1 Add Text
- Click the
 icon in the bottom toolbar to add and edit text on the canvas.
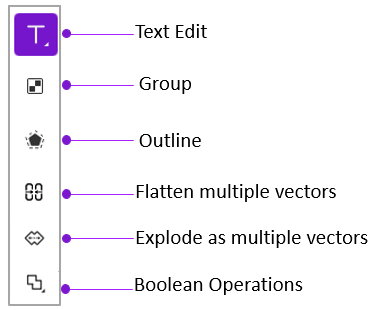
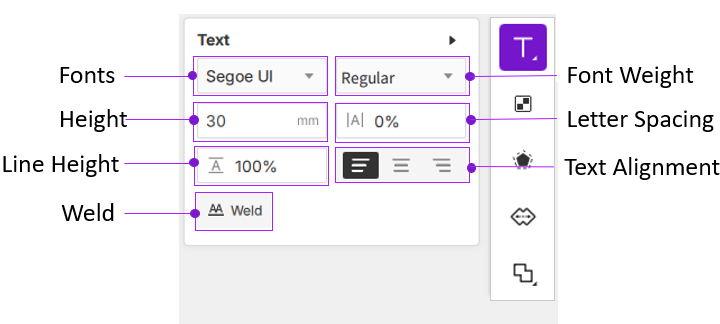
- When a text object is selected, the text editing tools appear in the upper-right corner of the canvas. Here, you can adjust font style, size, and other formatting properties.
¶ 4.1.2 Set Text Attributes
¶ 4.2 Convert to Curve
Convert to Curve converts one or more text objects into editable vector paths. After conversion, the text is no longer edited as text. It becomes a vector object that can be used for Boolean operations, outline generation, path editing, or cut-line preparation.
¶ 4.2.1 How to Convert to Curve?
- Select the text object you want to convert.
- Right-click the selected object.
- Choose Convert to Curve from the context menu.
- After conversion, the text becomes editable vector paths.
Warning:
After converting to curves, the text loses all text properties. You can no longer edit the text content, change the font, font weight, text height, or letter spacing.
¶ 4.3 Text Compound Vector
After text is converted to curves, it becomes a vector object. You can then flatten or explode those text vectors to organize text paths, create cut-out lettering, combine letter shapes, or prepare paths for Boolean operations and cutting.
¶ 4.3.1 Flatten multiple vectors
Flatten two or more text vectors into one compound vector object. After flattening, the selected text paths behave as one object for selection, movement, and editing. Use this when you want to keep a text composition together as one structure.
Difference between Convert to Curve and Flatten multiple vectors:
- Convert to Curve converts a text object into editable vector paths.
- Flatten multiple vectors combines multiple existing text vector paths into one compound vector object.
¶ 4.3.2 Explode as multiple vectors
Explode a text compound vector into multiple independent vector objects. Click the  icon to use Explode as multiple vectors. After exploding, you can select each text path separately and adjust its position, size, style, or laser processing parameters. This works the same way as Explode as multiple vectors in Vector Editing.
¶ 4.4 Boolean Operations
Perform Boolean operations on one or more text objects. During the operation, text objects will automatically be converted into vector shapes. Boolean rules follow the same principles as standard vector Boolean operations.
