¶ 1.Pre-check Before Operation
 |
 |
|---|---|
a. Ensure the exhaust pipe outlet is placed toward a ventilation duct or connected to an air purifier. b. Make sure the workspace is clean and clear of clutter. Avoid placing any heavy items on the machine cover. |
c. Check that the U-key is properly inserted into the corresponding port. d. Make sure the Emergency Stop Button is released. |
¶ 2.Powering On the Device
 |
 |
|---|---|
a. Turn on the Air Pump and switch it to Auto mode. |
b. Turn on the Main Power Switch of the laser engraver. |
¶ 3.Place the Material
Place the material in the center of the working area and close the X1 Lid.
For lightweight materials, use Material Clamps to secure them.
¶ 4.Connect the Device
-
Use the USB data cable to connect the computer and the device.
-
Open Aliencell Space software and create a new project.
-
Click the Device List, select the connected physical device, and confirm the connection status.
A green circle indicates the device is connected. When its status shows “Idle,” the device is ready for use.
- If no laser crosshair appears on the canvas, go to Settings → Advanced Settings in the software and enable Laser Module Position. This shows the current physical position of the Laser Module inside the machine.
¶ 5. Design Processing Files
The following sections guide you through the design process using Basic Shapes, Text, and Bitmaps.
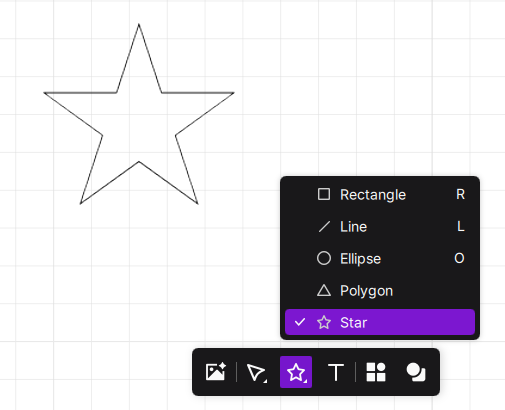
- We'll use a star as an example. You can find this shape in the bottom toolbar.
-
Configure Processing Parameters
- Processing Mode: Select "Process on slats".
- Material: Choose your actual material, such as "3mm Basswood Plywood".
- Processing Type: Select the object and choose "Cut". The software will automatically recommend the best parameters based on your selected material.
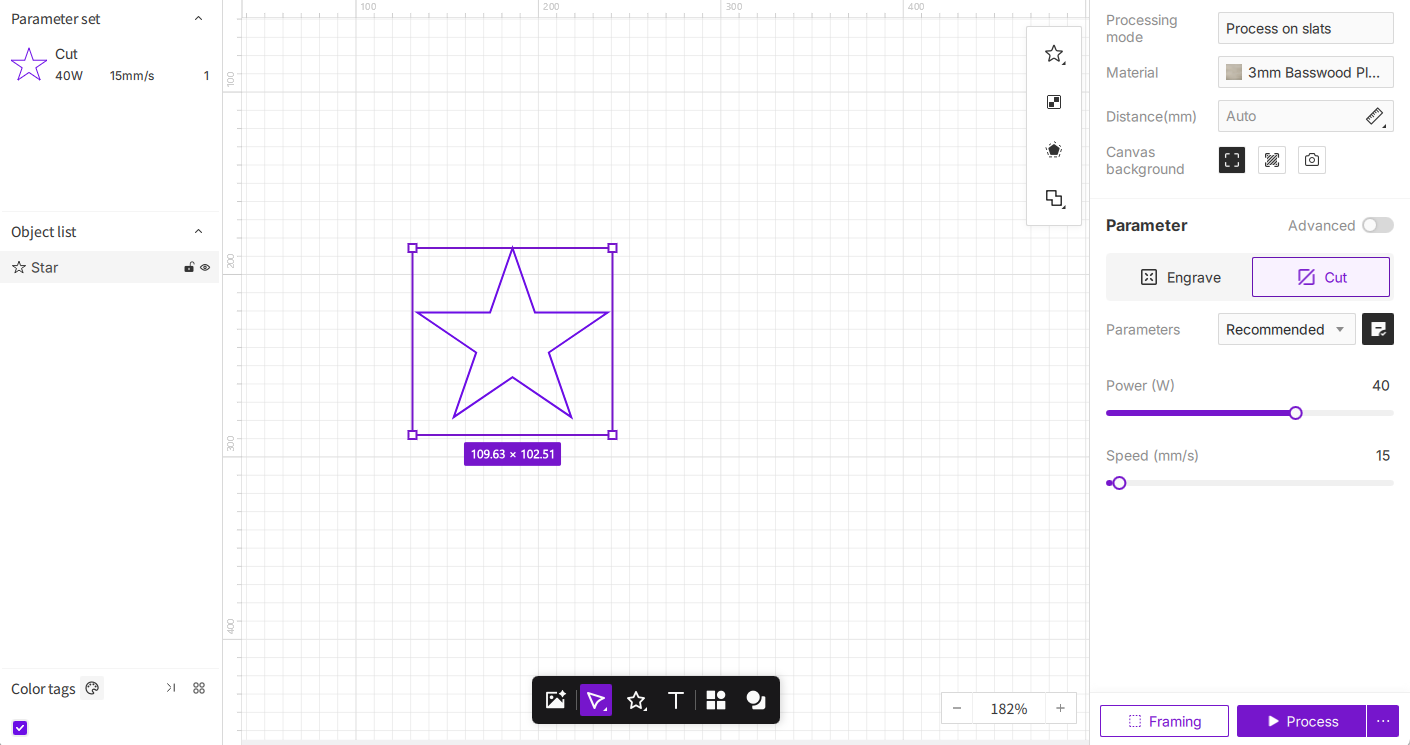
If you want to customize the settings, you can manually adjust power and speed. To add "Tabs" (micro-joints) to prevent parts from falling out, configure this in the Advanced Parameters.
-
We'll use a text object as an example. Find the Text tool in the bottom toolbar.
- Create a text object.
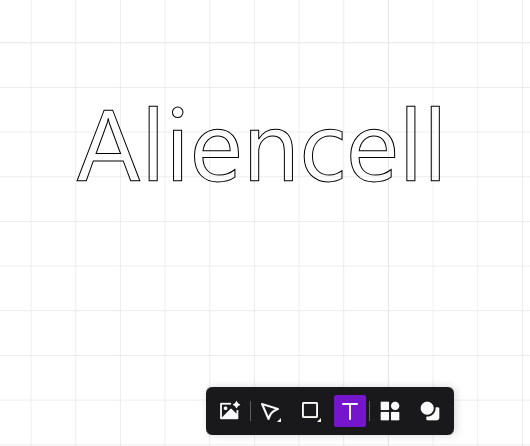
- Generate the text outline.
- Create a text object.
-
Configure Processing Parameters
- Processing Mode: Select "Process on slats".
- Material: Choose your actual material, such as "3mm Basswood Plywood".
- Processing Type: Select the text object and choose "Engrave". Select the text outline and choose "Cut". The software will recommend the appropriate parameters.
By default, created text objects are set to Engrave, while generated outlines are set to Cut.
-
Import a file using the Image icon in the bottom toolbar.
-
Generate the Bitmap Outline
Standard Image: If the background is opaque, the system generates a rectangular outline around the border.
Transparent Image (e.g., PNG) or Cutout: If the background is transparent or processed with the "Magic Wand", the outline will trace the actual shape of the content.
- Generate Outline Directly: Select the bitmap and click the "Outline" button. The software will create an outline based on the image shape.
If you want to cut along the specific shape of the subject, remove the background first.
-
Select the image and click Image Edit. Choose the Magic Wand tool and click on the background area you want to remove. Click Done to return to the canvas.
-
With the object still selected, click Outline. The software will now generate a cut line hugging the edge of your graphic.
-
Configure Processing Parameters
- Processing Mode: Select "Process on slats".
- Material: Choose your actual material, such as "3mm Basswood Plywood".
- Processing Type: Set the bitmap object to "Engrave" and the outline object to "Cut". The software will recommend the appropriate parameters.
By default, imported bitmap objects are set to Engrave, while generated outlines are set to Cut.
¶ 6. Camera Positioning
Once your parameters are set, click the ![]() icon to enable the camera. This captures a real-time view of the workspace and sets it as your canvas background, allowing you to drag your design to the exact position on the material.
icon to enable the camera. This captures a real-time view of the workspace and sets it as your canvas background, allowing you to drag your design to the exact position on the material.
¶ 7. Framing
Framing moves the laser head along the outer boundary of your design before processing starts. This confirms that your design fits on the material and avoids clamps or edges.
-
Click the
 Framing button in the bottom right corner to verify the area.
-
Watch the laser crosshair. If it moves outside the material or touches clamps, adjust the size or position of your design on the canvas.
¶ 8. Start Processing
Make sure the machine lid is closed before starting!
-
Click the Process button in the bottom right corner. The software will generate the file and send it to the machine. Once sent, you will be prompted to press the button on the machine.
-
Press the device’s blinking blue ring to begin. The machine will first perform full auto-focus.
Auto Distance Measurement: The laser extends a probe at the origin, moves to the file's center, lowers until contact with the material, records the distance, and returns. No manual focus is needed.
Other focusing options include Measure at current position, Measure by select point, and Manual Input.
- After completion, clean the workspace and turn off the machine and pump.