Preparation: Engraving material, bitmap file
¶ 1.Pre-check Before Operation
 |
 |
|---|---|
a. Ensure the exhaust pipe outlet is placed toward a ventilation duct or connected to an air purifier. b. Make sure the workspace is clean and clear of clutter. Avoid placing any heavy items on the machine cover. |
c. Check that the U-key is properly inserted into the corresponding port. d. Make sure the Emergency Stop Button is released. |
¶ 2.Powering On the Device
 |
 |
|---|---|
a. Turn on the Air Pump and switch it to Auto mode. |
b. Turn on the Main Power Switch of the laser engraver. |
¶ 3.Place the Material
Place the material in the center of the working area and close the X1 Lid.
For lightweight materials, use Material Clamps to secure them.
¶ 4.Connect the Device
-
Use the USB data cable to connect the computer and the device.
-
Open Aliencell Space software and create a new project.
-
Click the Device List, select the connected physical device, and confirm the connection status.
A green circle indicates the device is connected. When its status shows “Idle,” the device is ready for use.
- If no laser crosshair appears on the canvas, go to Settings → Advanced Settings in the software and enable Laser Module Position. This shows the current physical position of the Laser Module inside the machine.
¶ 5.Import Bitmap File
-
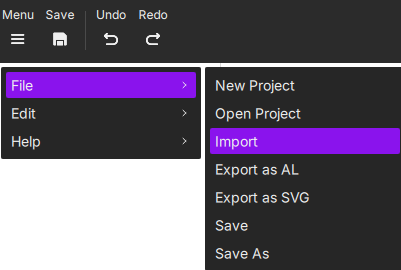
Option 1: Import from the Menu
Click Menu → File → Import.
-
Option 2: Import from the Toolbar
Click the image icon in the bottom toolbar and select the file you want to engrave.
¶ 6. Processing Bitmap Files (Image Pre-Processing)
Before setting your engraving parameters, make sure to complete the image pre-processing steps to achieve the best possible engraving results.
Image pre-processing refers to editing and optimizing the original digital image you import. It covers all adjustments made before engraving, including resizing, converting to grayscale, choosing a mode, editing, and adjusting image properties. The goal is to generate an engraving-ready image that clearly delivers the intended visual effect.
¶ 6.1 Image Adjustment
Adjust image properties such as Levels, White Clip, Clarity, Brightness, and Contrast to enhance details and shading suitable for engraving.
¶ 6.2 Image Editing
For bitmap images, use the editing tools to adjust pixels, remove unwanted areas, and fine-tune the image. Tools include Crop, Magic Wand, Eraser, and History Brush.
¶ 7. Preview Engraving
-
In the top-right corner, select the material and canvas fill type to preview the engraving result. Click
 to choose the material, e.g., “3mm Basswood,” then confirm.
 -
Choose the canvas fill type, e.g., Material Simulation, by clicking
 to see a realistic material preview.
-
To return to a blank canvas for adjustments, click
 .
.
¶ 8. Set Job Parameters
¶ 8.1 Select Processing Platform
- Select the Processing mode that matches your actual platform platformsetup , e.g., Process on slats.
¶ 8.2 Select Processing Type
- For bitmap images, only Engraving is available.
¶ 8.3 Set Engraving Parameters
-
Image Mode: Bitmaps default to Jarvis , suitable for most materials and image types, especially high-contrast, clear-line graphics.
-
Power & Speed: After selecting the material and thickness, recommended parameters are auto-loaded. You can use them directly or adjust based on experience or preview results.
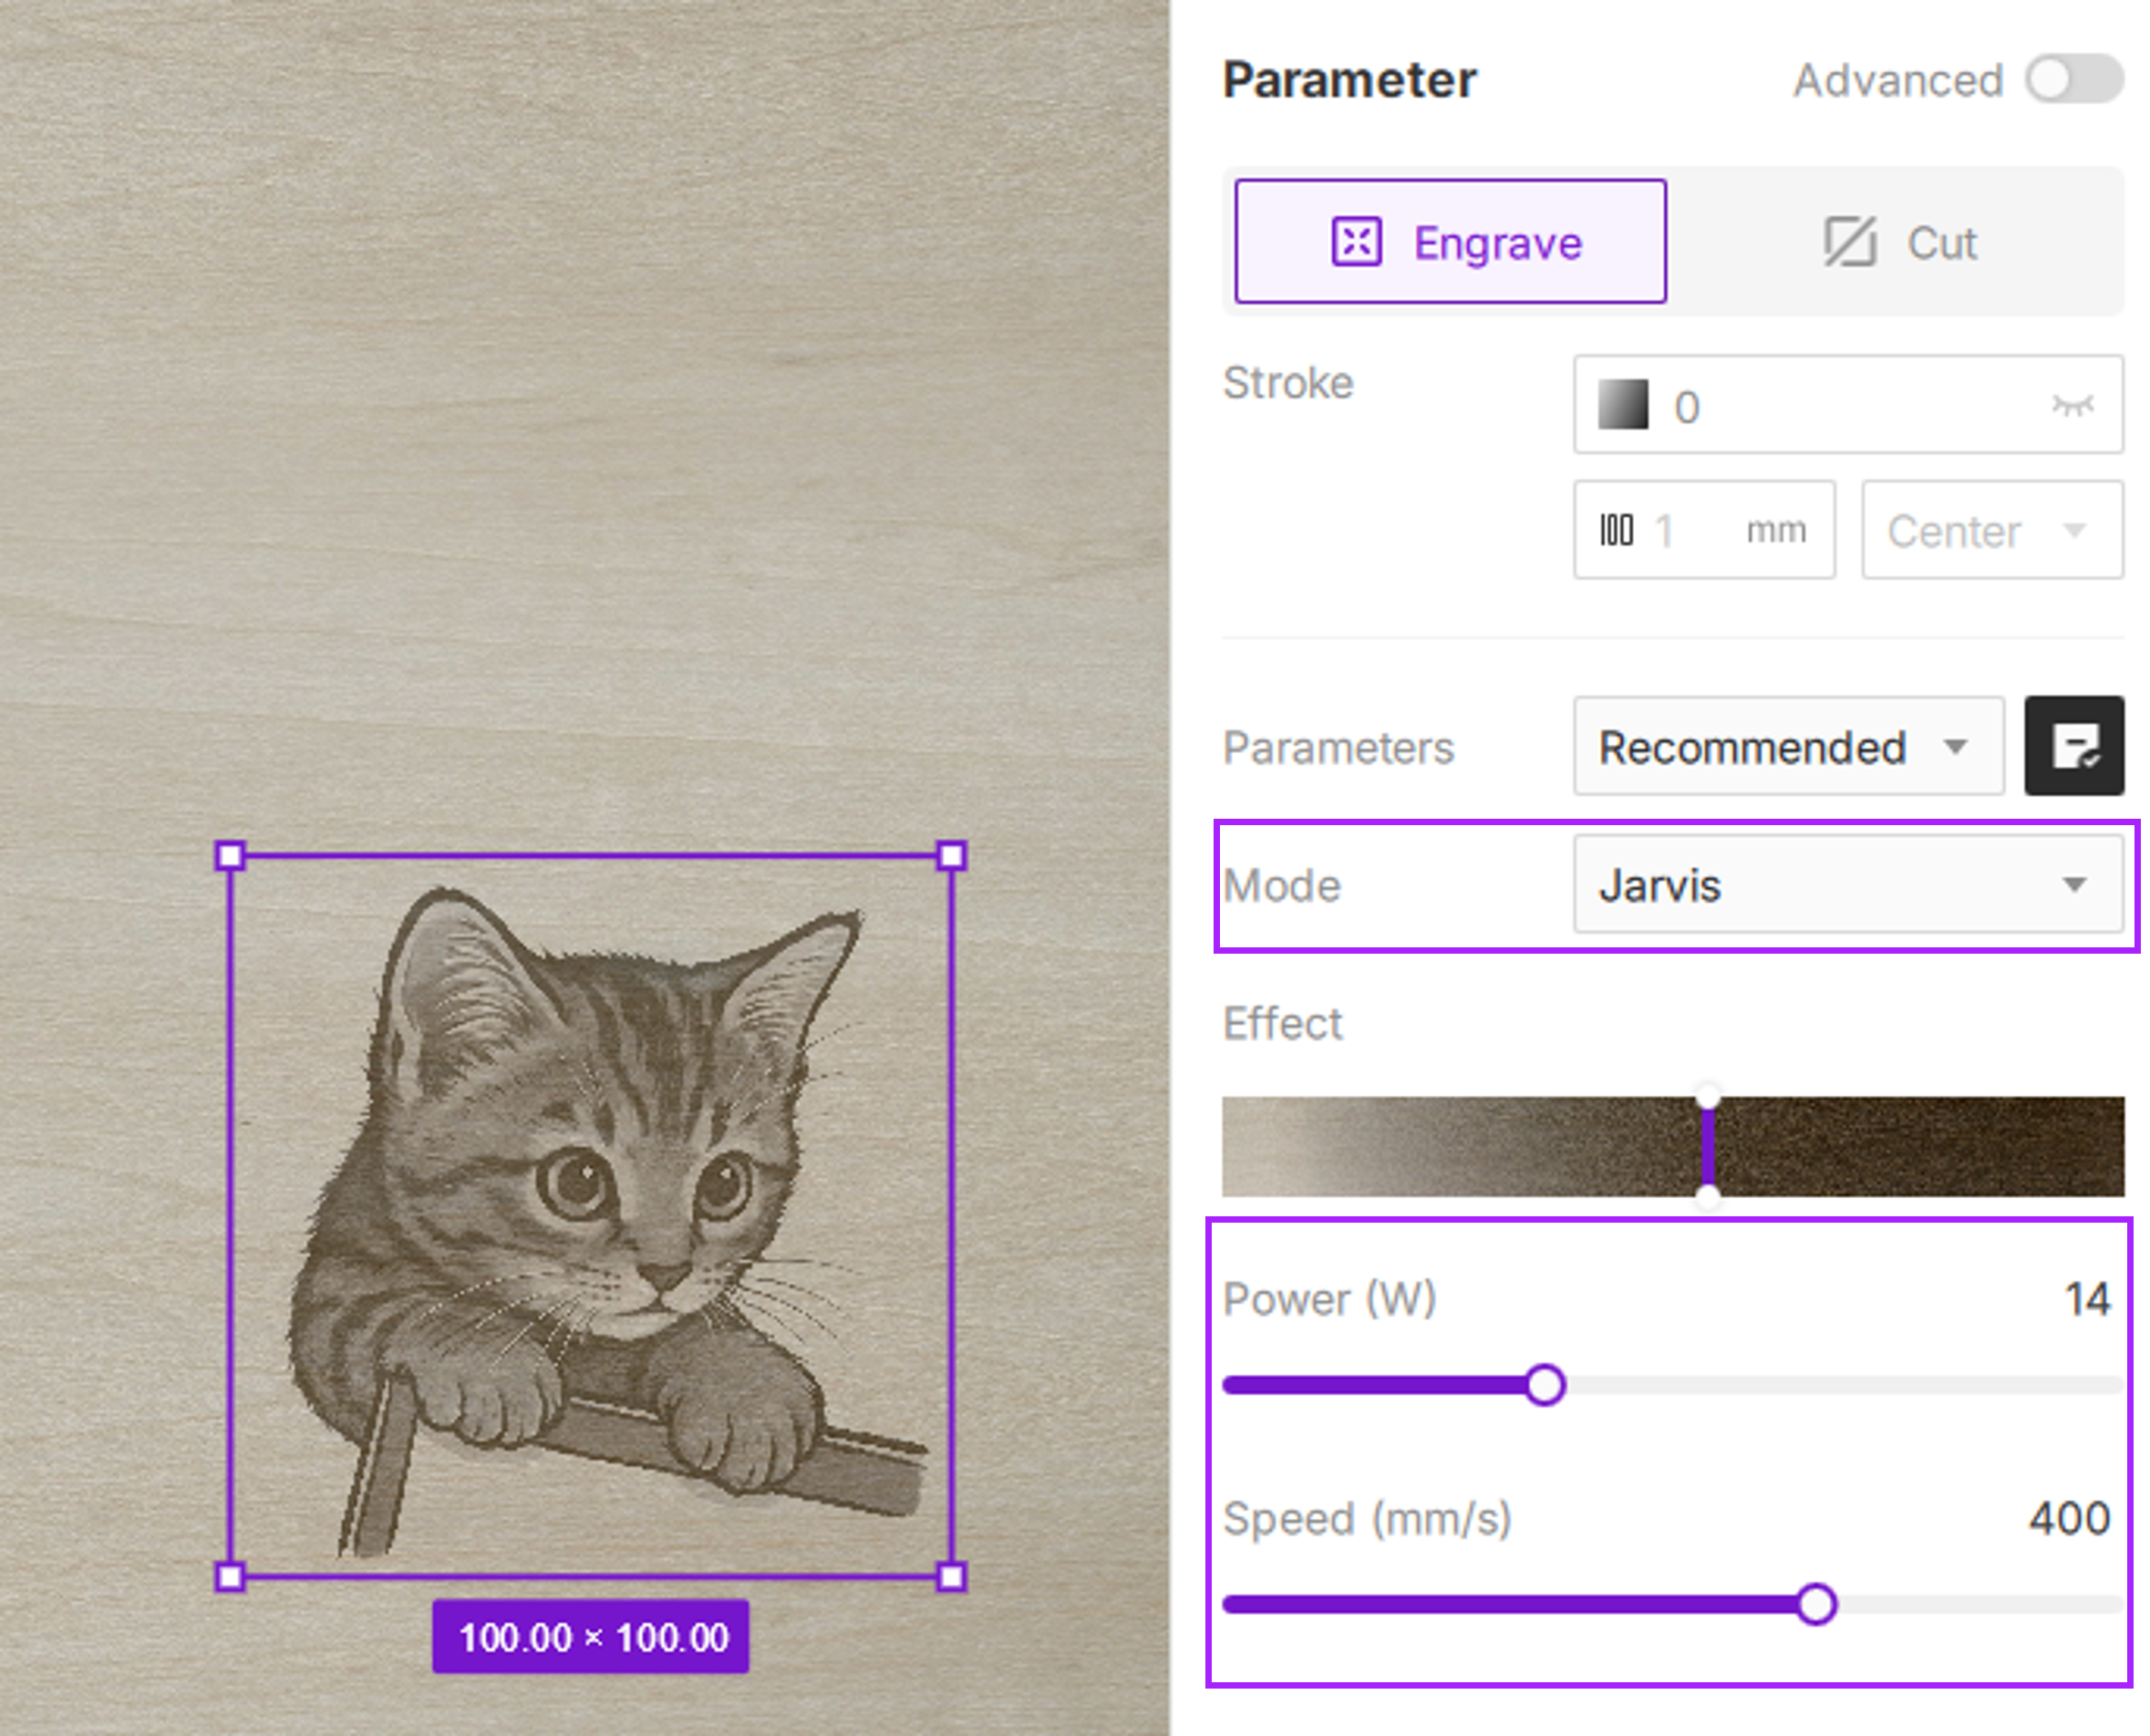
-
Effect Adjustment: With Material Simulation enabled, use the Effect slider to fine-tune the engraving depth and appearance.
Material simulation provides a close approximation but cannot replicate the physical result perfectly. Differences in laser units and material absorption can affect the final outcome. Aliencell Space aims for a what-you-see-is-what-you-get realistic preview. Treat this as a starting point to ensure professional-quality results.
¶ 9. Photo Positioning
- After setting job parameters, click
 to enable the camera. This captures the workspace and overlays it on the canvas for precise alignment of your design with the material.
¶ 10. Preview Job Area
Framing moves the laser head along the outer boundary of your design before processing starts. This confirms that your design fits on the material and avoids clamps or edges.
-
Click the
 Framing button in the bottom right corner to verify the area.
-
Check the laser crosshair path. If it exceeds the material size, adjust the image on the canvas.
¶ 11. Execute Job
Ensure the enclosure is closed before starting!
-
Click Process. The software sends all settings to the machine. Once ready, follow on-screen prompts to press the device button.
-
Press the device’s blinking blue ring to begin. The machine will first perform full auto-focus.
Auto Distance Measurement: The laser extends a probe at the origin, moves to the file's center, lowers until contact with the material, records the distance, and returns. No manual focus is needed.
Other focusing options include Measure at current position, Measure by select point, and Manual Input.
- After completion, clean the workspace and turn off the machine and pump.