¶ 1.Troubleshooting Procedure
The machine may encounter problems during operation. Causes can include hardware connections, software errors, network issues, user settings, material properties, or environmental factors.
You can view these codes:
- In the PC software when an error pop-up appears.
- On the device touchscreen (error pop-up or alarm area).
Please use the module code above to locate your specific error code. Based on those error codes, you can find the likely cause and recommended action in the table below.
| Error Code | Description | Recommended Action |
|---|---|---|
| 1100101 | Laser module signal abnormal. Please check if the laser module is properly installed. [1100101] | Power off the machine and reseat the laser module. Make sure the module is fully seated in the mount and that the pins and cables are clean, secure, and undamaged. If the error remains after restarting, export the error information and contact Support to check the laser module or main-control communication. Reference manual: Replace the laser moudle |
| 1100102 | Laser module temperature sensor abnormality. [1100102] | Do not continue processing while the temperature sensor is abnormal. Power off the machine, reinstall the laser module, and check the connector. If the error remains after restart, contact Support and treat it as a laser-module fault. Reference manual: Replace the laser moudle |
| 1100103 | Device accelerometer is abnormal. [1100103] | Check that the machine is placed on a stable, level surface and that it was not bumped or shaken during operation. If the error remains after restart, contact Support to inspect the laser-module accelerometer or control board. |
| 1100104 | The laser module has abnormal heat dissipation. Please check whether the wiring and fan speed are abnormal. [1100104] | Check whether the laser-module cooling fan is blocked by dust, jammed by debris, or affected by a loose cable. Clean the fan and heat sink, then restart the machine. If the error persists, contact Support to inspect the fan or laser module. Reference manual: Deep Clean: Laser Module & Cooling Fans, Laser Module High Temperature Alarm |
| 1100105 | The laser module has abnormal heat dissipation. Please check whether the wiring and fan speed are abnormal. [1100105] | Check that the laser-module cooling fan spins freely, then remove dust from the fan blades and heat sink. If the error appears repeatedly during processing, pause the job, allow the module to cool, and contact Support to verify the fan-speed feedback. Reference manual: Deep Clean: Laser Module & Cooling Fans, Laser Module High Temperature Alarm |
| 1100106 | Recommended cleaning and maintenance of the laser to maintain better processing results. Would you like to go to the maintain page? [1100106] | This is a maintenance reminder. Clean the laser lens, cooling fan, and dust on the outside of the module before long processing sessions. For short-term use, the pop-up can be closed and processing can continue. Reference manual: Clean the Protective Lens, Deep Clean: Laser Module & Cooling Fans, Clean the Laser Module |
| 1100107 | Laser accelerometer connection anomaly.[1100107] | Make sure the machine is level and the laser module is firmly installed. Avoid moving or bumping the machine during operation. If the warning remains after restart, contact Support to check the laser accelerometer connection. |
| 1100108 | Laser temperature is high. [1100108] | Pause processing immediately and keep the machine powered on for 5-10 minutes so the cooling fan can run. Check that the laser cooling fan is operating and that the heat sink is not clogged with dust. Clean the cooling system before resuming. For dusty materials or long jobs, process in sections and reduce power as needed. Reference manual: Laser Module High Temperature Alarm, Deep Clean: Laser Module & Cooling Fans |
| 1200101 | X-axis motor signal error detected. Please check the motor and connection.[1200101] | Power off the machine and check the X-axis motor cable, connectors, and motion path for obstruction or binding. Move the X axis by hand to confirm smooth travel. If the error persists, contact Support to inspect the motor, driver board, or main board. Reference manual: Replace Motor Driver Board |
| 1200102 | X-axis motor driver error detected.[1200102] | Restart the machine and confirm that the X axis is not jammed and that the belt and rail are free of debris. If the error repeats, contact Support to inspect the motor driver board. Reference manual: Replace Motor Driver Board |
| 1200103 | X-axis limit switch error. Please check the switch and its connection.[1200103] | Check whether material or debris is blocking the X-axis homing path, and confirm that the limit switch and cable are secure. Clear the obstruction and home the machine again. If homing still fails, the limit switch should be inspected. Reference manual: X/Y/Z Axis Limit Switch Troubleshooting |
| 1200201 | Y-axis motor signal error detected. Please check the motor and connection.[1200201] | Power off the machine and check the Y-axis motor connection, timing belt, and guide rails. Confirm that the axis can move without obstruction. If reset still fails after restart, contact Support to inspect the motor or driver board. Reference manual: Replace Motor Driver Board |
| 1200202 | Y-axis motor driver error detected.[1200202] | Check whether the Y axis is jammed or moving unevenly from side to side. Clean the guide rails and restart the machine. If the driver error continues, contact Support to inspect the motor driver board. Reference manual: Replace Motor Driver Board |
| 1200203 | Y-axis limit switch error. Please check the switch and its connection.[1200203] | Check for debris around the Y-axis limit switch and make sure the cable is secure. Move the gantry by hand to confirm it can home smoothly. If the error remains, contact Support to inspect the limit switch. Reference manual: X/Y/Z Axis Limit Switch Troubleshooting |
| 1200301 | Z-axis motor signal error detected. Please check the motor and connection.[1200301] | Check whether the Z-axis lift is blocked by the material, honeycomb panel, or probe mechanism, and confirm that the motor cable is secure. If the error remains after homing again, contact Support to inspect the Z-axis motor. Reference manual: Focusing Methods |
| 1200302 | Z-axis motor driver error detected.[1200302] | Make sure the Z axis is not mechanically jammed and that the material is not pressing against the laser module. If the driver error remains after restart, contact Support to inspect the Z-axis drive system. Reference manual: Focusing Methods, Replace Motor Driver Board |
| 1200303 | Z-axis limit switch error. Please check the switch and its connection.[1200303] | Check whether the Z-axis limit or homing position is blocked by debris, and confirm that the lift path is clear. If the error remains, contact Support to inspect the limit switch or cable. Reference manual: X/Y/Z Axis Limit Switch Troubleshooting |
| 1200304 | Motor mainboard communication anomaly.[1200304] | Restart the machine and check the motion-control board connections. If the error appears repeatedly, it is a control-board communication issue. Export the logs and contact Support. |
| 1300101 | Exhaust fan signal error,Please verify the hardware connection.[1300101] | Check the exhaust-fan cable and installation, and make sure the fan has not come loose. If this is only a warning and strong exhaust is not required, the job can continue. For smoke-heavy materials, repair the exhaust system first. Reference manual: Weak Exhaust Airflow & Low Suction Power, Cleaning the Smoke Exhaust Module |
| 1300102 | Exhaust fan speed is abnormal. Please check the fan for debris or damage. [1300102] | Check the exhaust-fan blades for chips, dust buildup, or foreign objects. Clean the exhaust fan and try again. If the error remains, inspect the fan for damage. Reference manual: Cleaning the Smoke Exhaust Module, Weak Exhaust Airflow & Low Suction Power |
| 1300103 | Camera signal signal is abnormal. Please check the hardware connection. [1300103] | Check the camera ribbon cable or connector and restart the machine. If you are using crosshair positioning or manual positioning only, the photo-capture function can be left unused for now. Reference manual: Calibrating Photo Positioning Accuracy Deviations, Photo capture calibration |
| 1300104 | Air Purifier Connection Error, please verify the hardware connection | Make sure the air purifier is powered on, the cable or Bluetooth connection is working, and reconnect it from the machine or software. If no air purifier is being used, this accessory warning can be ignored. Reference manual: Installation and Connection, Filter Not Detected |
| 1300105 | Air Assist Pump Connection Error, please verify the hardware connection. | Check that the air-assist pump has power and a secure connection, and make sure the air tube has not come loose. For cutting wood or acrylic, fix the issue before processing to reduce charring and flame risk. Reference manual: Air Assist, Using the Air Assist |
| 1300106 | Left photographic camera signal is abnormal. Please check the hardware connection. [1300106] | Check the left photo-capture camera connection and restart the machine. If photo stitching or camera positioning is not required, use crosshair positioning or manual positioning to continue processing. Reference manual: Calibrating Photo Positioning Accuracy Deviations, Photo capture calibration |
| 1300107 | Right photographic camera signal is abnormal. Please check the hardware connection. [1300107] | Check the right photo-capture camera connection and restart the machine. If photo stitching or camera positioning is not required, use crosshair positioning or manual positioning to continue processing. Reference manual: Calibrating Photo Positioning Accuracy Deviations, Photo capture calibration |
| 1300108 | Surveillance camera signal is abnormal. Please check the hardware connection. [1300108] | Check the monitoring-camera connection and restart the machine. This error mainly affects the live monitoring view and does not affect basic engraving or cutting control. Reference manual: Calibrating Photo Positioning Accuracy Deviations |
| 1400101 | Fire sensor error. Please check hardware connections. [1400101] | Check the flame-sensor connection and make sure the sensor window is not covered by smoke residue. Clean the sensor and restart the machine. Flame detection is a safety feature and should not be disabled for long-term use. Reference manual: Flame Safety Device Setup, Flame Detection Sensor Cleaning |
| 1400102 | PM10 sensor error. Please check hardware connections. [1400102] | Check the PM10 sensor connection and inspect the air path for dust buildup. This sensor is mainly used for air-quality and smoke monitoring. When processing smoky materials, keep exhaust and purification working properly. Reference manual: Filter Not Detected, Weak Exhaust Airflow & Low Suction Power |
| 1400103 | X-axis encoder error. Please check hardware connections. [1400103] | Check the X-axis encoder connection, inspect the rail for binding, and confirm that axis movement is normal. Because the encoder is part of motion feedback, do not continue processing if the error repeats. |
| 1400104 | Y-axis encoder error. Please check hardware connections. [1400104] | Check the Y-axis encoder connection, timing belt, and gantry movement. Repeated encoder errors may affect processing accuracy, so processing should not continue until the issue is resolved. |
| 1513101 | Device requires reset. Please reset to continue.[1513101] | The machine has not completed reset. Perform reset/homing first, and make sure the X, Y, and Z motion paths are not blocked by material or debris before starting a job. |
| 1513102 | Failed to retract probe. Please check for obstructions and test the sensor.[1513102] | If the probe fails to retract, first check whether the laser module is fully seated, whether the X-axis gantry is misaligned, and whether there is debris near the probe retraction dock. Follow the probe retraction troubleshooting procedure. Reference manual: Distance Sensor Probe Retraction Failure Troubleshooting, Distance Sensor Troubleshooting, Focusing Methods |
| 1513103 | The processed object exceeds the maximum processable height of the device. Please adjust the object's height. [1513103] | Check whether the material exceeds the maximum processable height. Lower the material or remove the riser or honeycomb panel and try again. Also confirm that the probe can extend and retract freely. Reference manual: Focusing Methods, Distance Sensor Troubleshooting |
| 1513104 | Could not detect probe signal. Ensure the proximity sensor is securely installed. | Select a flatter point on the material surface and run focus again. Check whether the probe can extend normally. If needed, use manual distance entry or point measurement instead. Reference manual: Focusing Methods, Distance Sensor Troubleshooting |
| 1513105 | Failed to retract probe. Please check for obstructions and test the sensor.[1513105] | Follow the probe retraction troubleshooting procedure: check laser-module installation, the retraction dock position, X-axis gantry alignment, and whether the probe is sticking. Reference manual: Distance Sensor Probe Retraction Failure Troubleshooting, Distance Sensor Troubleshooting |
| 1513106 | Measurement stopped unexpectedly. Please check system status.[1513106] | Run measurement or focusing again. Make sure the material is flat and the probe path is clear. If the error continues, inspect the probe module or use manual distance entry, then contact Support. Reference manual: Focusing Methods, Distance Sensor Troubleshooting |
| 1513107 | The focus position is outside the working range. Please reselect a focus position. [1513107] | The focus point is outside the measurable Z-axis range. Select another point on the material surface, confirm that the material height is within the machine's supported range, and lower the material if necessary. Reference manual: Focusing Methods, Distance Sensor Troubleshooting |
| 1513108 | Autofocus Failed.[1513108] | Restart the machine and run focus again. Check material flatness, probe movement, and laser-module installation. If focusing still fails, use manual distance entry and contact Support. Reference manual: Focusing Methods, Distance Sensor Troubleshooting |
| 1518105 | Please close the lid before starting photo capture calibration. [1518105] | Close the lid before running photo-capture calibration. If processing is required, do not start a laser job while the lid is open. Reference manual: Photo capture calibration, Calibrating Photo Positioning Accuracy Deviations |
| 1518301 | Photo capture calibration failed. Please check the camera and calibration chart. [1518301] | A photo-capture self-test failure usually affects camera positioning or calibration. Make sure the six calibration markers on the base are visible, the lid is closed, and the lens is clean, then run photo-capture calibration. If camera positioning is not needed, you can continue with crosshair or manual positioning. Reference manual: Photo capture calibration, Calibrating Photo Positioning Accuracy Deviations |
| 1518302 | Photo capture calibration failed.[1518302] | Clear the work area, make sure the calibration markers on the base are visible, close the lid, and run photo-capture calibration again. If it still fails, check the camera connection or contact Support. Reference manual: Photo capture calibration, Calibrating Photo Positioning Accuracy Deviations |
| 1519101 | Failed to open configuration file [1519101] | Restart the software and machine, then try again. If the configuration file still cannot be opened, update or reinstall the software and keep the logs for Support. |
| 1519102 | Configuration file path does not exist [1519102] | Check whether the software installation folder or configuration file has been moved, deleted, or blocked by security software. Reinstall the software or restore the configuration file and try again. |
| 1519103 | Key does not exist in the configuration file [1519103] | A missing configuration key is usually related to a software or firmware version mismatch, or a damaged configuration file. Update to the latest version, restart the software and machine, and submit logs if the error remains. |
| 1520101 | Invalid parameter [1520101] | Repeat the current operation and confirm that the input parameters are valid. If the error is triggered automatically by the software, restart the software and machine, then try again. If it persists, submit logs to Support. |
| 1520102 | System initialization not completed [1520102] | Wait until machine initialization is complete before operating. If initialization takes unusually long, restart the machine and check the connection status. |
| 1520104 | USB key removed [1520104] | Reinsert the USB Key and make sure it has a secure connection. If the machine is locked for safety, restore the USB Key before processing. Reference manual: USB Connection Issues |
| 1666100 | Please close the lid before starting the process. [1666100] | Close the lid before starting the job. This is a safety interlock and should not be bypassed. |
| 1666101 | Please close the tray before starting the process. [1666101] | Make sure the tray is fully pushed into the closed position, and check whether the tray-detection switch is blocked by debris. Reference manual: Tray Detection Function |
| 1666104 | Device is busy, please try again later. [1666104] | Wait for the previous job to finish, or safely cancel/stop the current job before starting a new one. |
| 1666106 | Device is resetting, please try again later. [1666106] | Wait until the machine has finished restarting and initialization before starting the job. If initialization takes too long, restart the machine and check the software connection. |
| 1666107 | Invalid file. Failed to start the process. [1666107] | Export or send the job file again, and avoid abnormal file names or paths. If necessary, regenerate the .al or G-code file. |
| 1666108 | Your design exceeds working area. Please adjust the position. [1666108] | The design is outside the working area. Move the objects back inside the white canvas area. If only frame preview is unreachable, you may process directly or temporarily move the objects to complete framing. Reference manual: Object Placement Exceeds Walking Border Area, Framing |
| 1666109 | Insufficient internal storage space. Failed to start the process. [1666109] | Clear internal storage or delete previous jobs, then try again. Send a smaller file if possible. If the error remains, export logs and contact Support. |
| 1666110 | Device is busy, please try again later. [1666110] | Wait until the current machine action is complete. If the software status appears stuck, restart the software and machine before starting the job again. |
| 1666111 | Please close the baseplate or install the riser base before processing.[1666111] | Make sure the tray, baseplate, or riser-base status matches the current processing mode. When using the riser base, install it according to the accessory instructions. For standard processing, close the tray. Reference manual: Riser Base, Tray Detection Function |
| 1666115 | Processing Launch Failed. Laser signal is abnormal. Please check if the laser is properly installed. Note: Power off the device before plugging/unplugging the laser to avoid damaging the laser. [1666115] | Power off the machine and reinstall the laser module, making sure the connection is secure. Do not plug or unplug the laser module while the machine is powered on. If the error remains, inspect the laser module or connector. Reference manual: Replace the laser moudle |
| 1666116 | Processing Launch Failed. Motor status is abnormal. [1666116] | Check whether any axis is jammed, whether homing has completed, and whether the motor cables are loose. If the error remains after restart, contact Support to inspect the motion system. Reference manual: Replace Motor Driver Board |
| 1666117 | Laser temperature sensor abnormal: Unable to monitor laser temperature. Avoid continuing processing. Continued use may cause laser damage, which is not covered under warranty. Contact after-sales for handling. [1666117] | Do not continue processing when the temperature sensor is not detected. Power off the machine, reinstall the laser module, and check the connector. Continued use may damage the laser module. Reference manual: Replace the laser moudle, Laser Module High Temperature Alarm |
| 1666118 | Laser temperature sensor overheated: Avoid continuing processing. Continued use may cause laser damage, which is not covered under warranty. Contact after-sales for handling. [166118] | If the laser temperature is too high, pause processing and allow the module to cool. Clean the cooling fan and heat sink. Do not force the job to continue after repeated alarms. Reference manual: Laser Module High Temperature Alarm, Deep Clean: Laser Module & Cooling Fans |
| 1666200 | The lid was opened during processing. Processing has been paused. [1666200] | Opening the lid during processing pauses the job. Close the lid and confirm it is safe before resuming. Do not open the lid while the laser is operating. |
| 1666201 | The tray was opened during processing. The process has been paused. [1666201] | Opening the tray during processing pauses the job. Push the tray fully into the closed position and confirm that material is not blocking it before resuming. Reference manual: Tray Detection Function |
| 1666204 | The exhaust fan signal is abnormal. Processing has been paused.[1666204] | An exhaust-fan signal error has paused the job. Check the fan connection and make sure the fan has not come loose. If this is only an exhaust warning and the workspace has adequate ventilation, processing may continue as needed. For smoke-heavy materials, repair the exhaust system first. Reference manual: Weak Exhaust Airflow & Low Suction Power, Cleaning the Smoke Exhaust Module |
| 1666205 | The tray was opened during processing. The process has been paused. [1666201] | The machine detected a change in riser-base or base status during processing and paused the job. Make sure the base, tray, and support platform are installed correctly before resuming. Reference manual: Riser Base, Tray Detection Function |
| 1666209 | Laser Temperature Sensor Abnormal: Unable to monitor laser temperature. Avoid continuing procession. Continuing may cause laser damage, not covered by warranty. Contact after-sales for handling.[1666209] | If the temperature becomes too high during processing, stop or pause the job, keep the machine powered on for cooling, and clean the laser cooling system. Continuing with the warning disabled is not recommended. Reference manual: Laser Module High Temperature Alarm, Deep Clean: Laser Module & Cooling Fans |
| 1666210 | Laser Temperature Sensor Abnormal: Unable to monitor temperature. Avoid continuing procession. Continuing may damage the laser, which is not covered under warranty. Contact after-sales.[1666210] | If the laser cooling fan speed is too low, pause processing. Clean the fan blades and heat sink, and confirm that the fan spins normally. If the error remains, contact Support to inspect the fan. Reference manual: Deep Clean: Laser Module & Cooling Fans, Laser Module High Temperature Alarm |
| 1666304 | System overload detected. Processing has been stopped. [1666304] | System overload is usually caused by excessive speed, frequent power switching, or overly dense toolpaths. Reduce speed, reduce rapid power changes, simplify the artwork, or split the job into separate layers or sections before trying again. |
| 1666305 | Exceeded working area. Processing has been stopped. [1666305] | The G-code coordinates are outside the working area. Check the canvas size, object position, and origin setting, then move the objects back into the processable area and export the job again. Reference manual: Object Placement Exceeds Walking Border Area, Framing |
| 1666307 | The laser temperature is too high. Processing has been stopped.[1666307] | The job stopped because the laser temperature was too high. Allow the module to cool, clean the cooling fan, and avoid long, high-power continuous processing. Reference manual: Laser Module High Temperature Alarm, Deep Clean: Laser Module & Cooling Fans |
| 1666308 | The laser cooling fan speed is too low. Processing has been stopped.[1666308] | The job stopped because the laser cooling fan speed was too low. Clean the fan and heat sink, and make sure the fan is not jammed. If the error remains, contact Support to repair or replace the fan or laser module. Reference manual: Deep Clean: Laser Module & Cooling Fans, Laser Module High Temperature Alarm |
| 1666400 | Please close the lid before starting the process. [1666400] | Close the lid before resuming the job. Confirm that the material has not shifted before resuming. |
| 1666401 | Please close the tray before starting the process. [1666401] | Push the tray fully into the closed position before resuming the job. Make sure the tray is not blocked by material or debris. Reference manual: Tray Detection Function |
¶ 2. Contact Technical Support — how to prepare
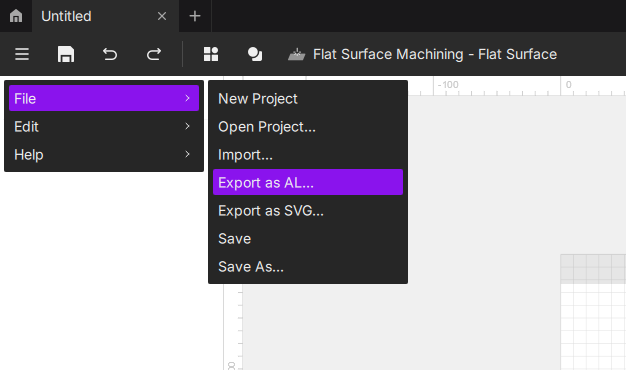
Step 1 — Export your project file (.al)
- Save and package your job as a
.alproject file without changing any settings before export. Keeping the original settings helps reproduce the issue.
Step 2 — Record photos / video
If possible, record a short video that clearly shows the problem (e.g., unusual noise, abnormal motion). Include:
- The error code and message on the machine touchscreen.
- Any error pop-ups or status messages in the PC software.
- The machine area where the issue occurs (stuck parts, abnormal components, indicator lights, cable connections).
Step 3 — Email support with the following information
Please prepare and submit the following information to our technical support team at support@aliencell.com:
- Error code(s) and exact alarm message(s).
- Photos / video showing the issue and error message(s).
- Detailed steps that led to the problem (what you clicked, what job you ran, material used).
- Troubleshooting already attempted and results.
- Software name and version , machine model , and firmware version(you can get this from the touchscreen).
- Attach the exported
.alfile.
Providing accurate and detailed information is the key to fast problem resolution. Clear error codes and a comprehensive report will greatly shorten the support process. Thank you for your cooperation.
¶ Tags
- error codes
- troubleshooting